
Five things you should put on your iPad Camera
By Martin Horejsi
Posted on 2012-12-04
The tablet computer like the iPad can be a magic box of inquiry. For instance, it has a camera, and in particular a front facing camera. Why that is important is because students can manipulate objects on the camera and collectively view the results. And of course you can, with the touch of a finger, record the image for later use. Or even take a video.
To get started, here is a short list of five things to put on an iPad camera:
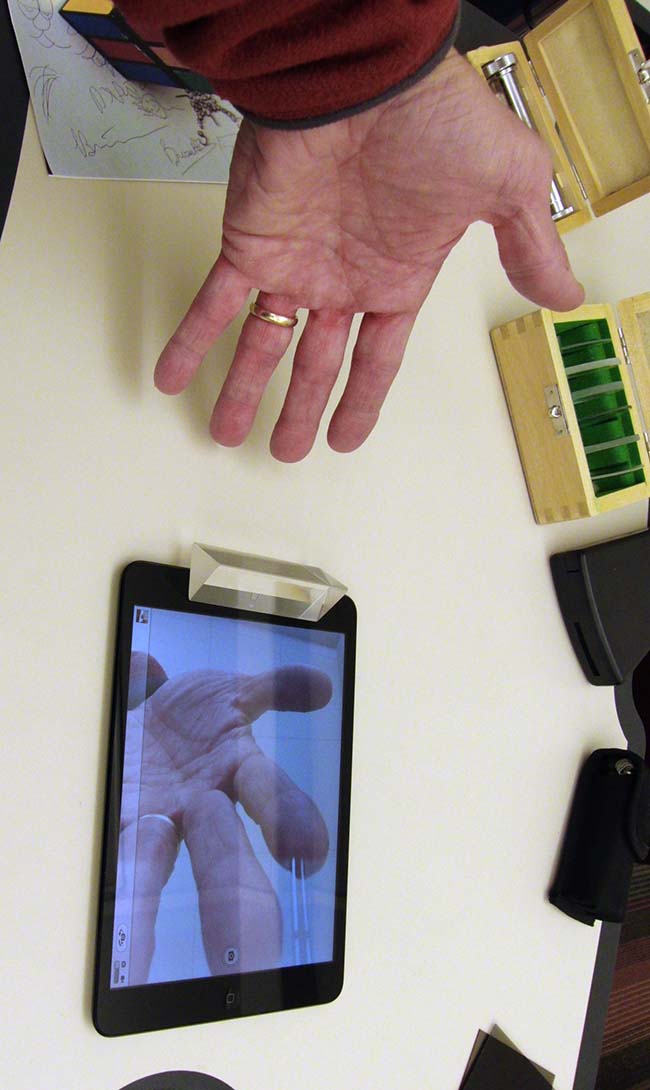
1. A prism. A prism “bends” light, and when placed on an iPad camera, the camera sees at a right angle. If the prism is centered, you have half the view in one direction and half in the opposite direction. Sliding the prism more to one side will adjust the view proportionately. The above image show the prism positioned towards the edge of the iPad Mini filling the screen with the hand.
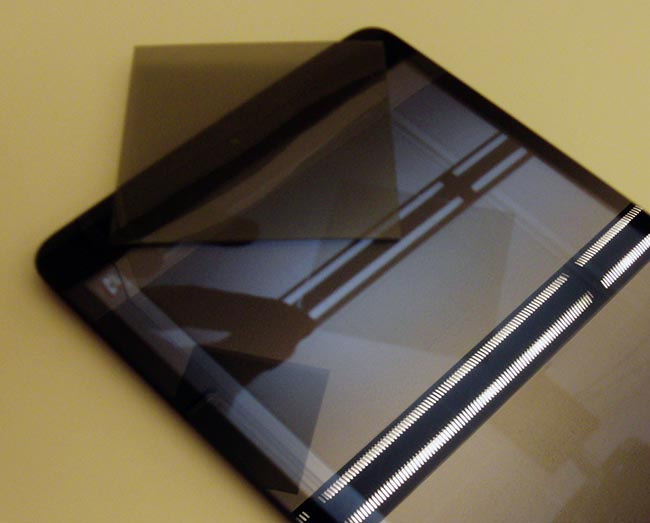
2. Polarizers. A pair of linear polarizers easily demonstrates the effect of cross polarization. When one polarizer is laid over the camera, the other polarizer can be manipulated at a distance from the iPad causing a reduction or blockage of the light reaching the camera. The above image has one polarizer covering the camera, and a second polarizer held above the camera that when rotated allows or filters the amount of visible light.

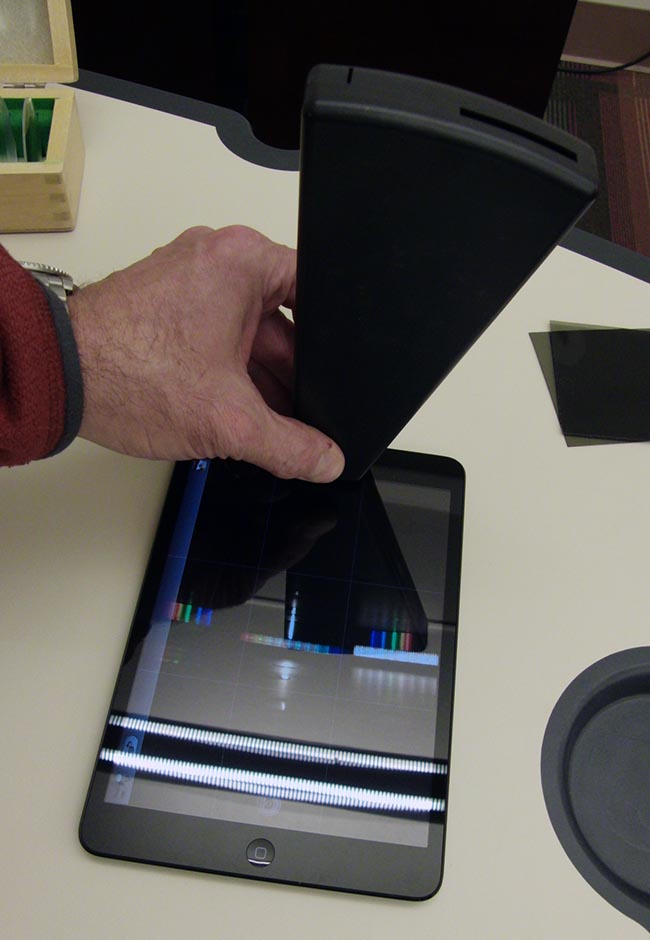
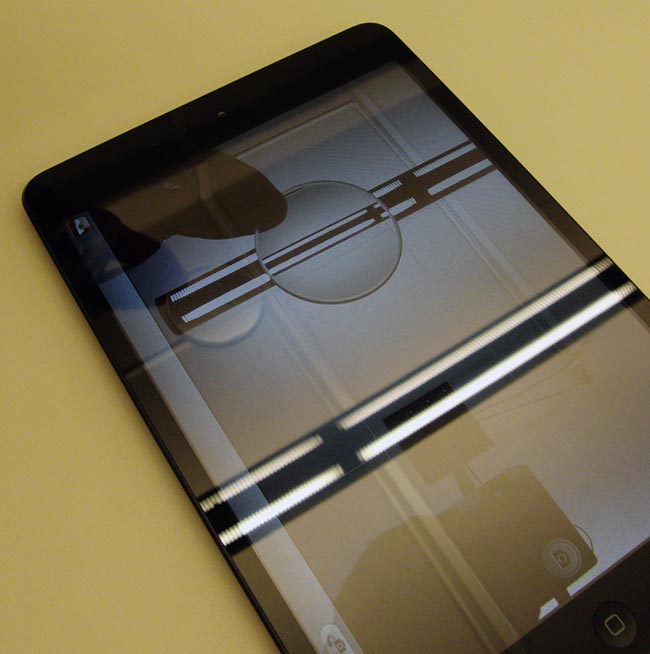
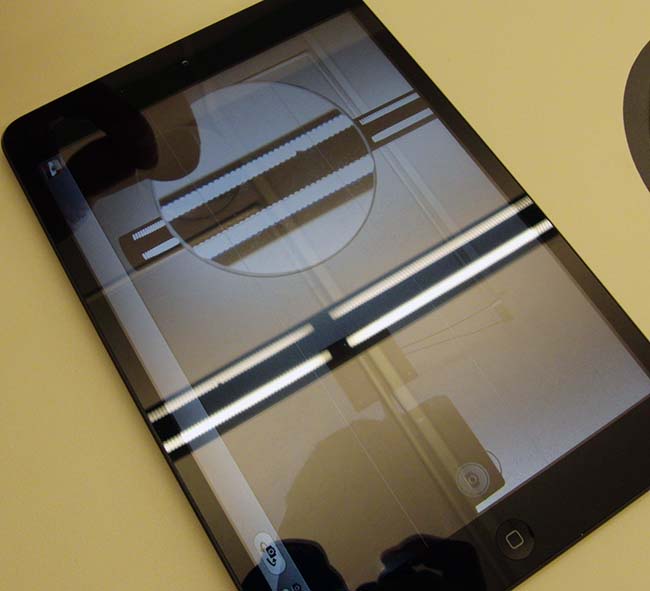
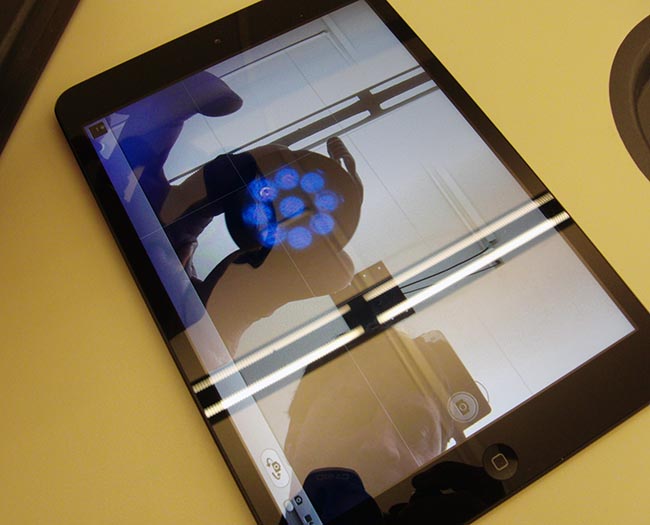
3. A Spectrometer. Both low and high quality classroom spectrometers can be placed directly over the camera providing a large-screen view of the color spectrum or color bands of various light sources. The image above uses a slit spectrometer. The image below uses a traditional classroom spectrometer. As you can see in the picture, the incomplete spectrum of the fluorescent lights is clearly visible. This is a good example what can be easily photographed.
4. Lenses. The effects of convex and concave lenses are obvious when placed at varying distances from the iPad camera. Imagine the assessment potential if you could show a real-time and testable lens effect. In fact, student photos could be the quiz. The above image shows a concave lens while the image below uses a convex lens.
5. UV and IR light sources. TV remotes and UV lights might not emit wavelengths the human eye can see (or even safe to look for in the case of UV light), but the iPad camera has no trouble seeing longer and shorter wavelengths of light. You can also test the penetration of the light by placing things over the light source. The image above is a short wave UV light that produces very little visible light. The iPad camera, however, has no trouble showing the large amount of light emitted by the UV flashlight.
The Best of All Worlds! How about combining the prisms, polarizers, lenses, spectrometers, and the UV and IR light sources into an inquiry based light lab? Sounds like a lot of science fun to me!
What do you think will happen if two crossed polarizers are placed between the UV light and the camera?
Disclaimer: The views expressed in this blog post are those of the author(s) and do not necessarily reflect the official position of the National Science Teaching Association (NSTA).