
Elementary | Daily Do
Why Is Our Sun So Big and Bright?

Astronomy Crosscutting Concepts Disciplinary Core Ideas Earth & Space Science Is Lesson Plan NGSS Phenomena Science and Engineering Practices Three-Dimensional Learning Elementary Grade 5
Sensemaking Checklist


Introduction
In elementary school, students begin to figure out our place in the universe. They develop an understanding that stars vary in their size and distance from Earth. The sun is a medium size star that appears larger and brighter than other stars because it is closer to us. In middle and high school, students build on their understanding of space and are able to explain how our solar system and galaxy formed. This includes using science ideas about how all stars give off visible light and other forms of energy and how the study of the energy given off by stars helps scientists figure out the formation, age, and composition of the universe.
In today's task, Why Is Our Sun So Big and Bright?, students and their families engage in science and engineering practices and use the thinking tool of patterns to make sense of the science idea the Sun appears larger and brighter than other stars in the night sky because it is closer.
Science Ideas "Why Is Our Sun So Big and Bright?" Builds On
Before you and your students engage with today's task, students need to have an understanding that (1) stars produce their own light and other objects are only seen by reflecting light from stars, and (2) the Sun is a star. You might share the What Are Stars? video to create an opportunity for students to share their understanding about these ideas or build on their understanding.
Experiencing the Phenomenon
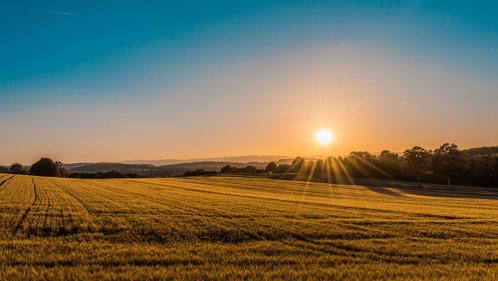
Share these two pictures of stars with your students. Ask students to make and record observations of the stars in the pictures. You might ask them to create a t-chart with one side labeled Similarities and the other side labeled Differences. Also encourage your students to record questions on the facing page in a science notebook or below their record of observations.
Ask students to share some of their observations and some of their questions with a partner or small group. If you are teaching remotely, students can share their observations and questions using an application like Jamboard. Then ask students to share their observations and questions with the class. Consider creating a class record of observations and questions that you can together refer to during as you move through the task.
Some of the questions children will have address the differences in the brightness and size between the sun and stars we see at night. We will investigate each of these differences.
Investigating Difference in Brightness of Stars
Students can collaboratively plan and carry out their own investigation to answer the question why some stars are brighter than others. You might ask students questions like:
- What can we use to represent the light coming from stars? (flashlight)
- How can we make the light appear brighter or dimmer? (move the flashlight closer to and farther away from a wall or the floor)
- What should we observe? (how bright the light appears, the size of the pool of light produced by the flashlight)
- What should we measure? (distance between the flashlight and the wall or the floor, size of the pool of light)
Starting with one flashlight, investigate what causes the sun to appear much brighter than all the other stars in the sky. Have children record what they did (including any measurement they made like the distances between flashlight and wall) and their observations. As you walk around the room, you might ask students if they notice a pattern in their data (observations). You might ask, "How do you think this pattern can help you explain why the Sun is brighter than other stars?"
Ask students to share their initial ideas to explain the phenomenon of the Sun being much brighter than other stars by creating a model. The model should include pictures and symbols, but also words to describe the components (parts of the model) and interactions (how the parts of the model interact to explain their observations). Ask them include the flashlight at two or more positions. You might create a template with two (or more) panels labeled "Flashlight close to the wall" and "Flashlight far from the wall".
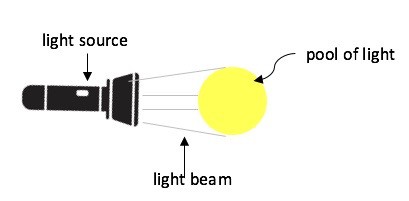
Initially, student models may look like this:

Discuss with students what needs to be included in the model so that others can understand what the model is trying to explain. Children will identify the light source and the pool of light formed by the light source. Ask what is missing from the model by pointing to the space in between the flashlight and the pool of light. Children will then recognize that there is a beam of light in that space. Give students an opportunity to add labels and a representation of a light beam(s) to their models.
Students completed models should show how the pool of light changes as the flashlight moves closer to and farther away from the wall. If you are standing at the wall, how would this appear to your eye? In what position of the flashlight would the light be bright? At what position of the flashlight would the light on the wall look dim?
At this point, children can give either an oral or written explanation of how the distance from the source of light affect how bright that light appear. They should include the idea that the pool of light appears to “fade away” and gets dimmer as it gets farther away from the light source.
Investigating Difference in Size of Stars
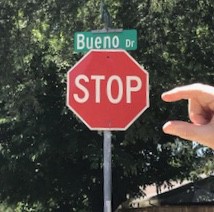
Most students understand that an object that is close appears larger than the same object at a distance. A simple way to have all students experience this is to go outside and stand close to an object. Ask them to use their thumb and forefinger to measure the height of an object. Students can use a ruler to measure the distance between their thumb and forefinger. Students should record the measurement.
Walk at least 50 paces away from the object and ask students to measure the same object again using their thumb and forefinger.
Ask students, "What do you notice?" and "Does the actual size of the object change?" Ask students to describe the cause and effect relationship between distance from the object and the size it appears to be. You might provide them a sentence starter like, "When I am far from the object, then ________."
Create a Model
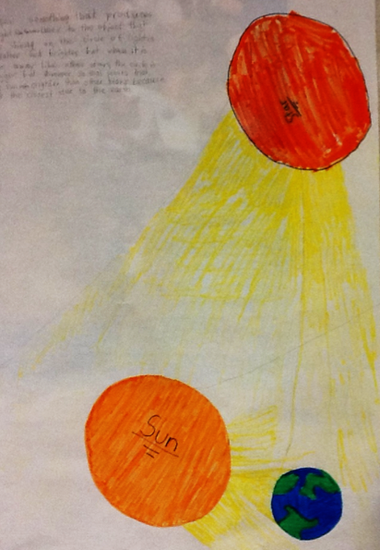
The next step is to help student connect their understandings from the two investigation to explain what causes the sun to appear brighter than other stars. With the students, create a list of components that need to be included in their model (a model "must-have" list). This list should include the sun (remind students that the sun is an average size star), other stars in the sky, the Earth, and the light given off by the sun and other stars. Discuss how we (the class) can represent bright light near the source of light and the light getting dimmer as distance from the light source increases. (Some ideas are using a color for the light beam that gets lighter as it moves away from the light source, or starting with a solid line and moving into a dashed or dotted line.) Remind students to include a key if they use symbols or colors (if the colors are designed to denote an aspect of the model). They should also use words and symbols to help explain their ideas.
You might share the student models below or ask students to share their models in small groups. Ask students to identify similarities and differences between their models and other students' models. After this discussion, allow students to revise their own models. You might choose to create a class consensus model. This can be done by asking student groups to share the similarities between their models; as each similarity is shared, add it to the class model (drawn on a whiteboard, poster paper, etc.).
Extension
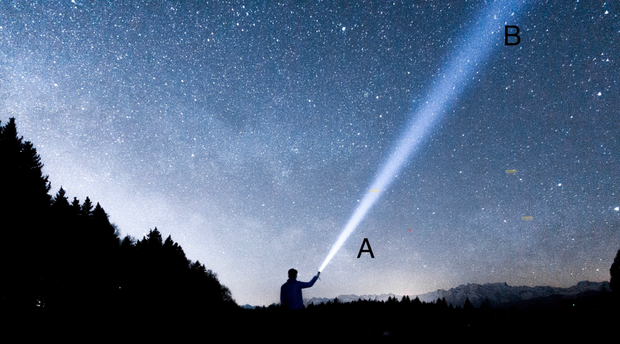
As an extension of this activity, ask students view the picture below and respond to the following questions:
Imagine that you are at point A looking at the flashlight and then move to point B.
- How would the light coming from the flashlight look different?
- What if you continued to look at the flashlight and moved to a point outside the picture?
- Could you move to a point far away where you could no longer see the light? What real life experiences do you have that help you answer this question? Explain your thinking.
Go back to the questions generated at the beginning of the lesson. Students will have many other questions about the objects shown in the sky. Some questions that students may have:
- What are shooting stars?
- What are constellations?
- I’ve heard that stars have different colors. What do the colors of stars mean?
- Why do stars twinkle?
- What are some other objects we can see in the sky? How can we see these other objects, do they give off light and energy like stars?
As a class, decide what you should investigate next. You might also provide grade-appropriate text, charts and media to pursue the answer to these questions.