
PITSCO Hot-Air Balloons
By Edwin P. Christmann
Posted on 2019-08-28
The “Zoon Hot-Air Balloons Getting Started Package” contains all the materials necessary for a class of 30 students to construct and launch their own hot air balloons. The kit is designed for students in Grades 3-12 and is user friendly. By having students follow the instructions provided in the manual, they can construct their very own hot air balloons out of the tissue paper that is provided in the kit.
The kit comes with 30 student user guides to guide students through creating their own hot air balloons. Subsequently, students can select whatever color of tissue paper that they desire to build their hot air balloon.
We found the instructions for constructing the hot air balloons to be clear and easy to follow. Moreover, the directions include helpful images to guide you through the instructions. In addition, the student user guide contains useful background information about the Zoon Balloon and a variety of balloon terms including: altitude, buoyancy, gore, temperature differential, and template. In essence, these terms will be essential for flying the balloon.
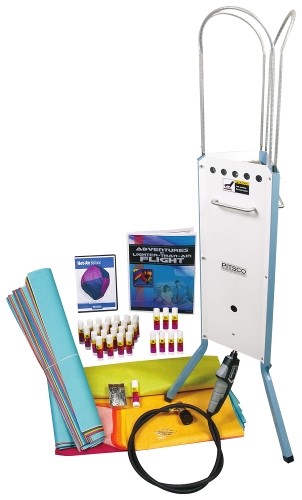
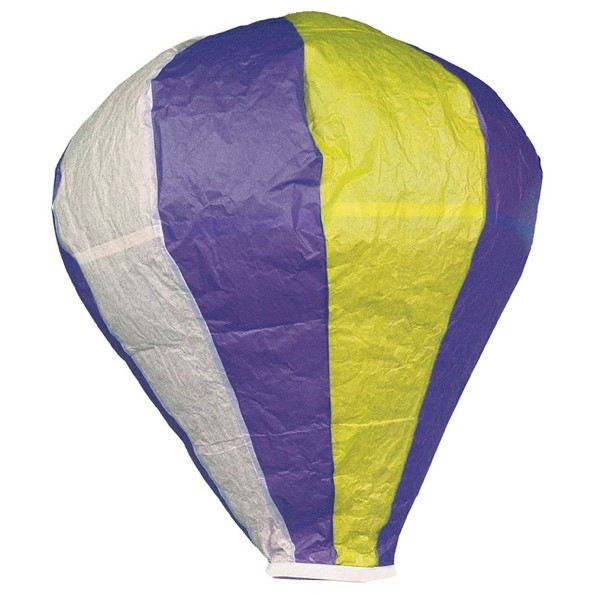
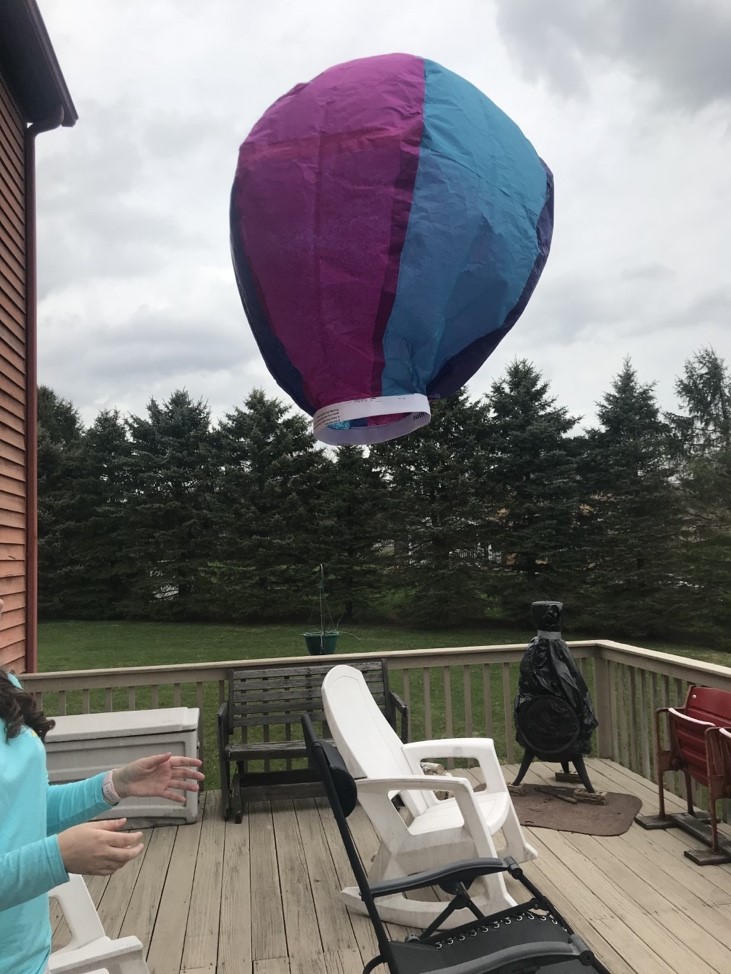
When assembling the hot air balloons, remind to students to be careful to not tear the delicate tissue paper. Holes in the tissue paper can prevent the hot air balloons from flying, so any tears or holes in the tissue paper must be mended before launching a hot air balloon. A picture of the kit is depicted below in Image 1. Image 2 is an example of what a constructed Zoon hot air balloon.
As a word of caution for time management, assembling the hot air balloons can be time consuming and could take several class periods. Therefore, by having students multiply tasks for efficiency, it would be helpful for students to work in pairs. Once the glue has dried and any holes have been repaired, it’s time to launch the balloon.
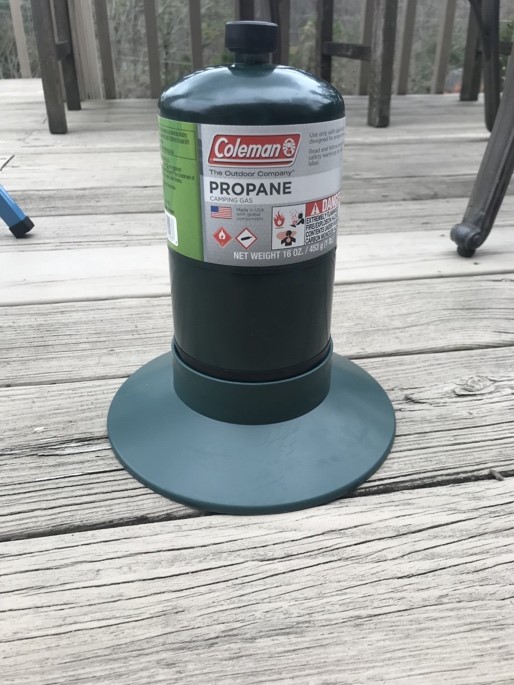
For safety, because propane hot air balloons need to be launched outside. The small propane canister needs placed in the propane cylinder base and screwed into place. Image 3 shows the propane canister on the propane cylinder base.
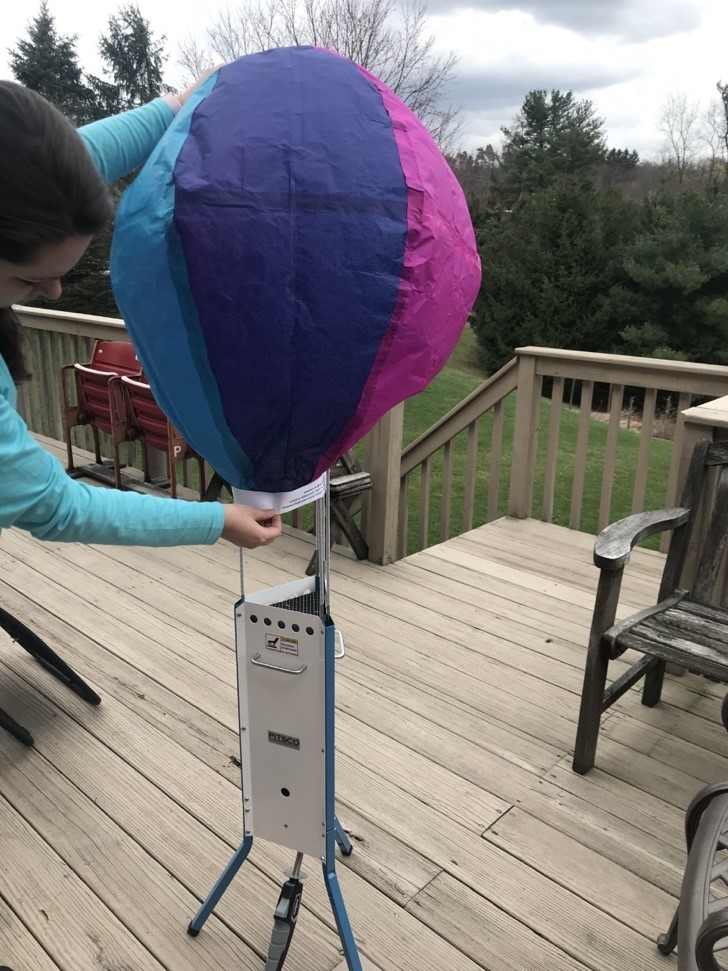
Once the propane canister is screwed into place, students can launch their hot air balloons by placing their hot air balloon on the launcher as shown in Image 4.
Once in position, make sure to wait for the balloon to inflate with air. Once the balloon is filled with air, students can release the balloon and it will fly. A picture of a hot air balloon in flight is depicted in Image 5.
What’s Included: – Zoon Hot-Air Balloons
o 30 glue sticks
o Box of 100 paper clips
o Zoon Balloon template
o Assorted colored tissue paper
o Zoon Balloon User Guide (30 copies) – The Inflation Station Hot Air Balloon Launcher
o Launcher Base
o 6 bots, 3 wing nuts, and 6 nuts
o Launcher legs (3)
o Torch and Igniter o Nylon wire wrap (3)
o Propane Cylinder Base – Hot Air Balloon video – Adventures in Lighter Than Air Flight booklet
What You’ll Need:
– Propane canister
– Scissors
Cost: $515.00
Edwin P. Christmann is a professor and chairman of the secondary education department and graduate coordinator of the mathematics and science teaching program at Slippery Rock University in Slippery Rock, Pennsylvania. Emily Ferraro is a graduate student in the mathematics and science teaching program at Slippery Rock University in Slippery Rock, Pennsylvania.
Disclaimer: The views expressed in this blog post are those of the author(s) and do not necessarily reflect the official position of the National Science Teaching Association (NSTA).