
Rolling from Inquiry into Engineering Design
By Peggy Ashbrook
Posted on 2019-01-15
 Guest blogger Jill Jensen began her 24th year as a science educator this fall. For the past twelve years she has been an Inquiry, Design, Engineering, Art & Science (IDEAS) Coach at Glacier Hills Elementary School of Arts and Science in Eagan, MN. Her current role allows her to partner with classroom teachers to extend and enrich their learning using inquiry, design, engineering, art and science. In this investigation she supports kindergarten students in pursuing an interest in objects rolling down ramps and extends it into an engineering design project improving an objects’ ability to roll.
Follow her on Twitter @GHSTEAMchic and read more about her work on her blog, Jensen’s Jots, at http://ghsteamchic.edublogs.org
What is it about watching objects roll that inspires cheers? As a K-5 science specialist, I’ve helped organize our annual Family Science Night since 2009. I try to have a balance of new stations and previous favorites. One station that remains every year is ‘Ramp Race’: two metal ramps placed side by side with the same number of blocks under each one and positioned about a meter from the wall. Families choose objects from a bin of miscellaneous items to place on the ramp and see which one hits the wall first. As simple as this sounds, it’s consistently one of the favorite stations and typically elicits oohs, ahhs and exclamations.
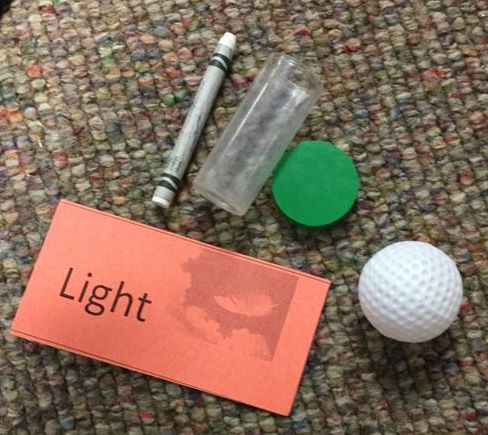
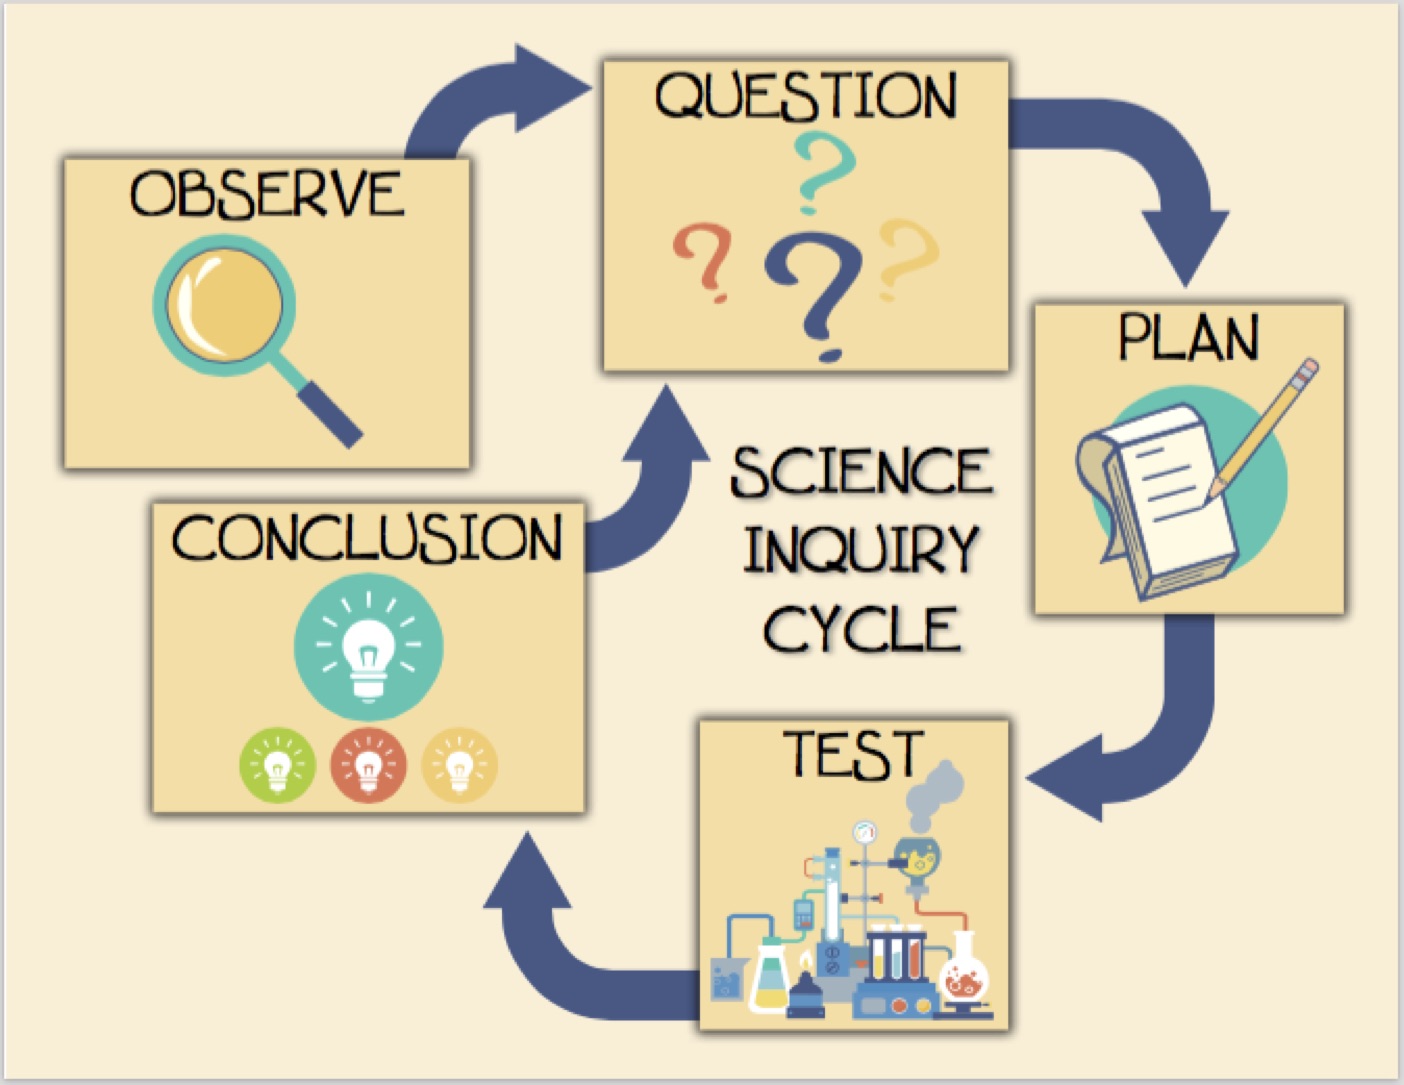 It was witnessing this excitement that led me to consider how to build on that enthusiasm. From this informal learning opportunity, I developed a four day mini-unit for kindergarten students that I’m excited to share. At Glacier Hills Elementary, we use an inquiry cycle shown in the picture above to guide our investigations. Our first step is to observe. For this experience, small groups of students are given the following objects: D battery, AA battery, crayon, vial, giant pom pom ball, ping pong ball, golf ball, a wooden circle (similar to wooden pattern blocks), a roll of masking tape and the inside circle from a used roll of scotch tape. The objects are carefully selected to represent a range of sizes, colors, weights and textures. This lesson takes place after teachers introduced three dimensional shapes in math.
For this particular lesson, on the first day, we emphasize the shapes of cylinder, sphere and circle. Groups of students sort the objects by a category of their choice (size, shape, color, weight or texture). Students can also play a ‘guess my rule’ game with their group. To play this game, a student chooses a category, but does not share what they have chosen to their group. The student puts out objects that fit their mystery category and asks their group to guess what category they are showing. After spending so much time observing and describing these objects we move to “I Wonder…”. Some questions include: where did these objects come from, how much do they weigh, how big are they,… and usually someone asks about rolling them. This is the question we explore the following day. This lesson is wrapped up by having students document a category for sorting in their science notebooks with writing and drawing.

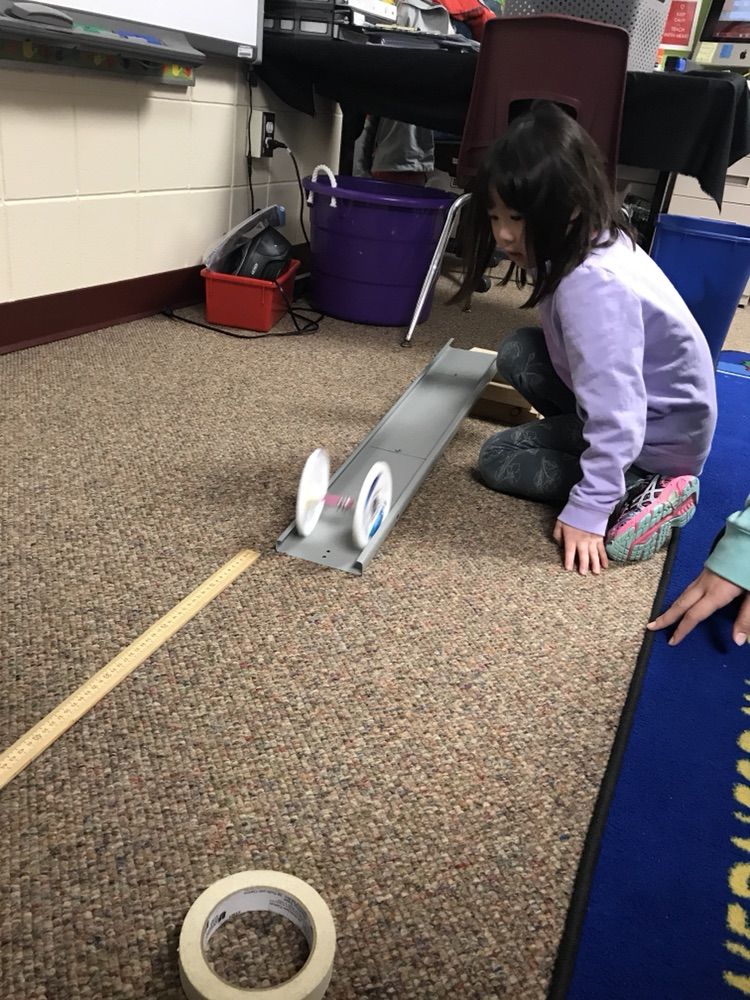
We start day two by reviewing the sorting (color, size, shape, texture, weight). We also review our “I Wonder…” question, “I wonder if we can roll these objects?” I prepare the room with eight stations, each with a metal ramp and three wooden blocks. I usually have students work in groups of three or four. Students start by exploring on their own, trying any combinations, arrangements and trials they wish. We come back together for students to share what they noticed. At some point, students mention that some things were good rollers and some things didn’t work very well. This leads to our investigation: to decide as a class which objects are ‘good’ rollers and ‘bad’ rollers. First students have to decide some rules and standards. I propose the following: to be a ‘good roller’ the object has to roll down the ramp and roll one meter on the floor. Standard testing is explained, meaning all the ramps need to be set up the same way (three blocks under one end of the ramp) and that we all need to test the same way (start behind the starting line, no pushing/helping or stopping).
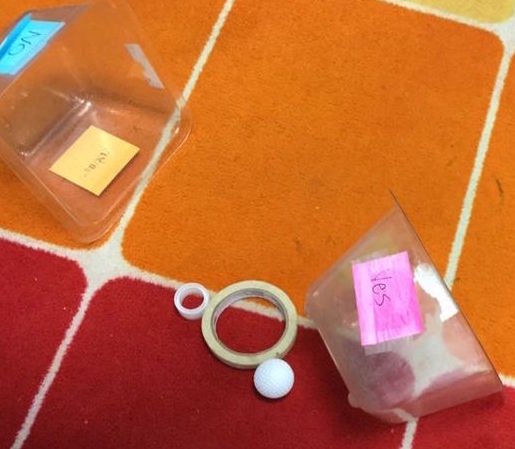 Students are given a meter stick and an additional block to put at the end of the meter stick to serve as a finish line. I also give students two containers, one labeled YES and one NO. If the object hits the block (reaches the finish line) it goes in the YES bucket. If it doesn’t, it goes in the NO bucket. Once students have tested their items, we come back together to share results. Frequently an object has mixed results, some groups get a YES and others NO. This leads to an opportunity to discuss argumentation in science. Having different results doesn’t mean that one person is right or wrong, it just means different results. However, we do need a class consensus. In this situation I do a do over and we use the results I get from the demonstration. We also discuss that if an object only works some of the time, it’s not really a ‘good roller’ Now what we have our final criteria and results, we share our findings by documenting our results with pictures and words in our science notebooks.
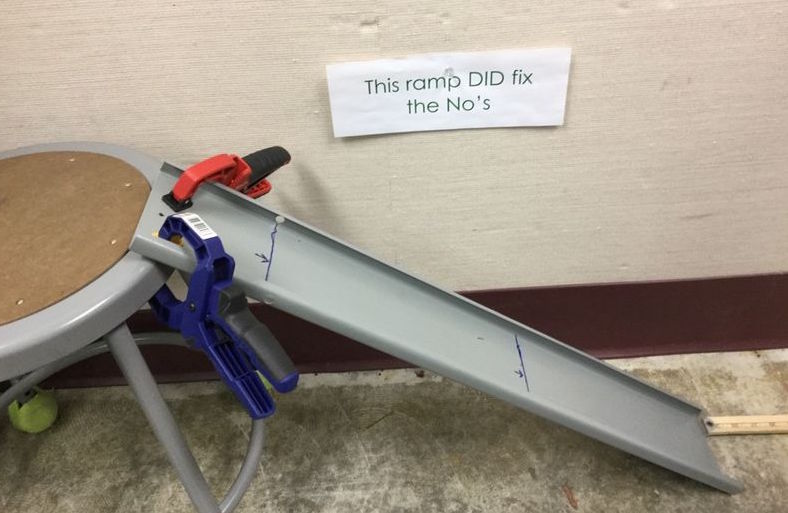
Finally, we start a conversation about the objects in the NO bucket. I ask if there are things we could do to the ramp that might make the objects be a YES. All ideas that students generate are listed on the board. Once we are out of ideas, I go back through the list and share whether I have the supplies and equipment to try their idea. Sometimes it’s an easy test, like adding more blocks to make the ramp steeper. Sometimes I have to do some searching for equipment, like trying a ramp made out of a different material. Sometimes students want to try a different length of ramp or a ramp without sides, all of which I have now gathered after several years of doing this investigation. Sometimes students come up with unique ideas that I would have never dreamed of and I do my best to make it happen. I’ll never forget one year a student wanted to run water down the ramp with the objects, thinking the water will help push the object and carry it down, which it did and that student was thrilled to see it happen.
 Testing out different ramps takes place the following day, giving me time to gather supplies and equipment. When students return, I have new stations set up around the room using as many of their ideas as I can. I have removed the YES items from the bin of objects to test since we know those already work. I still give the YES and NO buckets for students to document their results. Since there are a variety of different pieces of equipment to test, we rotate to each ramp in stations. At the end of class we compare our results and decide which ramps were most effective. Again our findings are documented in science notebooks.
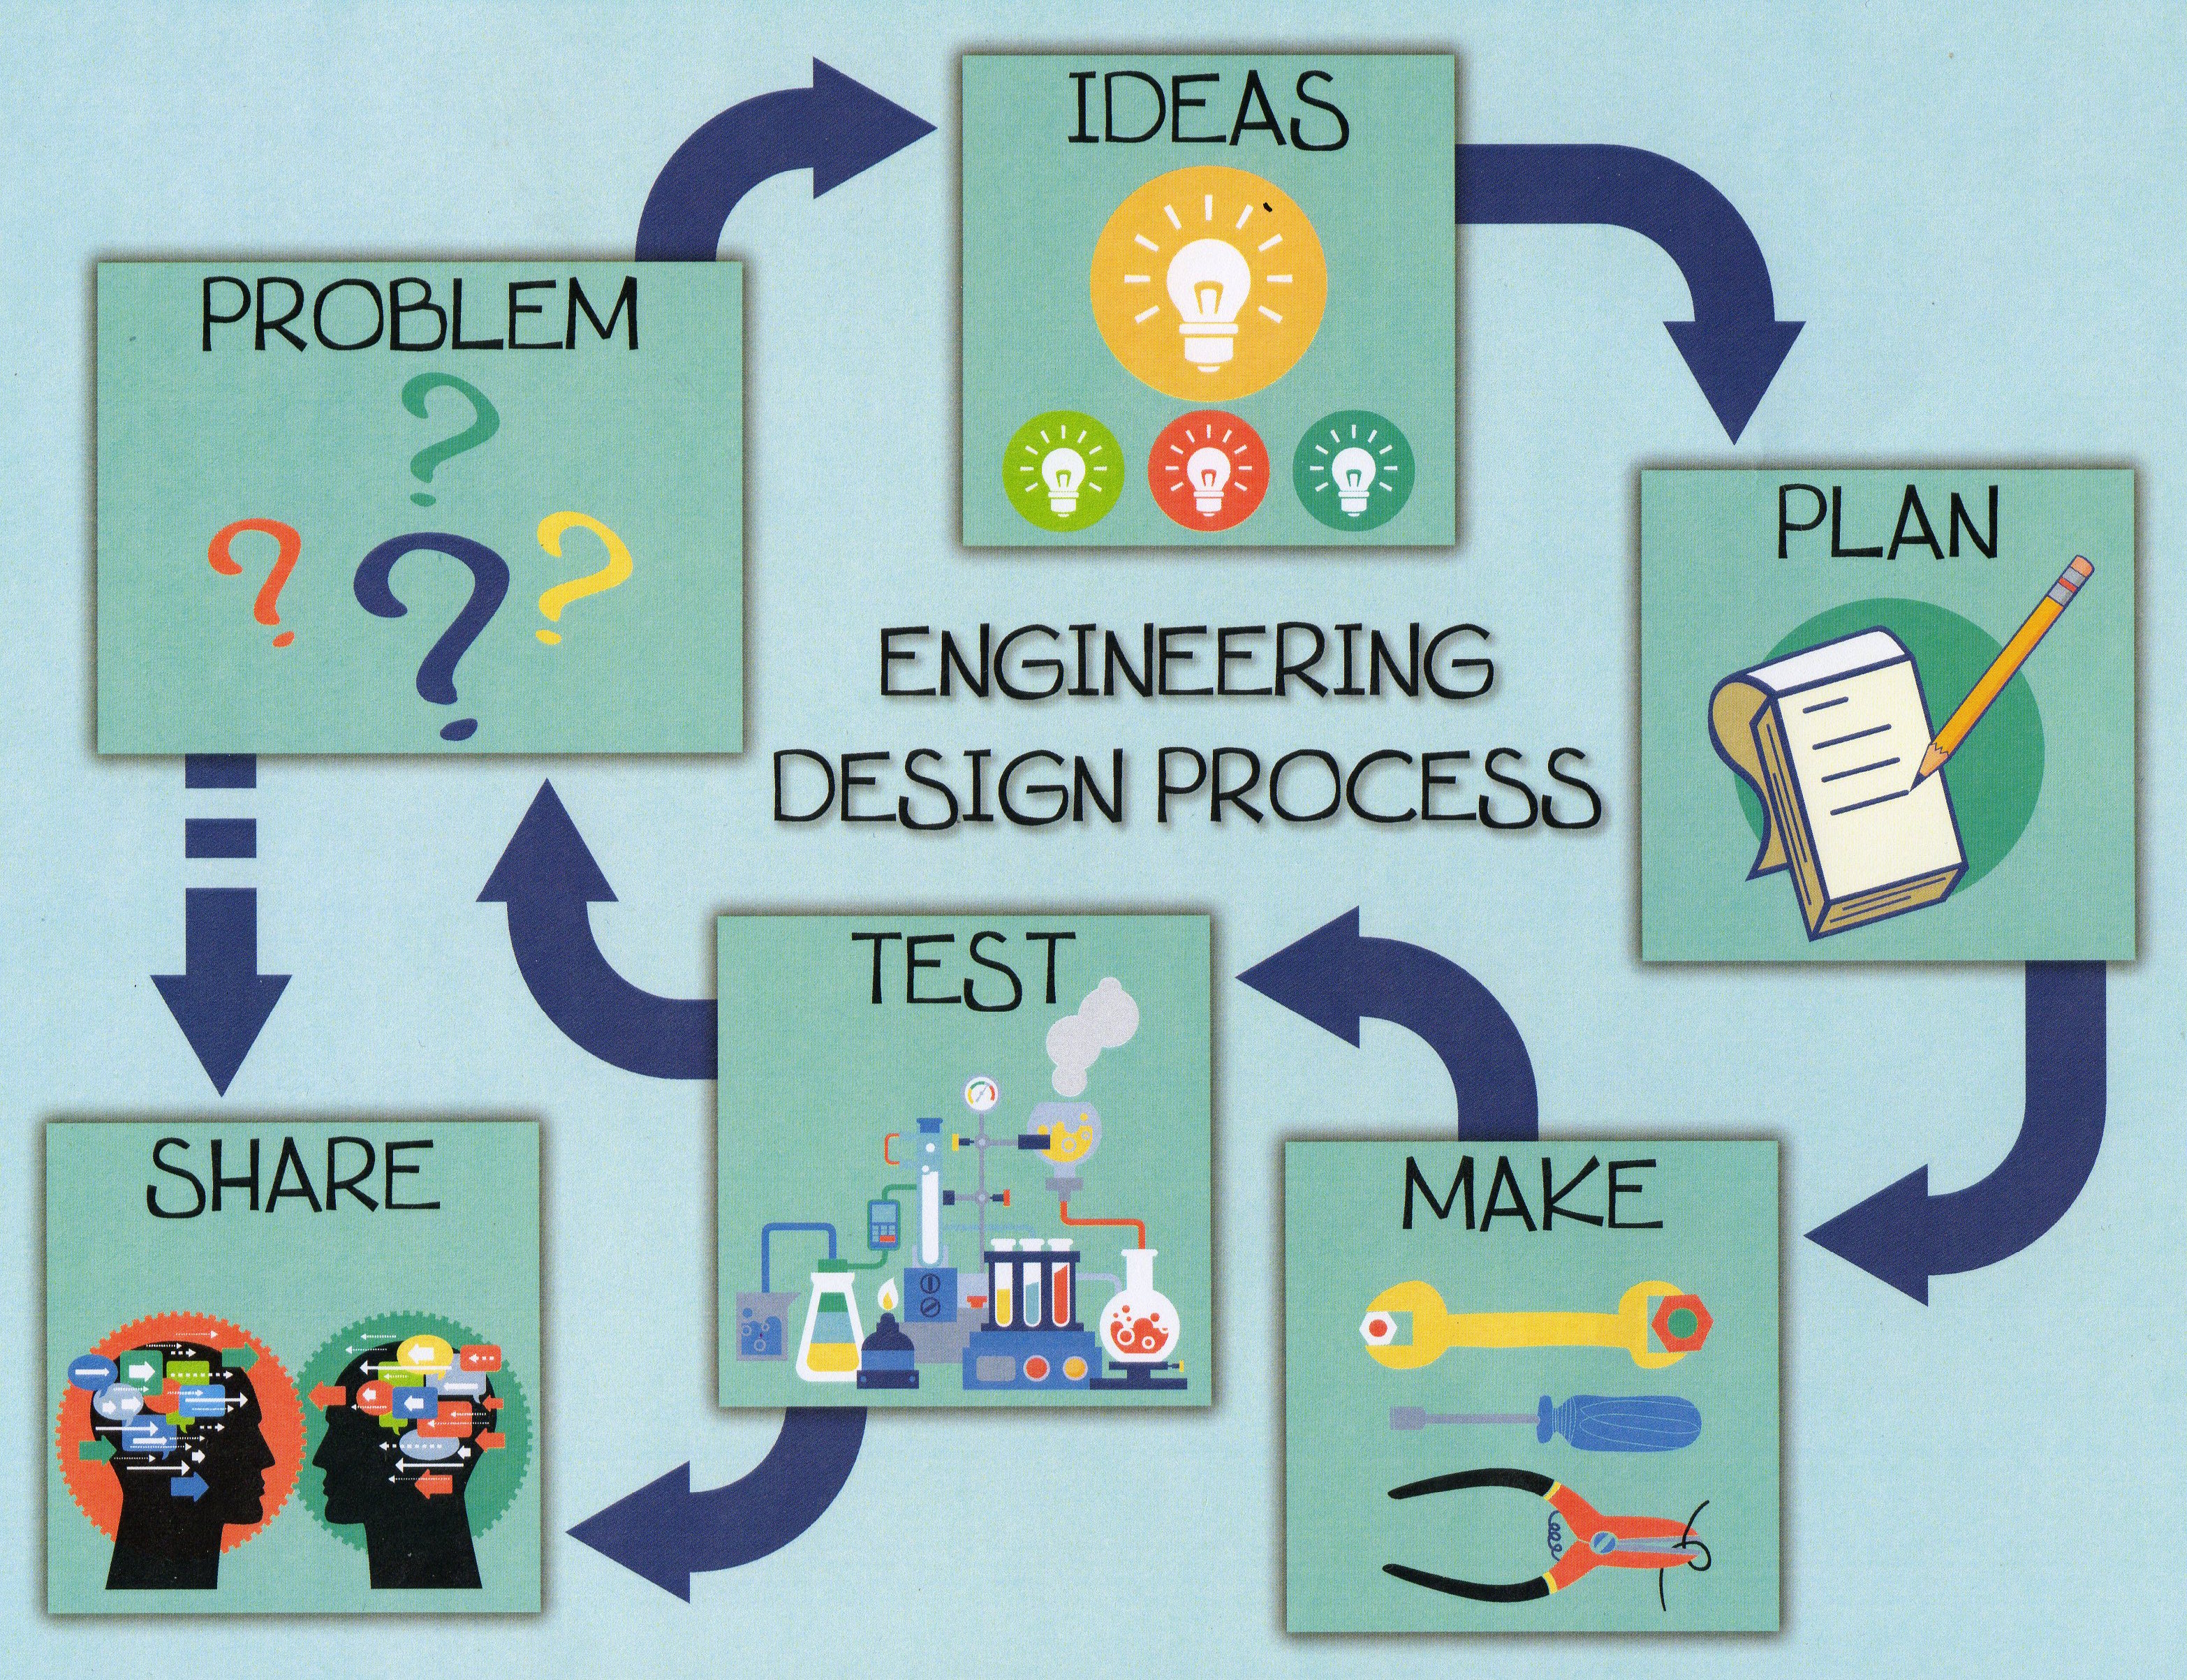 Our fourth day of investigating is an opportunity to introduce an Engineering Design Process to students. Using the diagram as a jumping off point, I share that engineers start with a problem rather than a question. Our problem is that we have several objects that aren’t good rollers. For the Ideas step, we look back at objects that were good rollers and see if we notice any patterns. To help facilitate our discussion, I’ll hold up the objects we observed the first day and compare them to our NO objects. We particularly pay attention to items that are the same shape. For example, I ask students to consider why the D battery a good roller but the crayon is not? Students are asked to describe how the battery is different from the crayon and how the tape roll is different from the wooden circle.
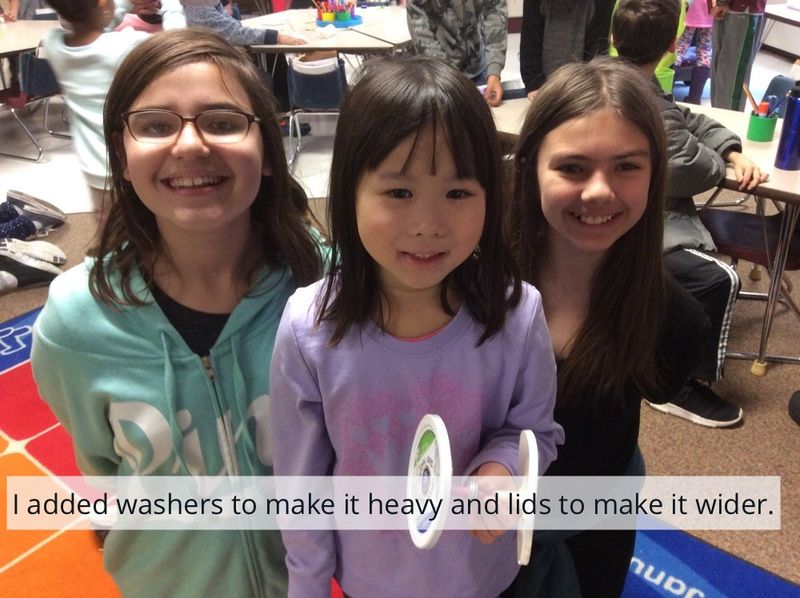
 After describing the differences between objects, we conclude together that good rollers tend to be wider or bigger and heavier. Next, we think about how to make the NO objects bigger, wider or heavier. Items available to students include: washers, bolts, bottle caps, plastic lids, paper plates as well as bins of several of the YES items (lots of tape rolls and batteries for example). Masking tape and duct tape are also provided for students to attach things. While we are engineering in this investigation, we still talk about the importance of following our science investigations rules (starting behind the starting line, not pushing or helping and that the object has to reach the finish line). We do this because we want to know if their design worked, not because help was given. We also talk about try, try again. If they tried some washers and it didn’t work, try some more. If that didn’t work, try something else.
 It only takes about ten minutes before cheers can be heard, telling me success was found. At that point, we’ll do a quick pause so the student that found success can share their design with the class; scientists and engineers don’t hide their designs from others, they shout their success so others can learn! Yes, there are copycat designs that come next, but there are variations that emerge as well. As with previous lessons, ideas and designs tried today are documented in science notebooks.
This mini unit has come to be one of my favorite experiences for kindergarten students. Students are given opportunities to observe, wonder, investigate, discover, find patterns, draw conclusions, test out their own ideas all while applying math vocabulary and science concepts.
Disclaimer: The views expressed in this blog post are those of the author(s) and do not necessarily reflect the official position of the National Science Teaching Association (NSTA).