
feature
My Robot Can Fly!
An integrated STEM lesson for preschoolers to learn about structure, function, biomimicry, and science in society
Science and Children—May/June 2021 (Volume 58, Issue 5)
By Deena Gould, Kathryn Knowlton, and Ruth Wylie
This early childhood lesson integrated science, technology, art, social studies, math, and language. Our students compared robots, programmed and created stories with robots, and became robot-inventors. They also imagined how their robot-creations might impact the world—a core idea related to Science, Technology and Society (STS) (NRC 2012).
Our preschool class included children with cognitive and communication difficulties and a range of fine and gross motor skills. In this article we describe each stage of the 5E learning cycle (Bybee et al. 2006). We also describe how we adapted each stage for our students’ developmental levels. We provide an assessment checklist online that shows how we observed and recorded data to guide us in planning the next stage of the lesson (see Supplemental Resources).
Engage: What Can Robots Do?
Day 1 in Class Circle (10 minutes): Meeting the Robot-dog
We gathered the class of 12 students in a circle. We placed a robot-dog in the center and commanded it to walk forward, turn its head, and blink its eyes. Any robot that mimics an animal would work well for this lesson. We pressed buttons and the robot-dog backed up, shook its head, and crouched on its hind legs.
We asked the students to talk about what robots can do. “The robot-dog can walk backward!” exclaimed one student. “It can dance and bark!” said another. One student answered by mimicking the robot-dog’s movements with his hands.
We asked the students, “What made the robot-dog move?” Students pointed to the wheels on the bottom. Several students emphasized that pushing the buttons on the control-device made the robot-dog move.
Explore: Making the Bee-Bot Move
Day 1 in Centers (15 minutes each): Exploring
We organized the class into four groups with three students in each group. The students were grouped heterogeneously. Each group had students with differing cognitive and communication abilities.
We introduced each group to the Bee-Bot, a programmable toy shaped like a large bumblebee. The Bee-Bot has two wheels on the bottom and a set of four directional control buttons on the top. Students program it to move by counting the number of button pushes and pressing the go button. The Bee-Bot is durable and designed for preschool hands. Students could safely hold, push, and tug on parts of the Bee-Bot.
We marked a starting point on the table for each student’s Bee-Bot. The starting point helped prevent Bee-Bots from crashing into other Bee-Bots. Also, noticing the starting point increased the likelihood that students would connect the effects related to their button-pushing.
The students eagerly pushed buttons on the Bee-Bot and watched what happened. We helped them interpret their experiences. “Great! You made the Bee-Bot go forward.” To help students learn to control the Bee-Bot, we prompted, “Make the Bee-Bot go forward again.” We modeled technical vocabulary, “You programmed the Bee-Bot to go backward!”
Most students noticed how their actions affected the direction of the Bee-Bot’s movement. We built on this knowledge to help students notice the distance the Bee-Bot moved for each button push. When students pushed the forward button three times we said, “You’re making the Bee-Bot go forward three units.” We prompted students to count the distance with us by placing paper measuring strips on the table in the path of the Bee-Bot. Each strip was 15 cm, corresponding with the distance the Bee-Bot traveled after one push of the forward or backward button.
We provided a plastic flower for explorations. Students laid the flower on the table and programmed their Bee-Bot to reach the flower (Figure 1). Some students laid the measuring strips across the table to count the distance. Some estimated the distance, “It needs to go 3.”
The students learned to use the forward and green go buttons quickly. However, they needed time to get used to the clear memory button, so during this stage we cleared each sequence for the students. By clearing the memory, students were more likely to connect their act of button-pushing with the Bee-Bot’s resulting action.
Day 2 in Centers (15 minutes each): Programming
Pushing the different buttons and observing the Bee-Bot’s responses was not enough for most children to learn that robots can be programmed to carry out specific tasks. Therefore, on day 2, we helped students identify tasks and program the Bee-Bot to accomplish those tasks.
We began by asking the group of three students what they planned to make their Bee-Bots do. “Move!” “Go!” they exclaimed. We asked which way they would make the Bee-Bot go. As they answered with statements like, “Forward” or by pointing forward, we provided the student a card with the image of the Bee-Bot’s forward and go buttons (see Supplemental Resources). We guided and assisted the students to use the pictures on the cards as a guide to know which buttons to push on the Bee-Bot to make the Bee-Bot do what they had planned.
We also modeled how to set and achieve intentions. For example, we placed the Bee-Bot on the opposite side of the table from children and told them that we were programming the Bee-Bot to move to them. We modeled how we measured the distance across the table with measuring strips. We asked students to follow us by pushing the buttons on their cards and counting with us as we programmed the Bee-Bot to move across the table to reach the child. Then we asked the child to program the Bee-Bot to return to us across the table.
Through exploration, most students realized they could program the Bee-Bot to move several units (of 15 cm each) at a time instead of just one unit at a time. Additionally, several students discovered that they could make the Bee-Bot turn repeatedly (using the turn arrows) and gleefully announced that they could make it “dance.” We reinforced these “aha” moments, “How did you do that? Make it dance again!”
Explain: Making a Bee-Bot Story
Day 3 in Centers (15 minutes each): Storytelling
For the explain stage, we worked with each small group of three students. We began with, “Let’s make a story.” Each student selected two or three pictures and positioned the pictures in separate squares of a 6 × 6 grid on a floor mat (Figure 2). The mat is covered with an attached clear plastic sheet. Students could lift the clear sheet, place the pictures on the grid, and then lower the plastic over to secure the pictures in place. We asked, “Where does the Bee-Bot want to go on the mat?” Each student dictated words for a story, “The Bee-Bot goes to _________________.” If students were uncertain about words, we asked them to point and show. Students then programmed the Bee-Bot to accomplish the sentences of their stories. For example, one student’s story had “the Bee-Bot want a flower, so it flew to a tree, then to the flower, then flew to the Sun.” We consulted the students’ Individualized Education Plans (IEP) and the speech/language therapist to individualize our expectations for each child. As a result, we differentiated our expectations about number of words, number of sentences, and use of ordinal words such as first, second, third.
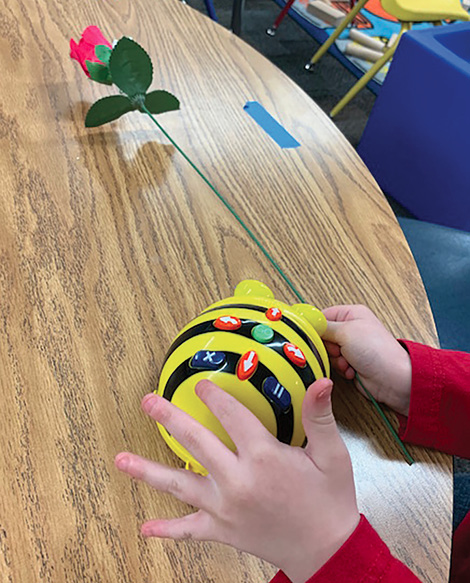
A child pushes the buttons on the Bee-Bot to make it go to the flower.
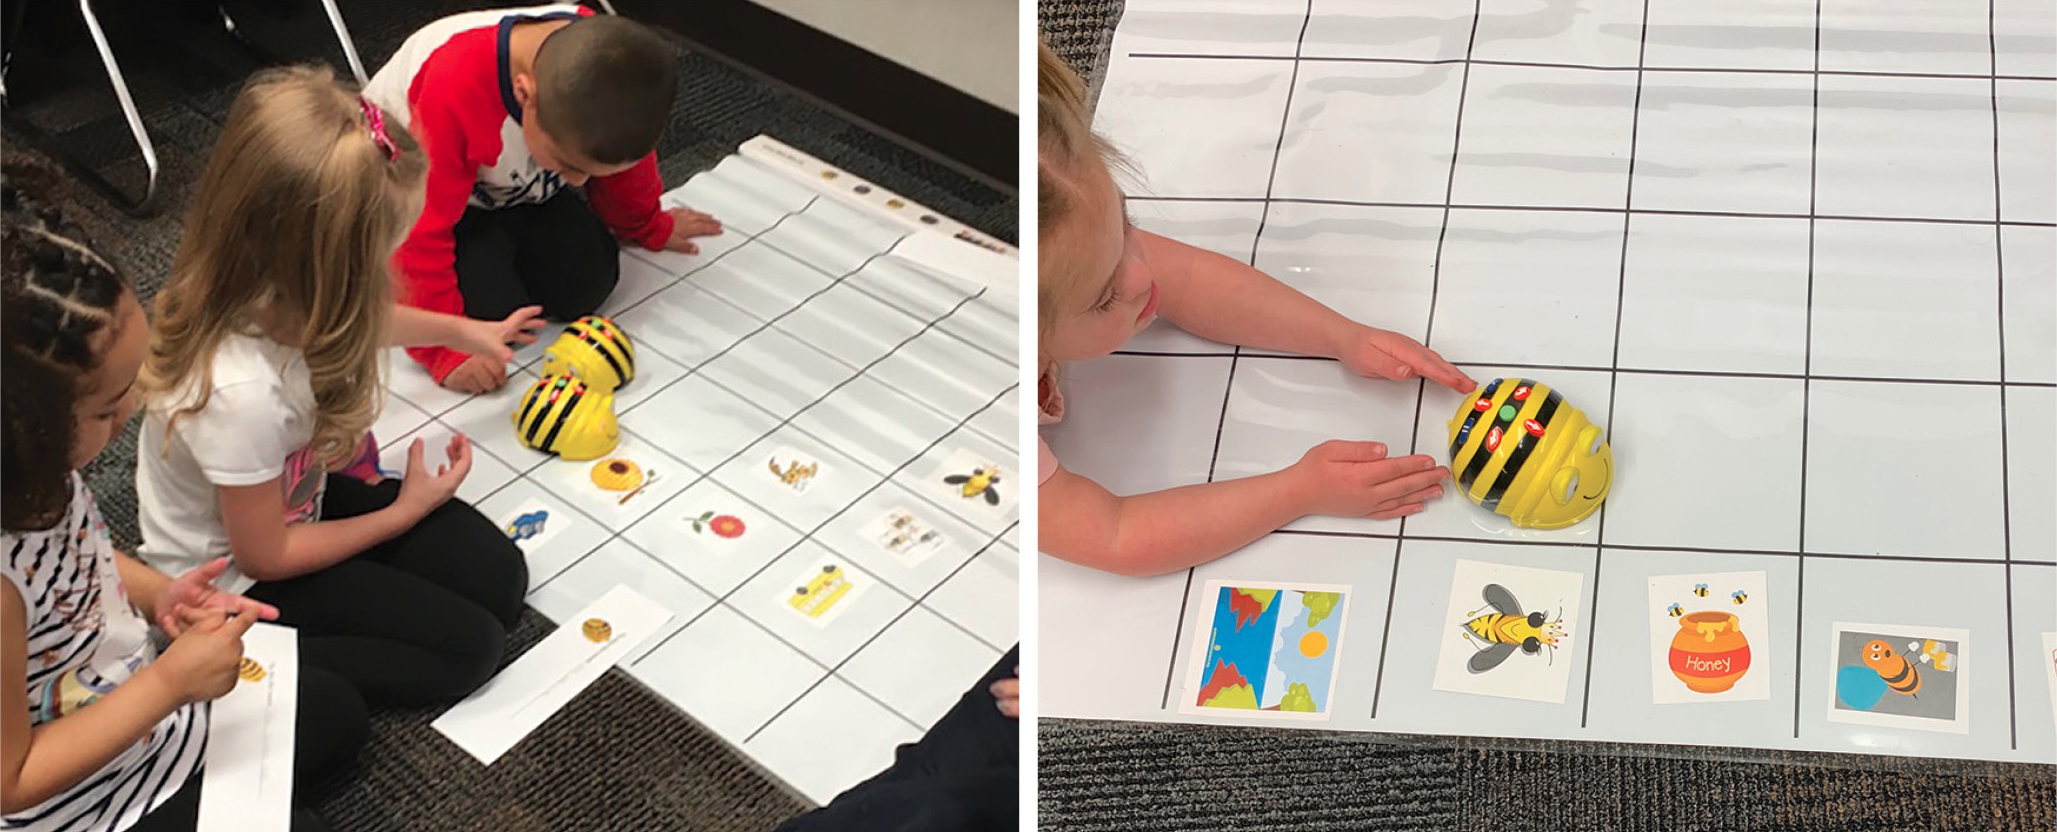
Children program the Bee-Bot to move to a picture on the mat.
Many students programmed the Bee-Bot on a straight path. Some students also programmed a turn of 90°. One student chose a destination that required the Bee-Bot to move forward three units, turn 90°, and then move forward three more units.
Many students communicated their intentions to us through gestures or play, such as wanting to make the Bee-Bot find the angry bee or go to the green cactus. We were careful to observe these gestures so we could support our students with communication challenges and differing developmental levels. We individually helped students find and use the buttons on the Bee-Bot to accomplish their intentions and create their own Bee-Bot journeys and stories. We prompted some students to count as they traced the path through the boxes with their hand and body. Each box is 15 cm in length to correspond with one button push. When students struggled to get their Bee-Bot to go where they wanted, we provided extra time and encouragement, “That’s a great story. Let’s try again.”
When students described the journey and programmed the Bee-Bot, they were developing the foundations of positional language, logical reasoning, and sequential/mathematical thinking (Kazakoff 2014; Umaschi Bers 2018).
Elaborate: Creating a Robot
Day 4 in Centers (15 minutes each): Designing
We began the elaborate stage by reading aloud the book Robot Zombie Frankenstein by Annette Simon (2012). In this story, two robots put on costumes and try to outdo the other. The robots take on roles of a zombie, Frankenstein’s creature, a chef, and a superhero. In the end, the robots become friends and eat pie together. The robot pictures are made from basic shapes and bright colors.
We invited students to create robots similar to the ones in the book. Students gathered around a table covered with white paper. We provided pre-cut shapes (see Supplemental Resources) in different colors that students could use for legs, hands, heads, eyes, torsos, feet, wheels, or arms. We also provided cutouts the students could use for hats, bolts, scars, and capes. To accommodate students with limited fine motor skills, we used heavy cardstock paper and provided a few heads that already had eyes attached. Students created a variety of robots (Figure 3).
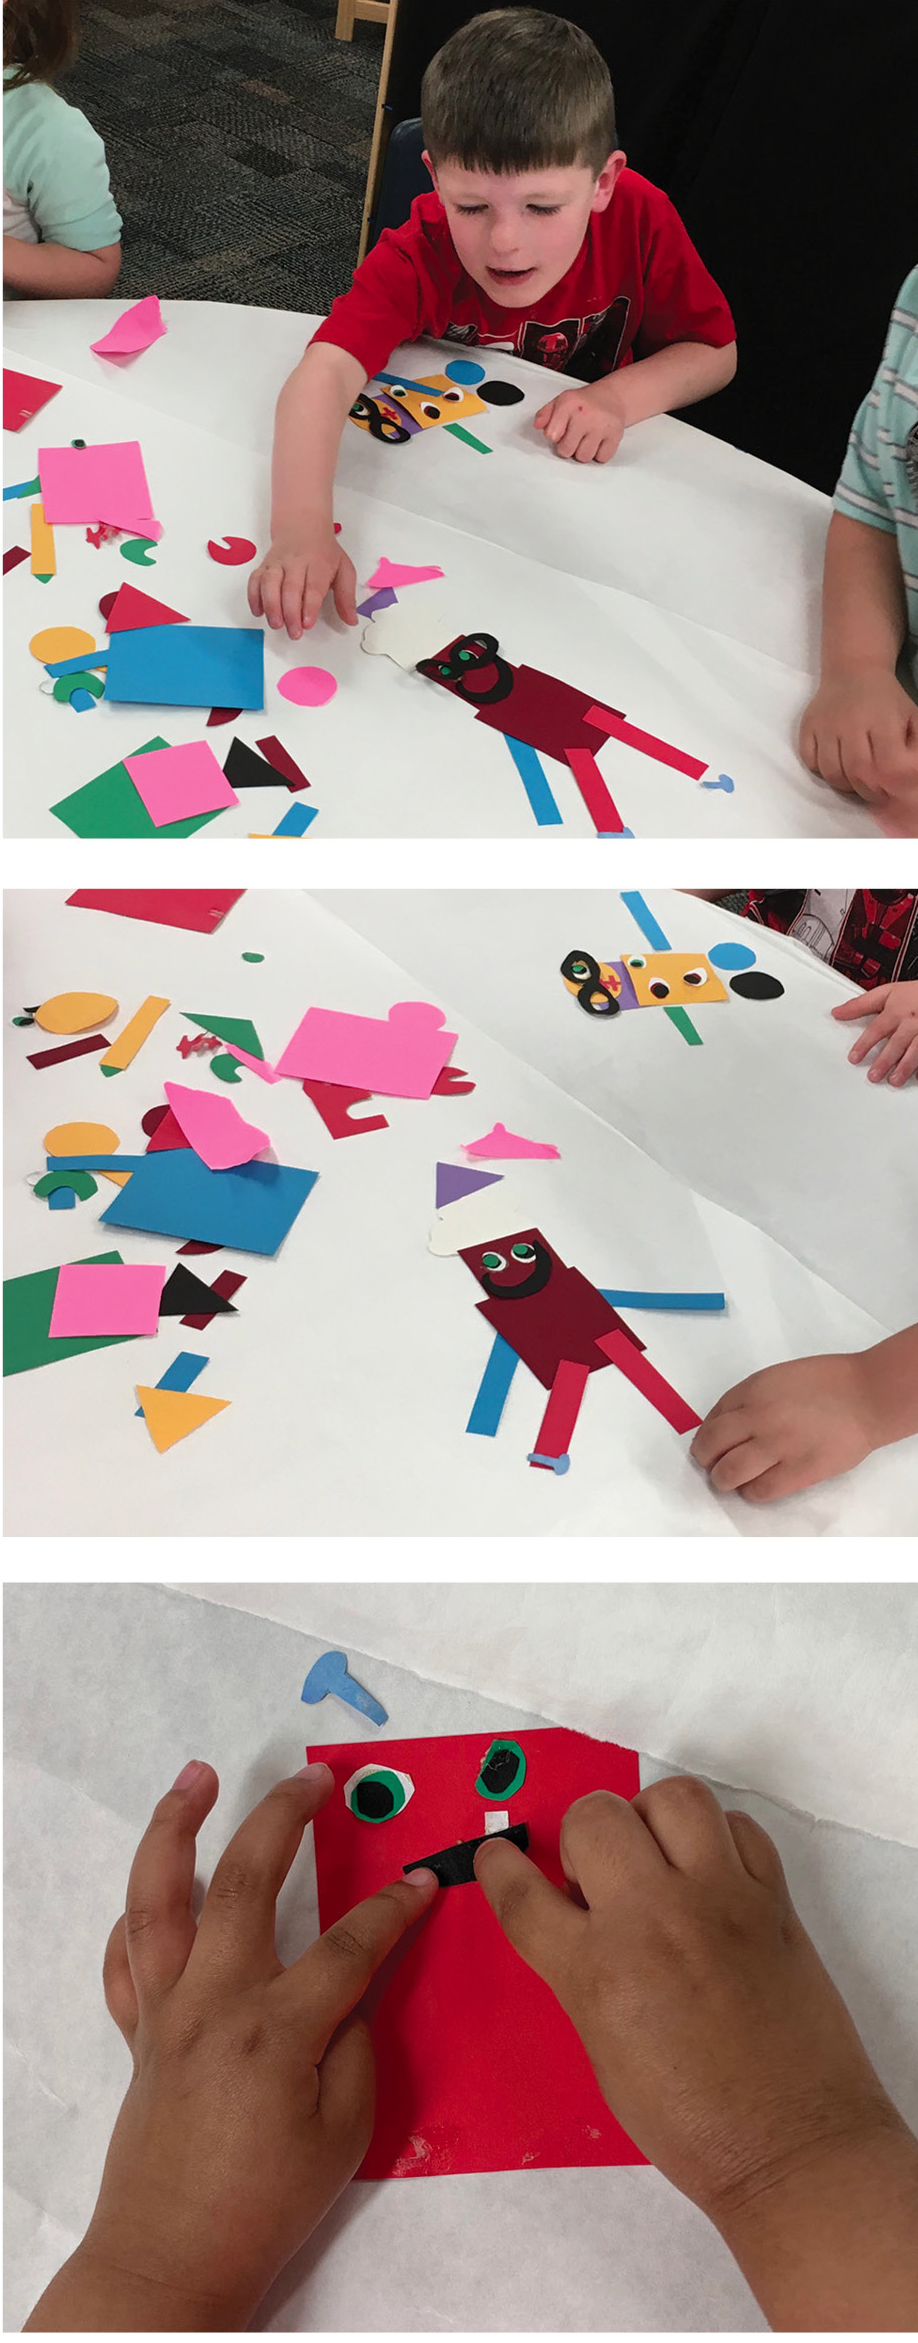
Children assemble robots out of cut-out shapes.
To introduce structure and function, we asked students to tell us or point to the parts of their robots that enabled them to move. Students pointed to legs, feet, and wheels. We also asked students to talk about what their robots could do. One student said, “My robot is named Tanela. She can walk and stomp!” Another student said, “My robot has two heads. He can disguise himself.” Many students said their robots could “roll.”
We also invited students to think about the potential impact of robots on society. We asked, “How might your robot be helpful?” Students said their robots could be a friend, give hugs, cook food, and play pirate with you. One student said his robot could fight a bad robot and save people. One student added legs and said that it made her robot better able to help people. Another student gestured to show how her robot used its three eyes to see laterally.
We also asked students how their robots might be harmful. One student imitated a scary robot and said “Arrrrrr!” Another said, “The robot stomps!” and made gestures of destruction. Students noted that robots could disguise themselves to trick people. They said that robots could take things and damage things. The students agreed that their robots could be helpful and also harmful. The students did well imagining how their imaginary robots might be helpful or harmful. We will improve the lesson next time by providing students photographs of real-world robotic items and guiding them to talk about how these robots might potentially impact society.
Elaborate: Structure and Function
Day 5 in Class Circle (10 minutes): Comparing
In order to help students learn how different body parts serve different purposes, we asked students to compare robots with animals. We placed a Bee-Bot in the center of a class circle and asked students to compare it to a bee. They said the Bee-Bot was yellow and had legs like a bee. They said the Bee-Bot could go forward, go backward, and turn like a bee. They said the Bee-Bot moved with wheels, which made it different from a bee.
Next, we asked the students to compare the robot-dog to a dog. They noted that the robot-dog had four legs and a tail like a dog. They also noted that it could move forward, move backward, turn, bark, and shake its tail like a dog.
Day 5 in Centers (15 minutes each): Designing with Biomimicry
We again invited students to build robots. Like before, the students positioned cut-out shapes on a white background. To help students imagine robots that might mimic the structures of animals, we provided pieces of wooden animals, fur, feathers, fins, wings, webbed feet, and animal legs. The flat painted wooden animal figures sold at craft stores worked well. We cut apart these figures so preschoolers could easily move and position the different body pieces. The pieces worked well with children who had limited fine motor skills.
Students made robots that mimicked the structures and functions of animals (Figure 4), a principle called biomimicry. Some students added insect wings. Others added bird feathers. They said their robots could “fly to save people.” One student applied spotted armor and said the robot used the armor to “hide and change heads.” Another student assembled a “superhero” robot with limbs from different animals. She gestured to show how her robot could fly, swim, and trot. Several students used their own bodies to communicate with us about the actions that their robots could do. By accepting students’ gestures, we invited greater participation from students who had language and communication challenges.
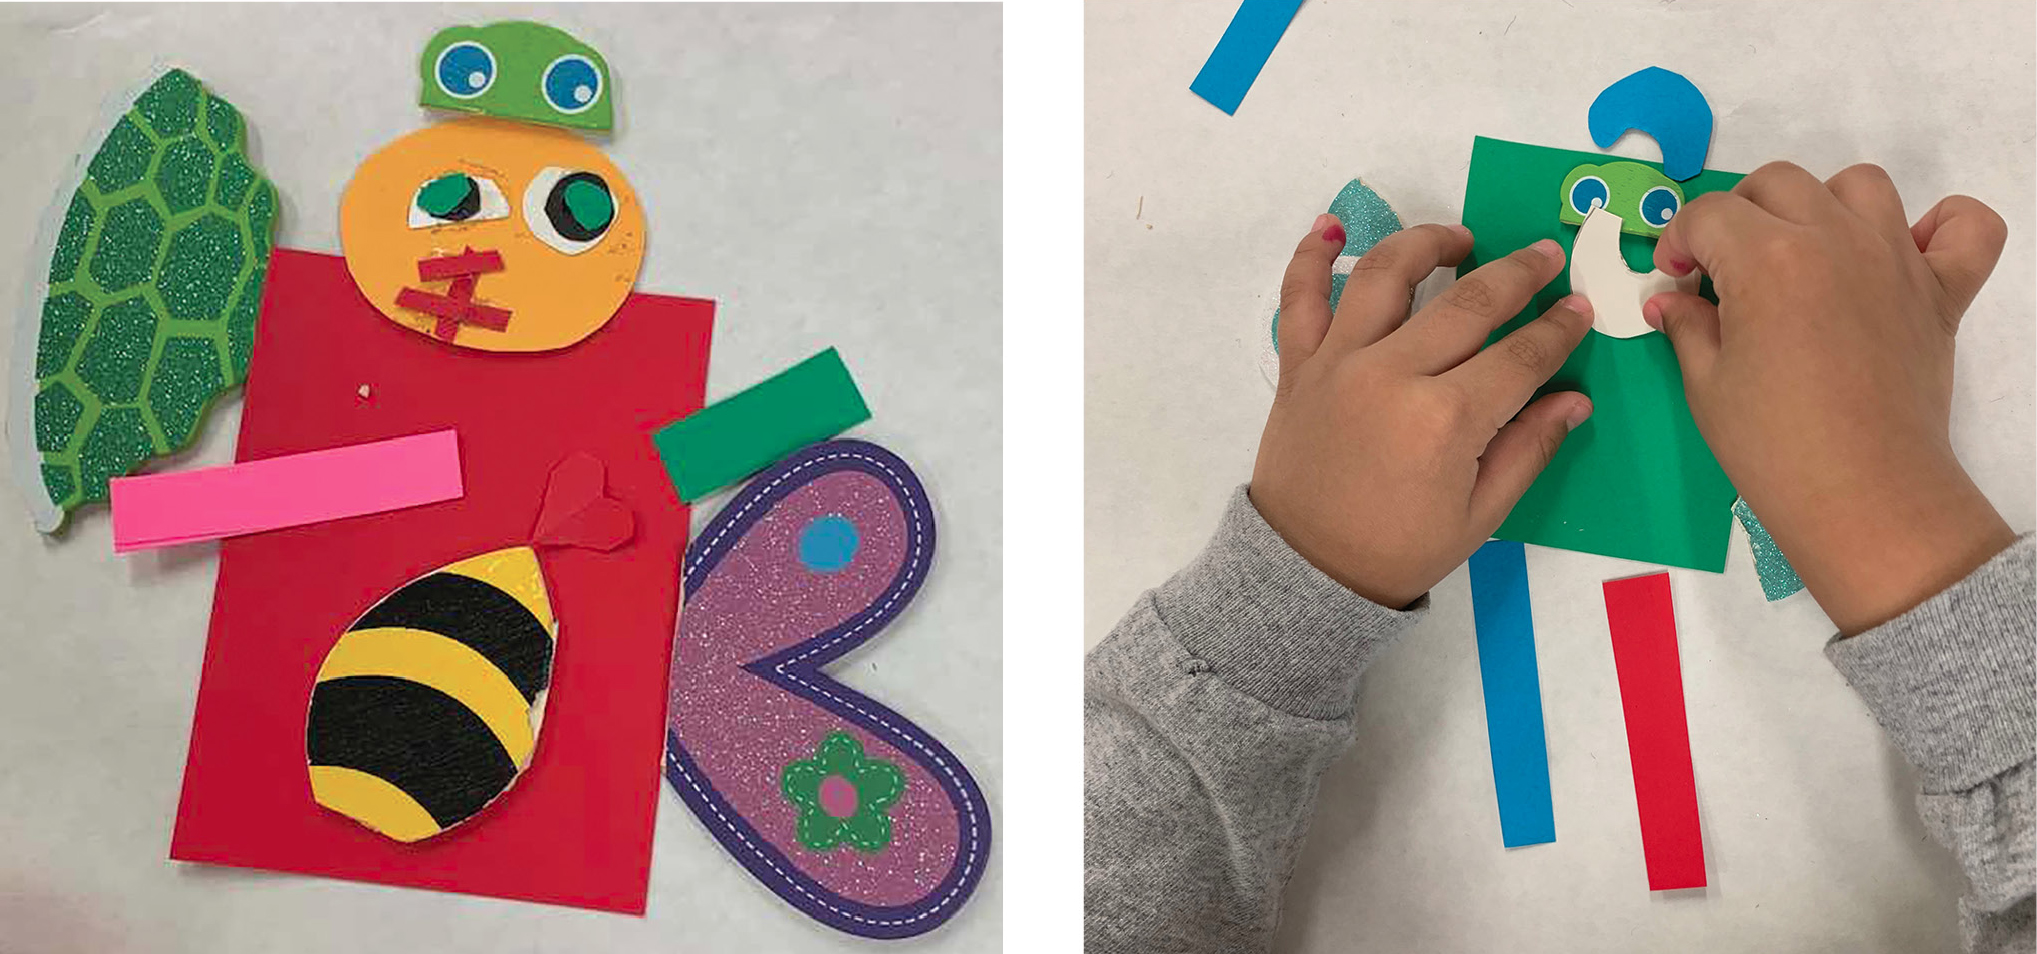
One child assembled a robot with wings so it can fly (left) and another a robot with turtle-eyes and insect-wings (right).
One student assembled a conglomerate of body parts and said that his robot could assemble itself to fit different tasks. He picked up three pieces and lifted them into the air to show how the robot would intelligently assemble itself to fly. Then he picked up different pieces to show how the robot would reassemble itself to lift and carry a person to safety.
As students designed their robots, they explored different ways the shapes and structures of body parts related to their functions. They designed robots with legs, wings, and arms that could grasp objects, roll, defend themselves, carry people, hide, and move through water and air. Students demonstrated through their designs and their actions that different structures served different functions.
Conclusion
In this lesson, our students developed early skills in science, literacy, and numeracy. There is a common misconception that STEM is only for older students or is only important for students who already excel (McClure et al. 2017). We think it is important to engage all students in STEM. By supporting young children, including those with special learning challenges, to explore, discover, and create using STEM, we make it more likely that they will later approach STEM with confidence, curiosity, and imagination (Fleer 2019). ●
Acknowledgment
This material is based upon work supported by the National Science Foundation under Grant No. 1516684.
Online Resources
Download images to use with the mat at https://bit.ly/3xeEqN3, robot shape templates at https://bit.ly/3dHXYSh, an assessment checklist at https://bit.ly/2Qg6bV1, and Standards connections at https://bit.ly/2QoHTbh.
Bee-Bot and Bee-Bot mat: www.terrapinlogo.com/stories.html
Robot-dog: www.sgile.com/products/sgile-robot-dog-intelligent-programmable
Deena Gould (DNAgould@unm.edu) is an assistant professor at the University of New Mexico in Albuquerque. Kathryn Knowlton is a preschool teacher in Mesa Public Schools in Mesa, Arizona. Ruth Wylie is an assistant director at the Center for Science and the Imagination at Arizona State University.
Computer Science Makerspace STEM Technology Early Childhood