
Winter Fun Without Wet Mittens
Second-grade students explore materials and problem-solving.
“It’s raining, it’s snowing!” Precipitation in our area can change within the same day. When it snows, children are permitted to play outside during recess, which causes them to experience a variety of problems with their mittens or gloves. To align our instruction with a problem student’s experience (Tobin and Tippett 2014), we developed and administered a short survey to second graders in an after-school program. We found the majority of students’ mittens/gloves get wet when playing in the snow. We used this problem and the second-grade standards (see p. 39) to guide our development of six lessons to support the students with finding a solution to their problem. Each lesson was implemented for one hour a week over a six-week period. Online, we share the materials that were used in each lesson, which were purchased with department funds (see NSTA Connection).
Week 1: Problem Introduction
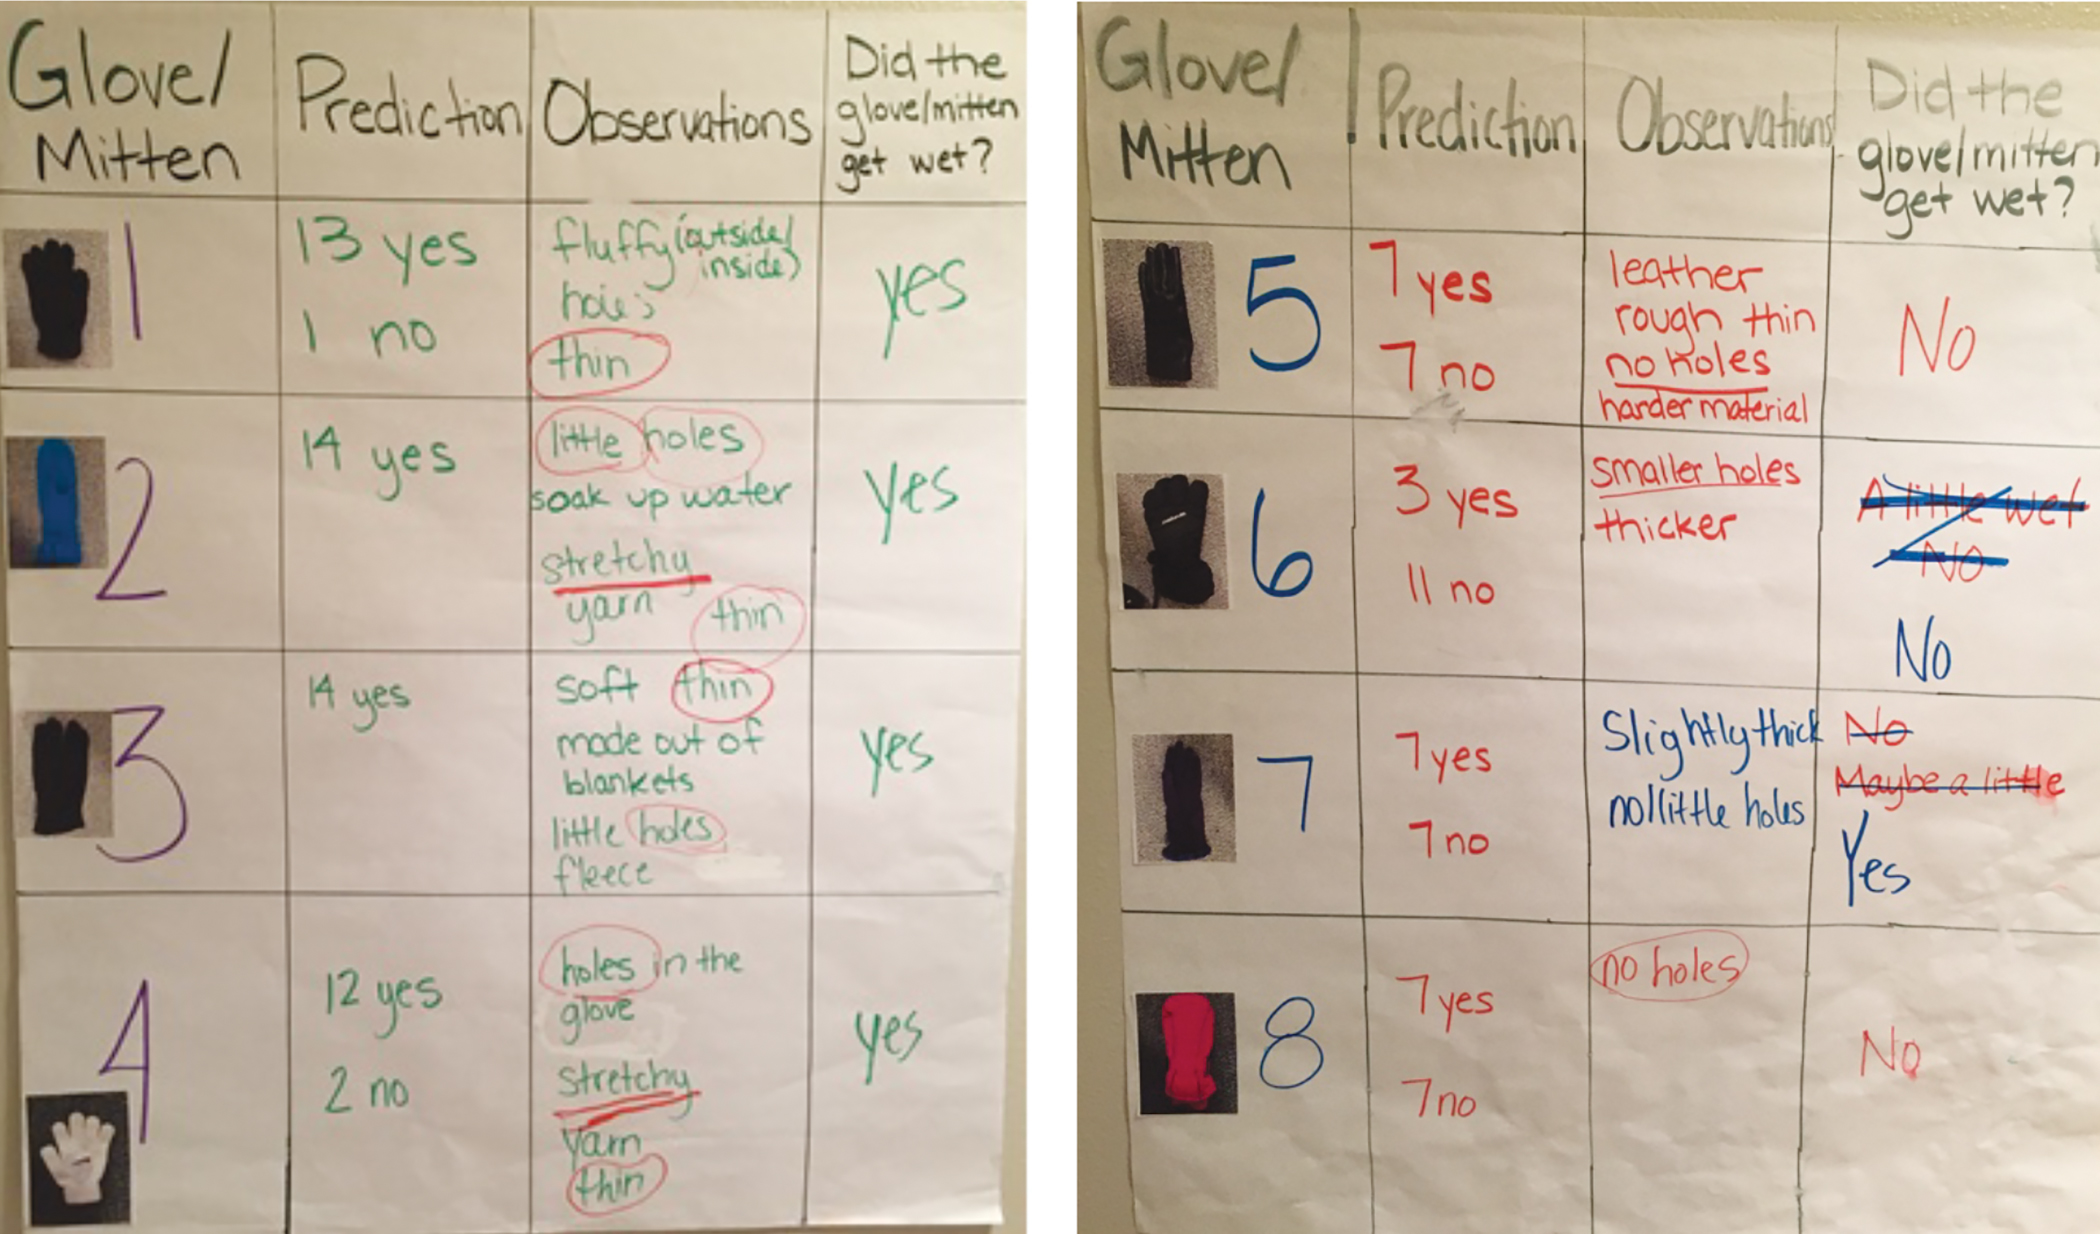
We started the first class by asking students whether they ever had wet mittens/gloves, and if so, how it affected their experience outside. Students shared that wet mittens/gloves caused their hands to get cold. We then explained that the goal of the lesson was to identify “What characteristics of mittens/gloves cause them to get wet while playing in the snow?” To address this question, we used eight mittens/gloves made of a variety of materials. Each mitten/glove was given a number, and a picture of it was posted on our class data chart so all students knew what mitten or glove was being discussed (Figure 1). Students passed each mitten/glove around the circle to analyze and describe their properties using their senses of touch and sight. We guided students who needed support with sharing their observations by asking questions such as, “How does the material feel?” “What do you notice about the material when you stretch it?” To informally assess the students, we also asked them to predict whether the mitten/glove would get wet in the snow based on its properties. When making predictions, the students relied heavily on their prior experiences to help them make predictions. One student stated, “I have gloves like this (acrylic mitten) and they get wet.” Other students noted they had the nylon gloves with rubber palm padding and said, “they do not get wet.” Many of the students mentioned they have fleece blankets at home and predicted the material would get wet because their blankets get wet in the washer or when they spill liquid on them.
For the investigation, the students went to two stations (6 per station) to explore eight mittens/gloves (4 per station) after they were buried in snow for 15 minutes. Our snow was made with a snow cone machine; however, outdoor snow could be used if available. For safety reasons, the students were asked to not place their hands in the snow. Each mitten/glove was also removed from the snow before allowing the students to insert their hand inside to determine if it was wet or dry. Students were prompted to pull their hands out of the mitten/glove to look for moisture on their fingers. All 14 students shared their observation(s) for each mitten/glove before completing the last column in Figure 1. A mitten/glove was deemed wet inside if 80% or more of the students made this observation. Thus, an inter-observer approach was used to achieve reliable results.
Week 2: Exploring Mitten Materials
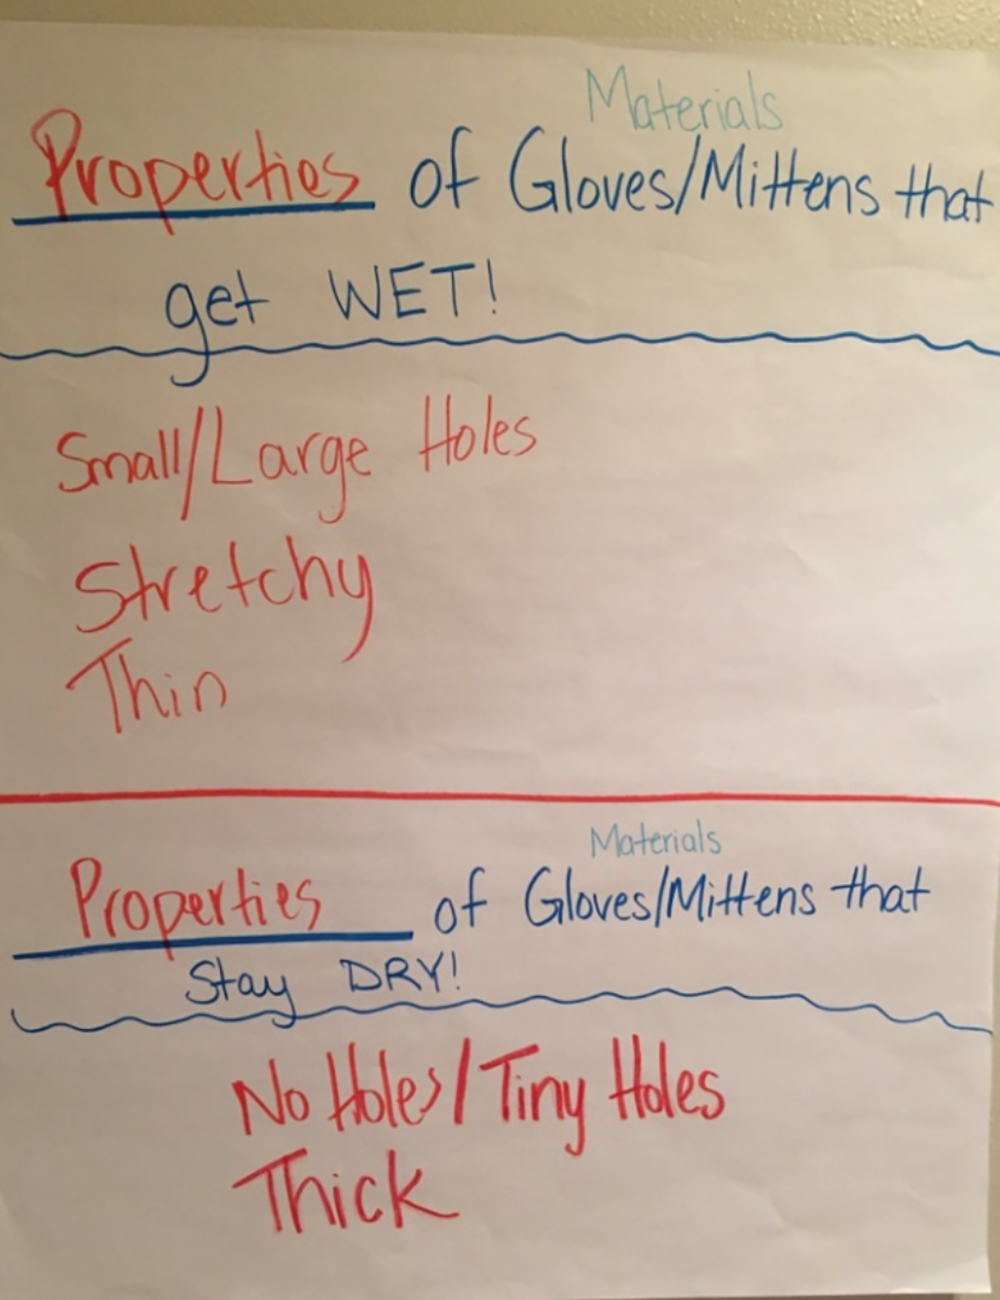
We started week 2 by asking the students to analyze Figure 1 and identify what mittens/gloves got wet in the snow. Students noticed that glove 6 and 7 had contradicting results. We discussed possible reasons these discrepancies could have occurred. For example, some students could have had difficulty determining whether the inside of the mitten/glove felt cold or wet. As a result, we retested gloves 6 and 7 using the same process and reminded students to pull their hand out of the mitten/glove to look for moisture. Using the students’ agreed-upon observations, we revised Figure 1. Students were then asked to identify common characteristics of mittens/gloves that get wet and stay dry. We circled the characteristics on Figure 1 and outlined them on our properties list (Figure 2). Students were informed that a more scientific way of describing the characteristics of the wet/dry mittens was the term properties.
To assess the students’ knowledge of the properties of mittens/gloves, we provided each pair of students an acrylic mitten and asked them to complete the following sentence stem, “We think this mitten will/will not get wet because_____.” Sentence stems are a great support for students who need help with communicating their thoughts, which is an important literacy skill (Fulwiler 2011). All students knew the acrylic mitten would get wet from their prior experiences or the previous weeks investigation; therefore, we informed the students that we would be exploring 10 different materials (see NSTA Connection) to determine whether they could help keep a mitten from getting wet. Teachers could allow students to select the materials to test if time and/or resources allow for a more open-ended exploration. Our focus question for this lesson was “How many materials will not get wet inside?”
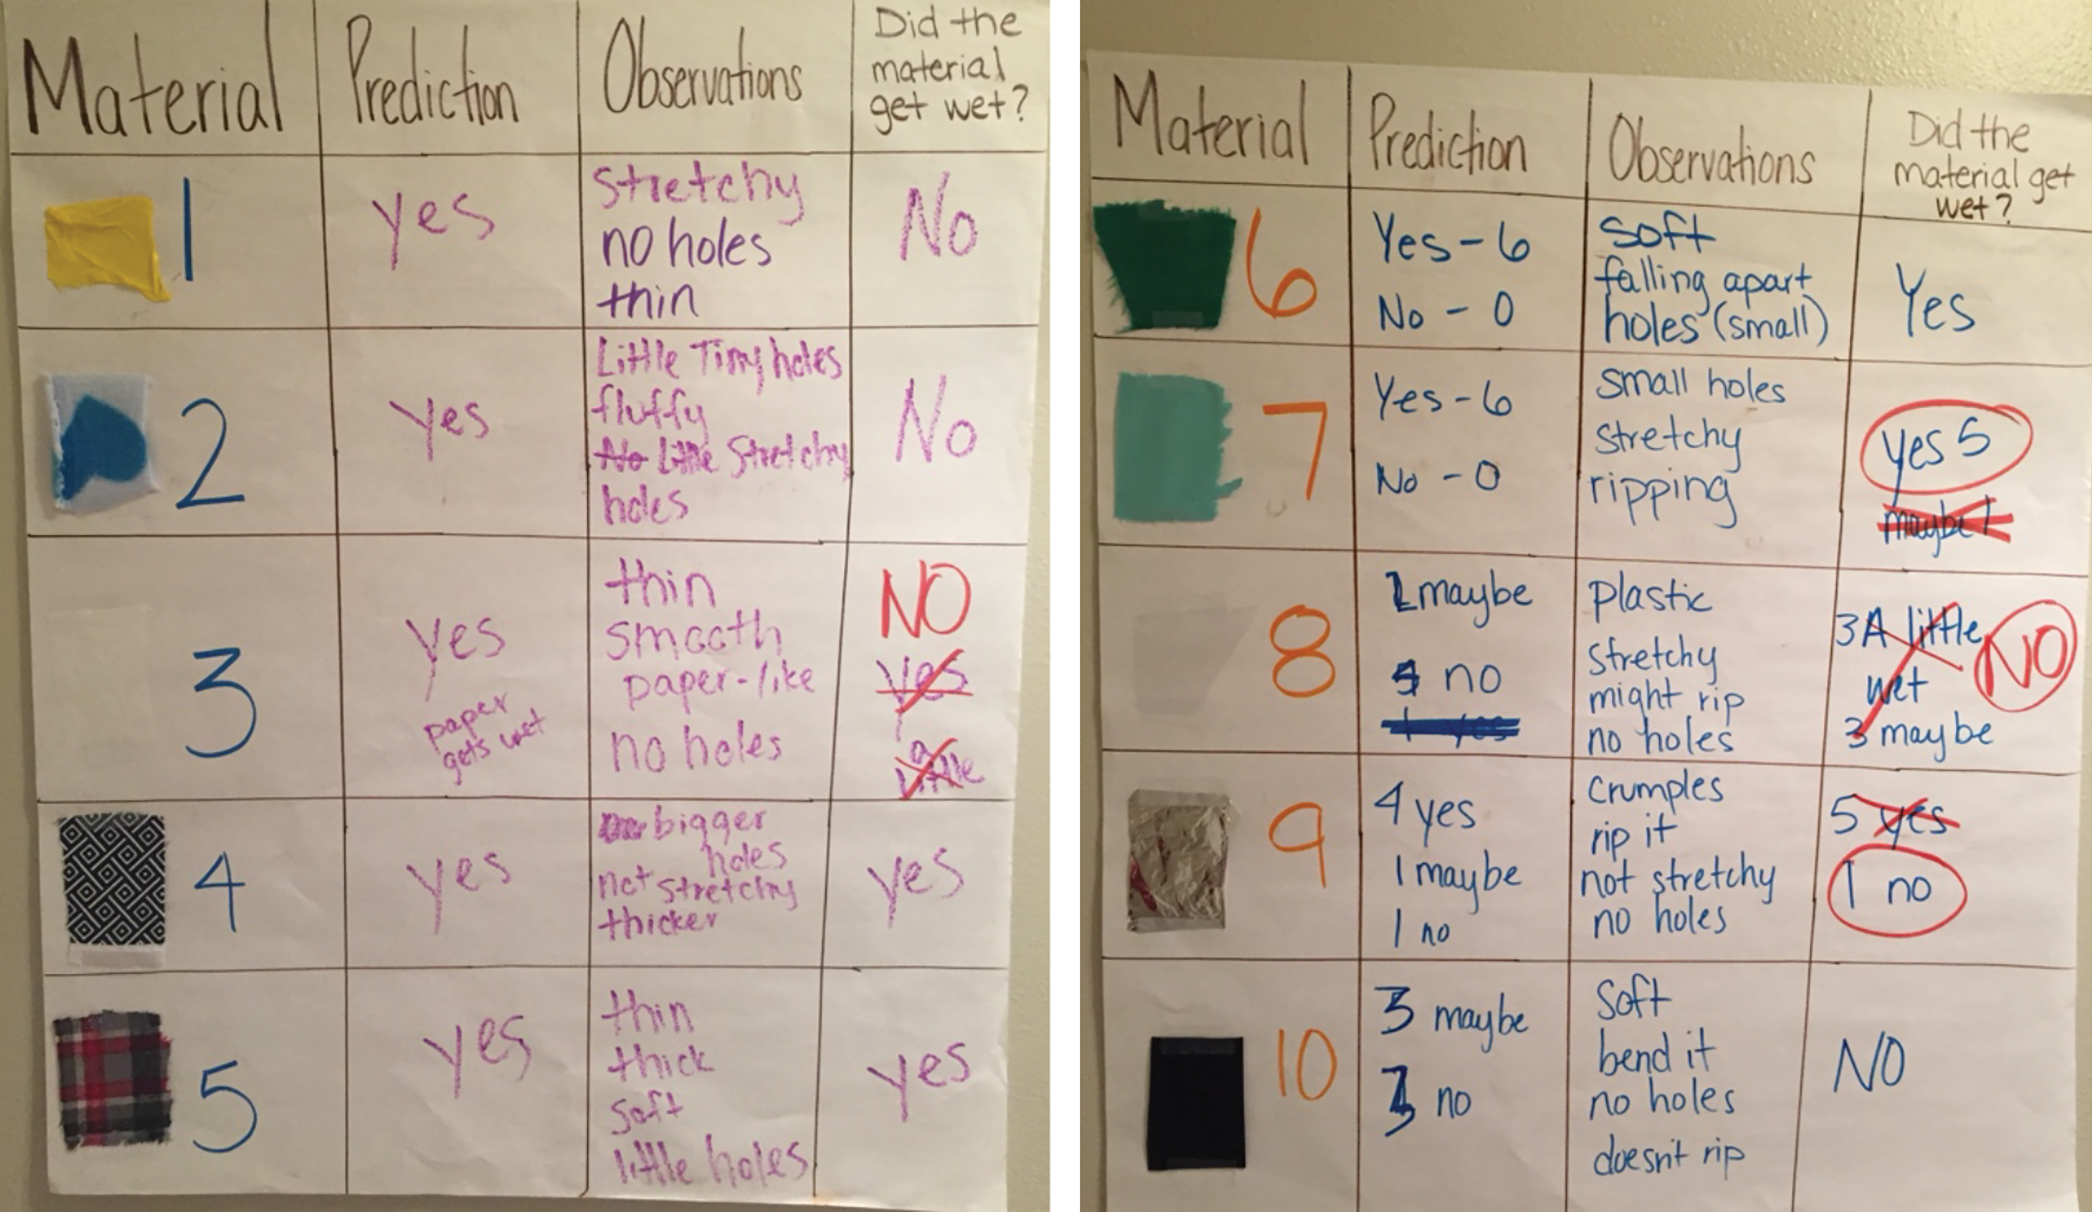
For the investigation, the students were split into two groups (6 per group) to explore 10 different materials shaped as pockets. Each material was given a number and a sample of it was included on our class data chart (Figure 3, p. 36). The 10 pockets were placed in two bins of snow for 15 minutes prior to the exploration. We provided the students with small rectangles of each material to observe and predict whether the material would get wet in the snow. Students used Figure 2 when making their predictions. For example, one student stated, “I think number 10 will stay dry because it doesn’t have holes.” We recorded the students’ observations and predictions (Figure 3), which served as an informal assessment. We then removed each pocket from the snow to allow all students to put their hand inside and determine if the inside was wet or dry. We informed the students that for safety reasons they could not touch the snow with their hands. Students were reminded to look for moisture on their fingers after removing them from the pocket. By giving all students the opportunity to observe each material, we were able to develop more reliable results. To conclude, we recorded the students’ findings (Figure 3).
Week 3: Mitten Design
At the beginning of week 3, we asked the students what they noticed about our data. Students quickly identified the materials that got wet and stayed dry when placed in the snow. They also noticed there were four materials (3, 7, 8, and 9) with inconsistent results. Therefore, we retested them using the same process as the previous week. After 15 minutes, we took the four materials out of the snow and invited all students to observe if each was wet or dry inside. We modified our chart (Figure 3) and supported the students through the process of answering the investigable question “How many materials will not get wet inside?” Students who have experience with forming scientific explanations could answer the question on their own using the data collected. From this discussion, we were able to informally assess the students’ knowledge of which material properties kept the pockets dry when placed in the snow. Thus, we knew they were ready to find a solution to the problem: “How can we improve these mittens, so they do not get wet in the snow?”
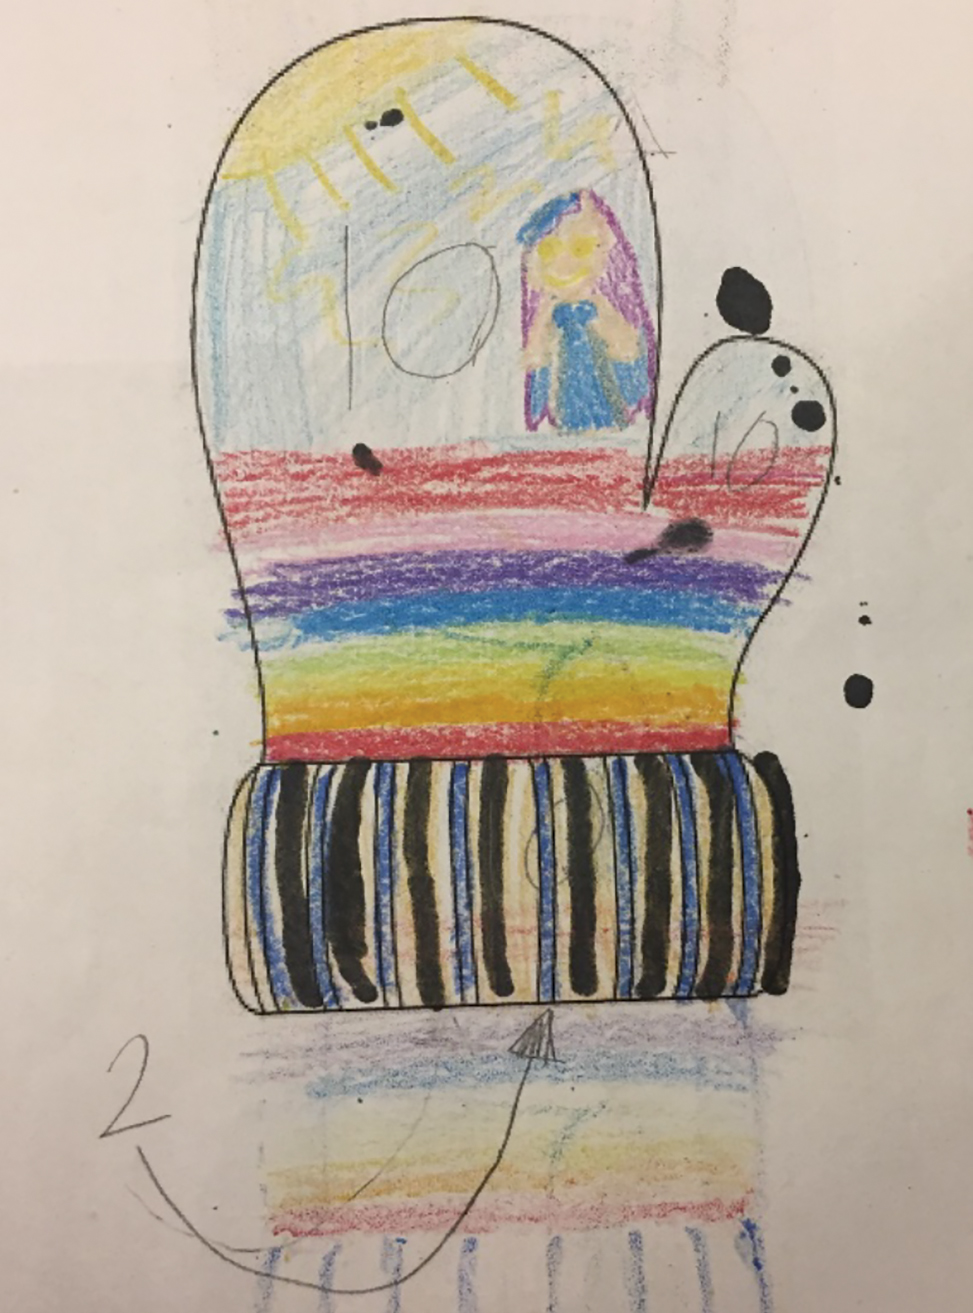
Before the students began working on their mitten solutions, we were able to address a few literacy standards by reading the book Anything is Possible by Giulia Belloni (2011) and stopping at various pages to discuss the different phases of the Engineering Design Process: Ask, Imagine, Plan, Create, and Improve. To help reduce the students’ fear of their mitten solution not working, we emphasized that engineers’ initial designs do not always work. In addition, we explained to the students that over the next three weeks they would be taking on the role of an engineer to find a solution to keep an acrylic mitten dry when placed in the snow for 15 minutes. Last, we discussed the constraints engineers must keep in mind when designing their product: time, cost, and resources. Students were informed they could only work on their mitten design during our time together using the resources outlined in Figure 3 and duct tape. We also encouraged students to limit the amount of materials and duct tape in their design to help reduce cost. Teachers could assign prices to each material and provide students a budget to work within to address second-grade math standards. Each engineer was then given a pencil, crayons, and a piece of paper with a mitten printed on the front and back side. Students were asked to label with numbers (Figure 3) the materials and location of where they would place each material on their mitten outline.
The engineers worked individually on their mitten designs. While the students were working, we rotated around the room to informally assess the students’ decisions to use certain materials. One student stated, “I am going to put number 10 on the outside because it will keep the snow out” (Figure 4). We also were able to provide additional guidance to students who were struggling to use the results from previous testing to inform their design. A majority of the students were considering just adding material to the outside of their acrylic mitten, but there were some students who wanted to add material to the outside and inside of their acrylic mitten.
Week 4: Constructing Mitten Design
During week 4, we asked the engineers to share with a partner the reason they included certain materials in their design using the following sentence stem as a literacy support (Fulwiler 2011), “I chose material number ____ because _______.” This discussion allowed us to informally assess that many students were able to justify their materials by using previous testing results. For example, a student stated, “I chose material number 10 because it doesn’t have holes and it is thick.” Before the engineers began working on their mitten solutions, we discussed the importance of following their designs and safely using the scissors. We also reminded the students to continue to keep the constraint of cost in mind when applying duct tape.
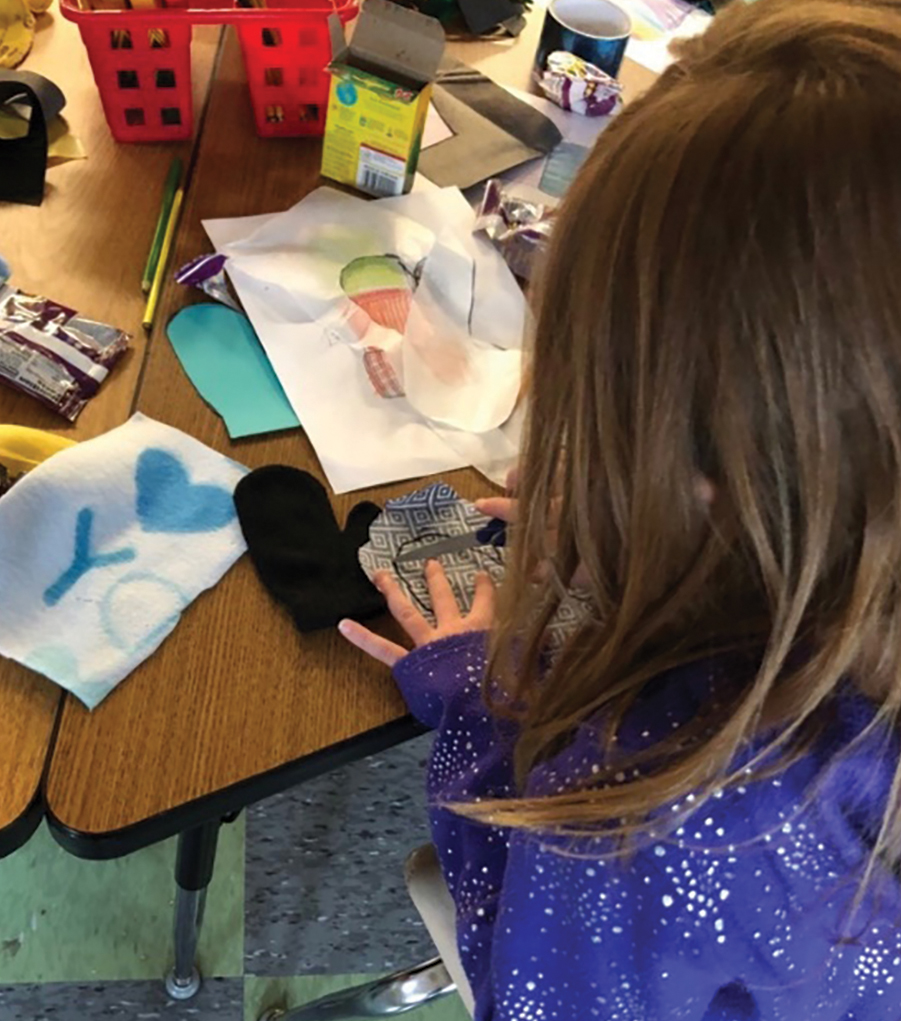
To create their mitten solution, each engineer received an acrylic mitten, the materials outlined in their design, a cardstock mitten template, scissors, and duct tape. While working on their solutions, we noticed the students had trouble with the size of the mitten. We purchased children’s mittens to make the problem more authentic; however, the mitten size made it difficult for students to attach their materials so their hand could fit in the mitten. This was especially the case for students who decided to add material to the inside and outside of their mitten (mittens were flipped inside out to add material to the inside).
We supported the students with this challenge by modeling how to cut and apply small strips of duct tape. However, we found that many students still used a lot of duct tape, which often covered a large portion of their material(s) and mitten. To avoid these problems, we recommend buying larger mittens.
Week 5: Mitten Solution Testing
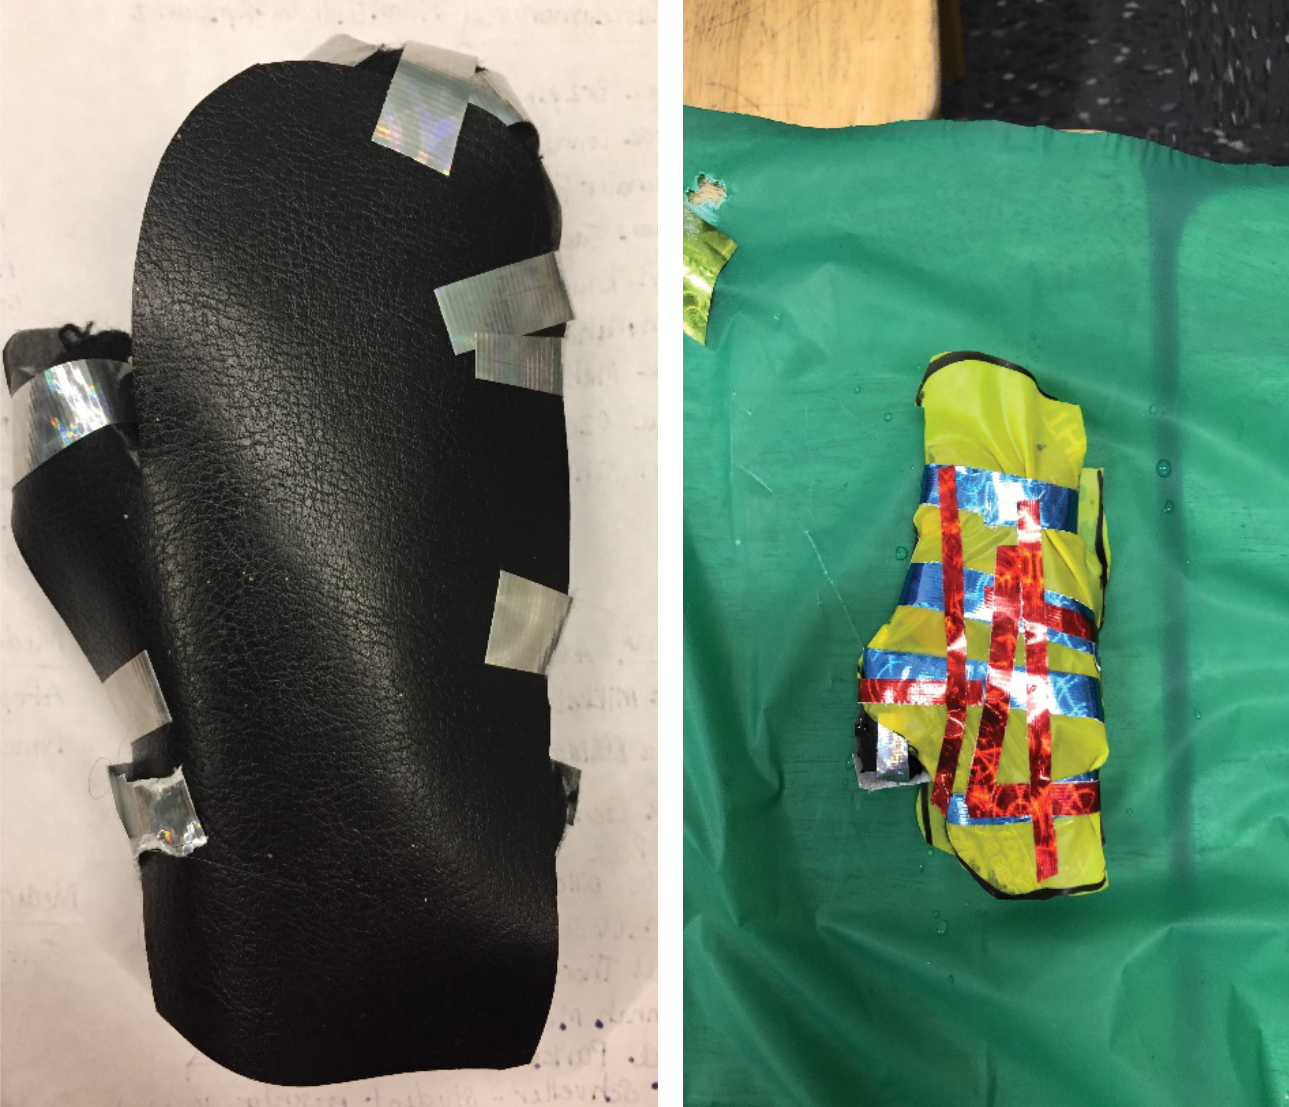
To kick off week 5, we reenergized the engineers by explaining that they would be testing their mitten solutions. While sitting in a circle, we informally assessed the students’ thinking as they shared their mitten solution (Figure 5) and predictions regarding the primary criterion of keeping the mitten dry in the snow. One student shared, “I think that my mitten is going to stay dry because I used materials that do not get wet.” Following this discussion, we reviewed the story Anything Is Possible and how the characters were not successful engineers the first time. This discussion set the engineers at ease, knowing they would have the opportunity to fix and retest their mitten solution.
Mitten solutions.
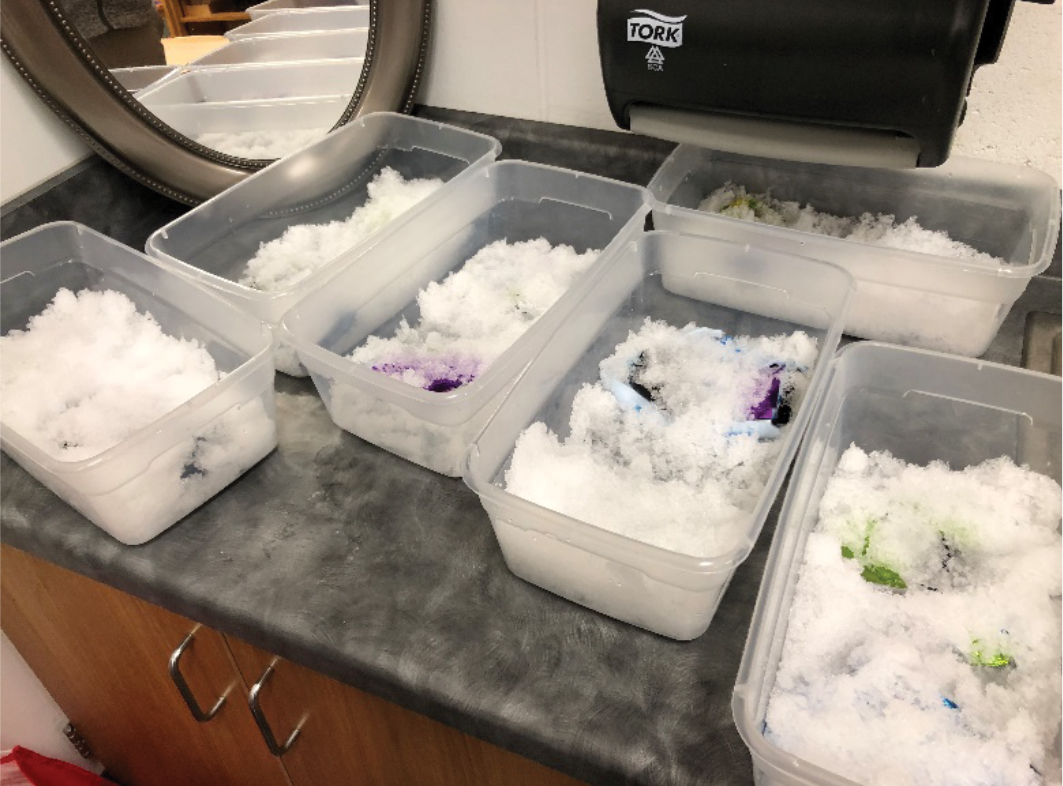
To test the mitten solutions, we asked the engineers to make a line in front of eight plastic containers full of snow on the other side of the room (Figure 6). For safety purposes, we placed the students’ mittens under the snow for them. While the mittens were in the snow for 15 minutes, we played a game called Snowball (similar to hot potato) with a Styrofoam ball. Before taking the mittens out of the snow, we explained the observation sheet the students would fill out, which was designed for students still learning to write. The mittens were then removed from the snow to allow the students to record their observations. Based on their results, we asked the students to begin brainstorming one modification they would like to make to their mitten solution.
Mitten testing.
Week 6: Mitten Solution Revisions and Retest
For our last week with the engineers, we jumped right into having the students think about one design feature they wanted to change about their mitten. We explained that if their mitten got wet, they could add one material or more tape. If their mitten stayed dry, they should remove one item (for most students this was duct tape) to reduce the cost (constraint) of their mitten solution, as well as improve the style and function of their mitten (criteria to push students further). The engineers were then given a chance to brainstorm one item they would add or remove, which we used as an informal assessment. One student shared, “I’m going to add material 2 to my mitten because it is another material that didn’t get wet and it is more flexible than material 10” (Figure 6). Students received 25 minutes to make one change to their mitten solution before it was placed into the snow using the same process as described in week 5.
While the mittens were in the snow, we made snow cones to celebrate the last day of the program with the students. After 15 minutes, the mittens were removed from the snow by the teachers and the students filled out their observation sheet (see NSTA Connection for a blank template) using a different color. As a final assessment, students were given the opportunity to use their data recording sheet to share whether their mitten solution should be purchased using the following sentence frame as a literacy support (Fulwiler 2011), “My mitten solution should/should not be purchased because…” Several students shared, “My mitten solution should be purchased because it didn’t get wet in the snow.” We congratulated the engineers on using their knowledge of material properties to keep their mitten from getting wet in the snow.
Reflection
By engaging in this series of lessons, the second graders learned how to examine what properties of materials cause them to get wet or stay dry. They were able to apply this knowledge to improve the design of an acrylic mitten so that it would no longer get wet in the snow. When children can apply their knowledge to a real-life context, we know they have achieved conceptual understanding (Bybee 2014). However, with only six days to work in the after-school program, we did not have enough time to implement our summative assessment, which involved the students developing a commercial to sell their mitten solution. In the commercial, we wanted the students to use their knowledge of material properties to explain what makes their mitten solution effective for playing outside in the snow. Online, we share a rubric teachers could use to assess the students’ commercials (see NSTA Connection). Math content could also be included within this series of lessons by introducing a budget element to the challenge. Students could work on adding and subtracting money by giving them a budget and assigning a price to each material. Overall, the students learned how to use their knowledge of science to make informed decisions as engineers. They are now ready for winter fun without wet mittens.
Earth & Space Science Elementary