
Blended Learning in the Science Classroom
Blended Learning in the Science Classroom
By LAUREN ANGELONE
An introduction to atoms and molecules
Blended learning has been defined by the Clayton Christensen Institute as a cohesive blend of formal in-person instruction and online learning with “some element of student control over time, place, path, and/or pace” (2019). Essentially, teachers strive to provide the best of both worlds with this instructional method. The face-to-face portions of class time are spent working with students individually or in small groups, allowing students to engage and socialize with other learners, and providing a common space that encourages learning in more personalized ways. Working online can allow students to take more or less time on a specific assignment/module as needed, work at their “just right” level of reading, or choose among a variety of modules that teach the same content in ways that serve different types of learners.
The creation of blended modules in science classrooms should be based on sound theoretical frameworks. In this blended module, we made use of constructivist learning theory by using the 5E learning cycle (Bybee and Landes 1988) and differentiating by process (Tomlinson 2000).
Context
In order to successfully implement blended learning, device access must be 1:1 and a learning management system (LMS) must be available. 1:1 access is important because instruction is being personalized, so students need to have access to their own device in order to truly move at their own pace. A learning management system is an online classroom space that acts as a framework for teachers to organize and build lessons and for students to submit assignments. Schoology, Canvas, and Blackboard are common learning management systems used in K–12 schools. Students who completed this module were provided Chromebooks through a grant and had access to Schoology. After investigating several options, Schoology was selected by the district because it has a user-friendly interface, Google integration, and a social space for teachers to share ideas and lessons. Schoology is free for individual teachers to use, but there is a fee for a district enterprise package.
Students spent the first marking period becoming familiar with their Chromebooks and Schoology, using it widely in each class and receiving training from a technology specialist. Before beginning this module, students were expected to know how to properly handle their Chromebook, log in to all necessary accounts, submit assignments on Schoology, and understand the Google suite, which includes their Google Drive and tools such as Google Docs and Google Slides. Students then worked through this module at their own pace, but also worked with similarly paced peers when appropriate. In preparation for this module, the researcher and teacher created a single folder within Schoology that contained all assignments and resources.
Engage
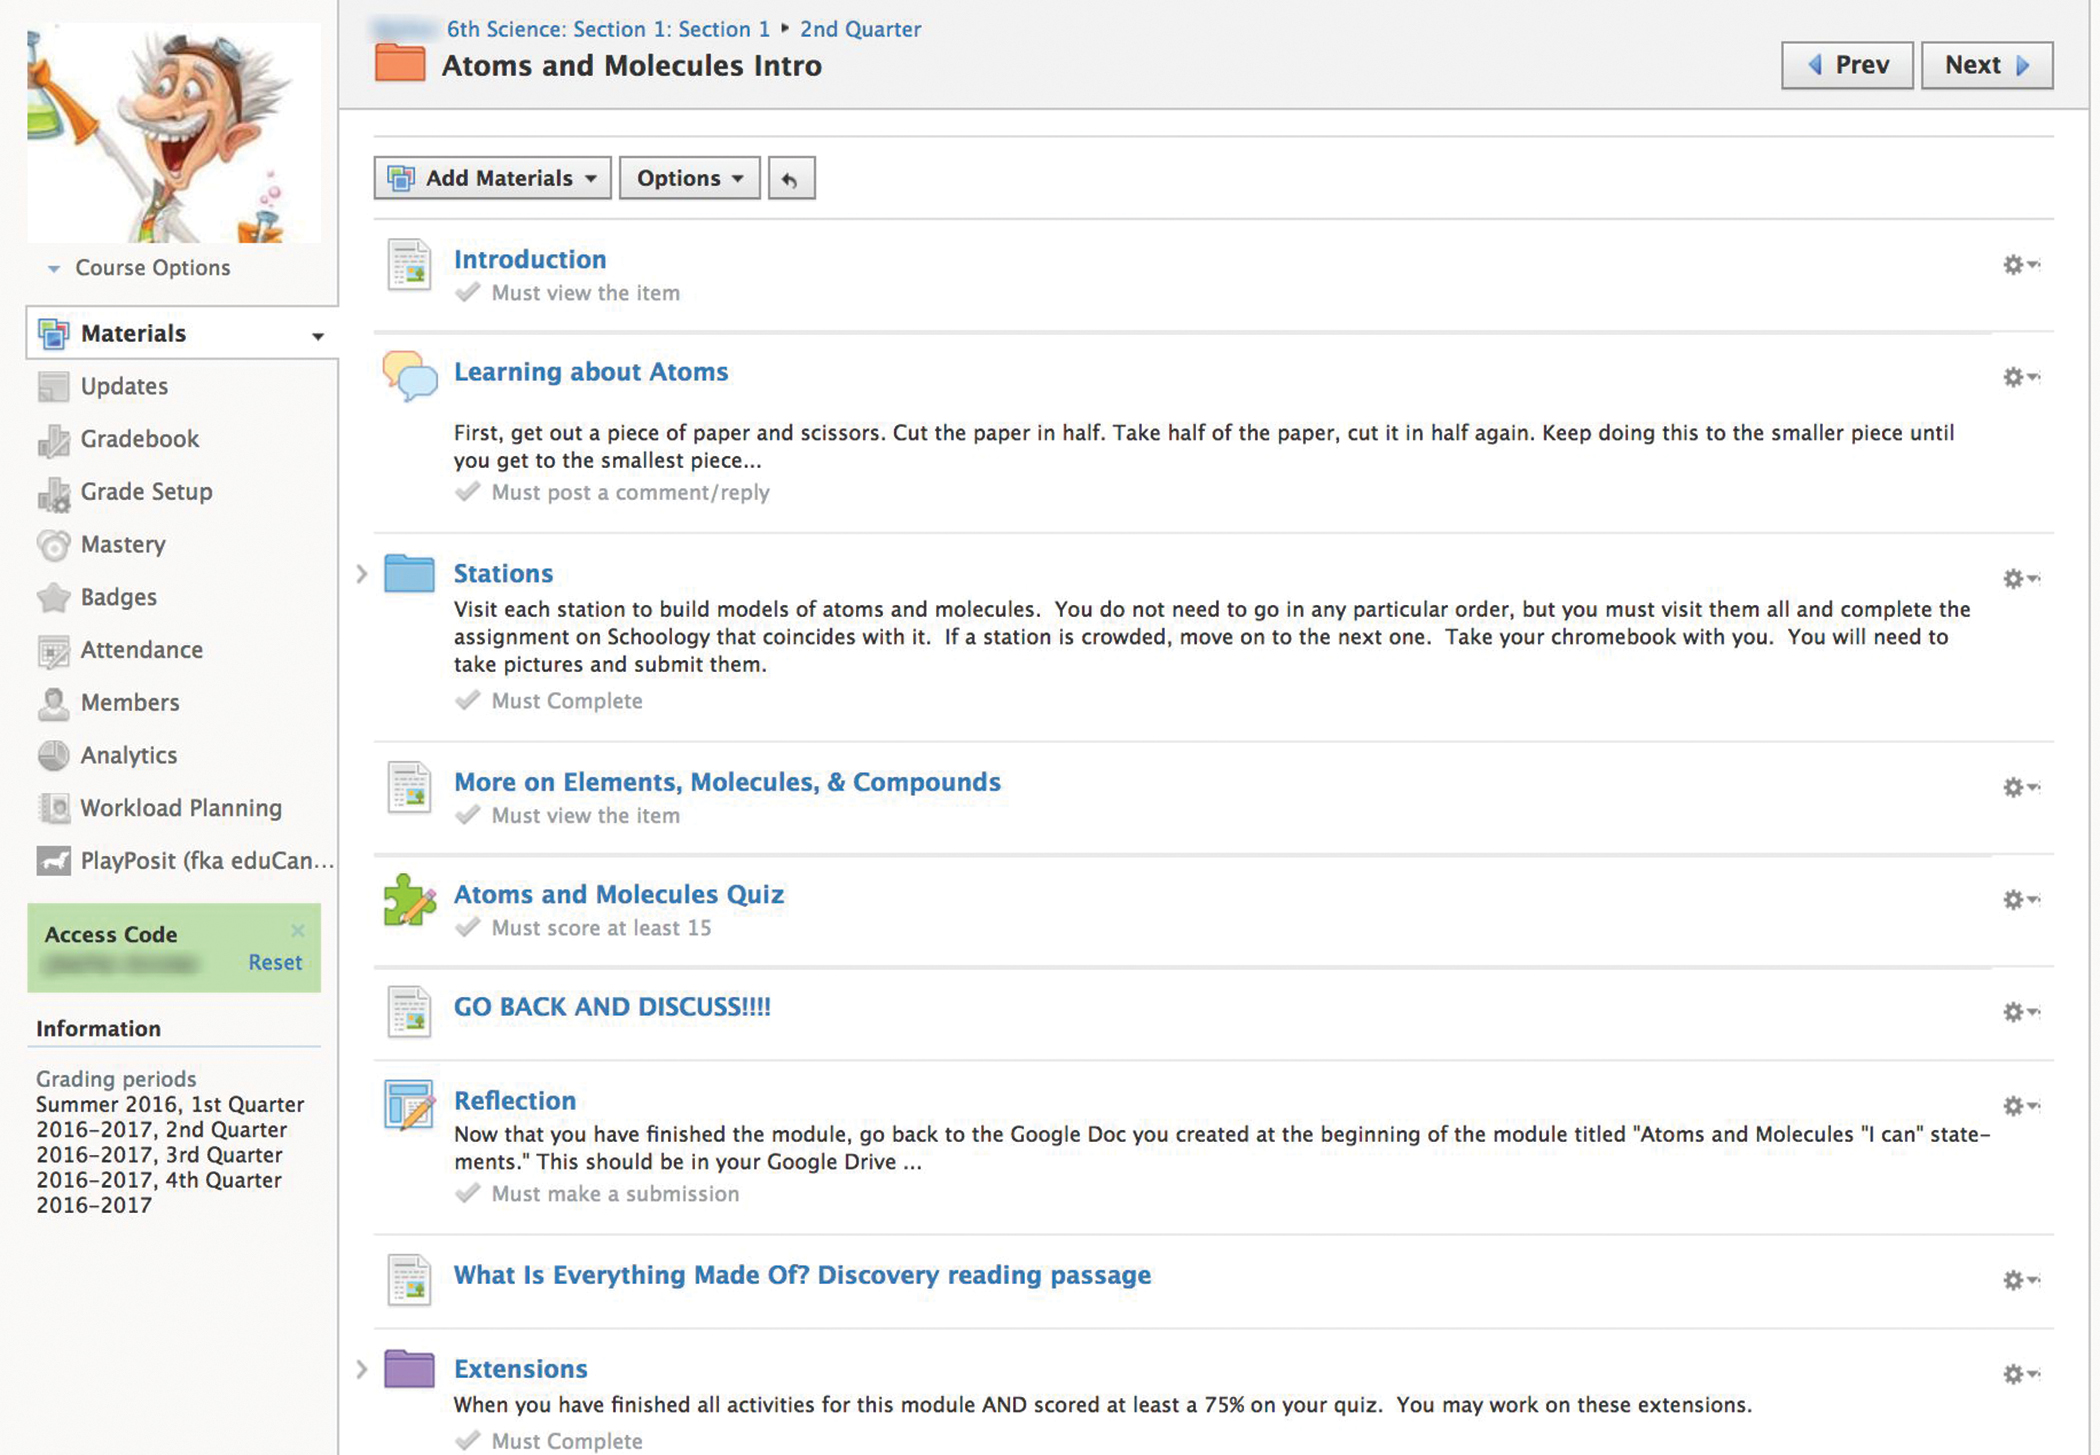
Students logged into Schoology and accessed a digital folder titled, “Atoms and Molecules Intro.” All class work associated with this module was in this folder. Students were familiar with folders, as teachers had been using them to organize class work throughout the first marking period. The folder contained an introduction to the unit, discussion boards, assignments for each station, a quiz, and an extensions folder (see Figure 1). Students began with a discussion board in which students can type responses, including images, and have threaded discussions. The introduction on the discussion board asked students to get a piece of paper and a pair of scissors and to cut the paper in half. Then, students take one half of the paper and cut it in half. This should be repeated until the smallest piece of paper possible is achieved. (Teacher tip: Students were also instructed to keep all of the materials contained on their desk.)
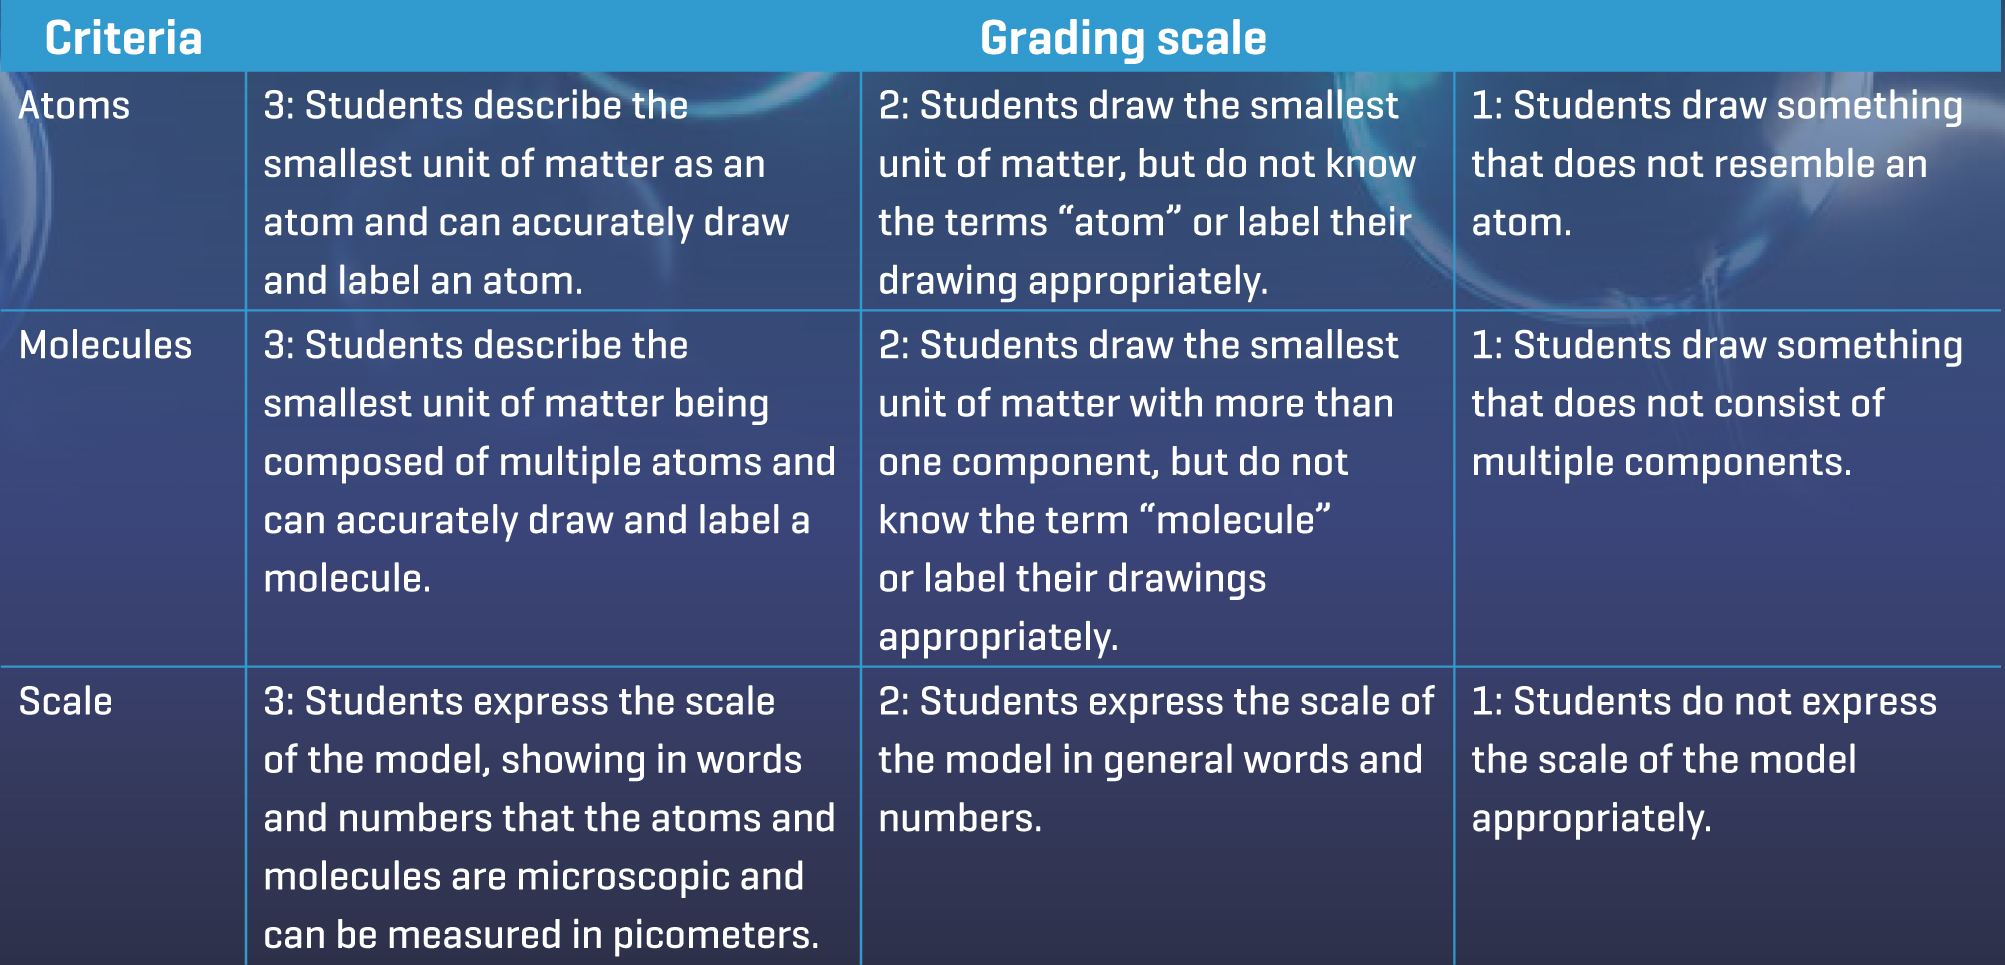
Once complete, students were asked to respond to the following prompt on the discussion board. “You should have a very tiny piece of paper left. If you had a microscopic pair of scissors, how much smaller do you think you could cut the paper? Draw a model of what you think the tiniest piece of paper possible would look like. Consider scale when making your drawing. How will you show how tiny it is?” Students answered the prompt in text and pictures. Some students drew a small dot with the scissors next to it for scale and some drew an image that resembled the model of an atom with labels and a magnifying glass over it to show that it would need magnification. To share pictures in a discussion board, students simply drew on paper and took a picture with the camera on their Chromebooks. (Teacher tip: In most LMSs, the teacher can change settings to disallow students from seeing other student responses until they have posted their own. This is a good place to use this feature.) Students’ responses to this discussion board serve as a preassessment, gauging students’ knowledge of atoms, molecules, and scale. Responses were assessed using a rubric that would be used in the Evaluate phase as well (see Figure 2).
Explore
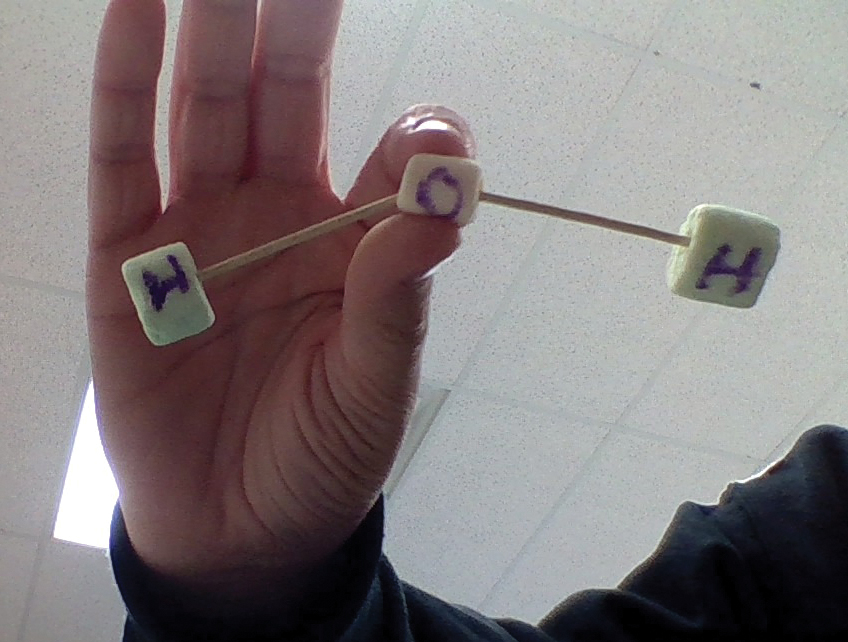
In the next section of the module, a subfolder was created that housed three assignments. Each of these assignments corresponded to a station set up in the room. The assignments provided instructions for each station, which asked students to use marshmallows and toothpicks to create 3-D models of three different molecules: water, carbon dioxide, and hydrogen gas. Students looked at diagrams of each molecule and created the model. In keeping with the spirit of the 5E learning cycle, atoms and molecules were not yet named. Instead, students were creating the smallest unit of some substances using the smallest pieces of matter that they described in their original model.
Students took their Chromebooks with them to each station where they created and labeled the models and then took pictures (see Figure 3, p. 62) of them with their Chromebook to submit as their assignment, serving as another formative assessment. (Teacher tips: The marshmallows were messy, so leaving marshmallows out to go stale, or using clay might be a better option. Also, having two sets of each station would allow students more space to create molecules.) During this part of the module, students continued to work at their own pace and were able to visit stations of their choosing until all three were complete. The teacher used this time to check in with stations and check work submitted online to see who needed support.
Explain
Once students finished submitting their work at each station within Schoology, they moved onto the Explain portion. This included watching a video (see Resources) on their Chromebooks that explained atoms and molecules and then taking a short quiz created within Schoology. If students did not score at least a 75% on the quiz (see Online Supplemental Materials), they were directed to watch a second video with a reading (see Resources) and meet with their teacher before trying to take the quiz again. (Teacher tip: By using grading groups in Schoology, you can assign students different readings or videos based on their needs. If you have a small group of students on IEPs, for example, you can put those students in a group and they will only see the work you have assigned to them.)
Extend
To further apply their learning, students were then asked to return to their original model of the smallest piece of paper possible. Students should now be able to call atoms and molecules by name and label simple models of each. They were asked to revise their original models on paper. The revisions reflected their growing understanding of the smallest units of matter and how they are organized at a microscopic level.
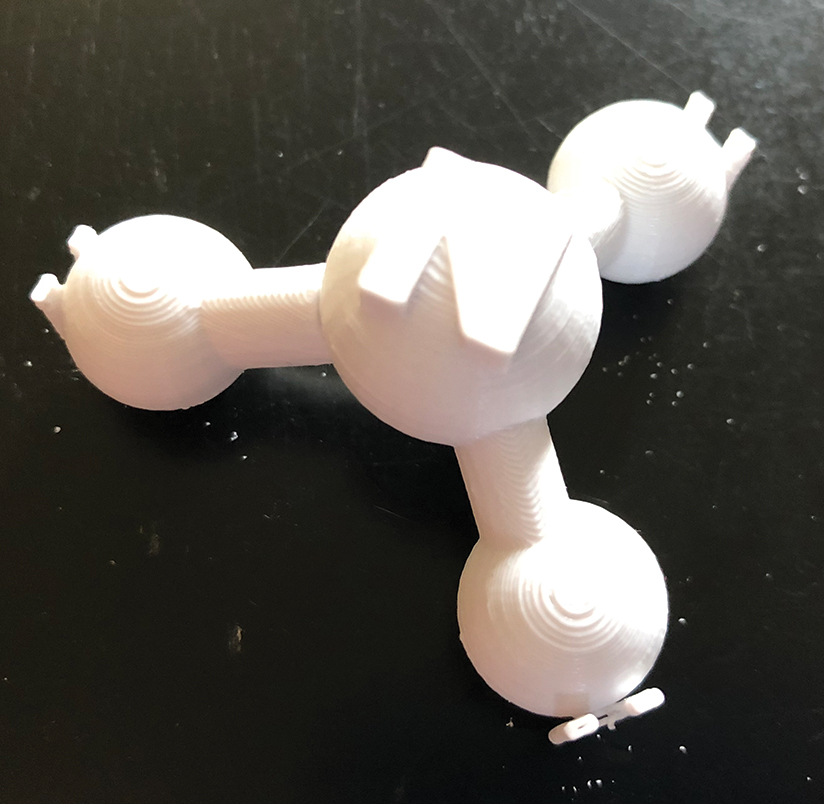
Once students have revised their models, they moved on to research molecules of everyday substances, such as sugar or ammonia. They were able to choose their own molecule to build in Tinkercad, a computer-assisted design program that is free to use and simple enough for elementary and middle school students. Students spent one day working through the built-in tutorials before spending another day building their models in Tinkercad and exporting them into an .STL file. The file is sent to the 3-D printer in the makerspace in the media center overseen by the media specialist. Each 3-D model takes about an hour to print (see Figures 4 and 5 for an example of an ammonia molecule created in Tinkercad and 3-D printed). The printing took about a week at this particular rural district with approximately 60 students per grade level, but students could also print one model per group to mitigate printing time.

Safety around the 3-D printer is very important. Be sure to work with someone who understands the 3-D printing process and can recommend the appropriate settings based on the model (i.e., whether to print with supports, bed adhesion options such as a raft, etc.) It is recommended that the media specialist (or someone with experience 3-D printing), provide tips on designing for the best printing outcome. The 3-D printer should be used in a well-ventilated area. The extruder and the heated bed can be very hot and students should not touch models as they print.
If a 3-D printer is not available, students could simply print images of their model from multiple angles from Tinkercad. Students could also use their Tinkercad design and create a physical model out of clay or other materials available in the makerspace.
Evaluate
Blended learning includes both online and face-to-face components and it is important to balance the two. At this point, students shifted from using technology to a more traditional activity involving students articulating what they knew about models. They gathered their 3-D printed molecules and created a label for it that explained the atoms that made up the molecule and calculated the scale at which the audience was viewing the molecule. To get the sense of scale and calculate it, students used the Learn.Genetics tool from the University of Utah (see Resources). On this site, students zoomed in to the smallest item, which is a carbon atom labeled 340 pm (picometers). The site also includes a table defining each unit in scientific notation, decimal, fraction, and words. If a student had carbon in their molecule, they could then measure the carbon atom in their model and create a simple ratio, for example 340pm:2cm. With guidance, students then simplified to show scale of approximately 58,800,000:1.
Students then placed their molecules around the room so that they could view one another’s work. Students spent time asking questions about the design of molecules and the different arrangements of atoms. These molecules and labels were graded by the teacher as a summative assessment determining how well students understood atoms, molecules, and scale (I use the same rubric used for the preassessment; see Figure 2). The molecule models also served as visual support in the next module, in which students learned that molecules may also be extended structures.
Implementing blended learning
Systematically making use of LMSs to create self-paced modules within a face-to-face classroom is a blended approach to differentiate science instruction. Though the time up front is significant, teachers find that the payoff long term is worth it. Slowly, teachers build a collection of modules to be used year after year, making planning for differentiation easier with each iteration.
Middle schoolers struggle to pace themselves and to take ownership of their own learning. When first implementing a blended module, it is important to provide a significant amount of student support and to check in regularly on student work, both in class and within the LMS. Students who need extra support can be provided with a schedule of work to be completed each day and students who work quickly can be provided with extensions within Schoology, such as a folder containing further projects. Schoology and other LMSs have data analytics to be able to see how long students have spent in the course and on certain assignments. This can help students stay on track, alongside a general outline for how long work should take posted in the room. When used regularly, blended modules support student independence and allow more time for teachers to work individually or in small groups with students who need more guidance or who need their instruction extended.