
Thanks to the children who attended the conference
By Peggy Ashbrook
Posted on 2010-03-22
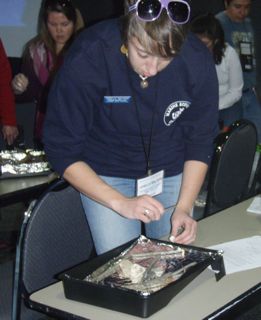
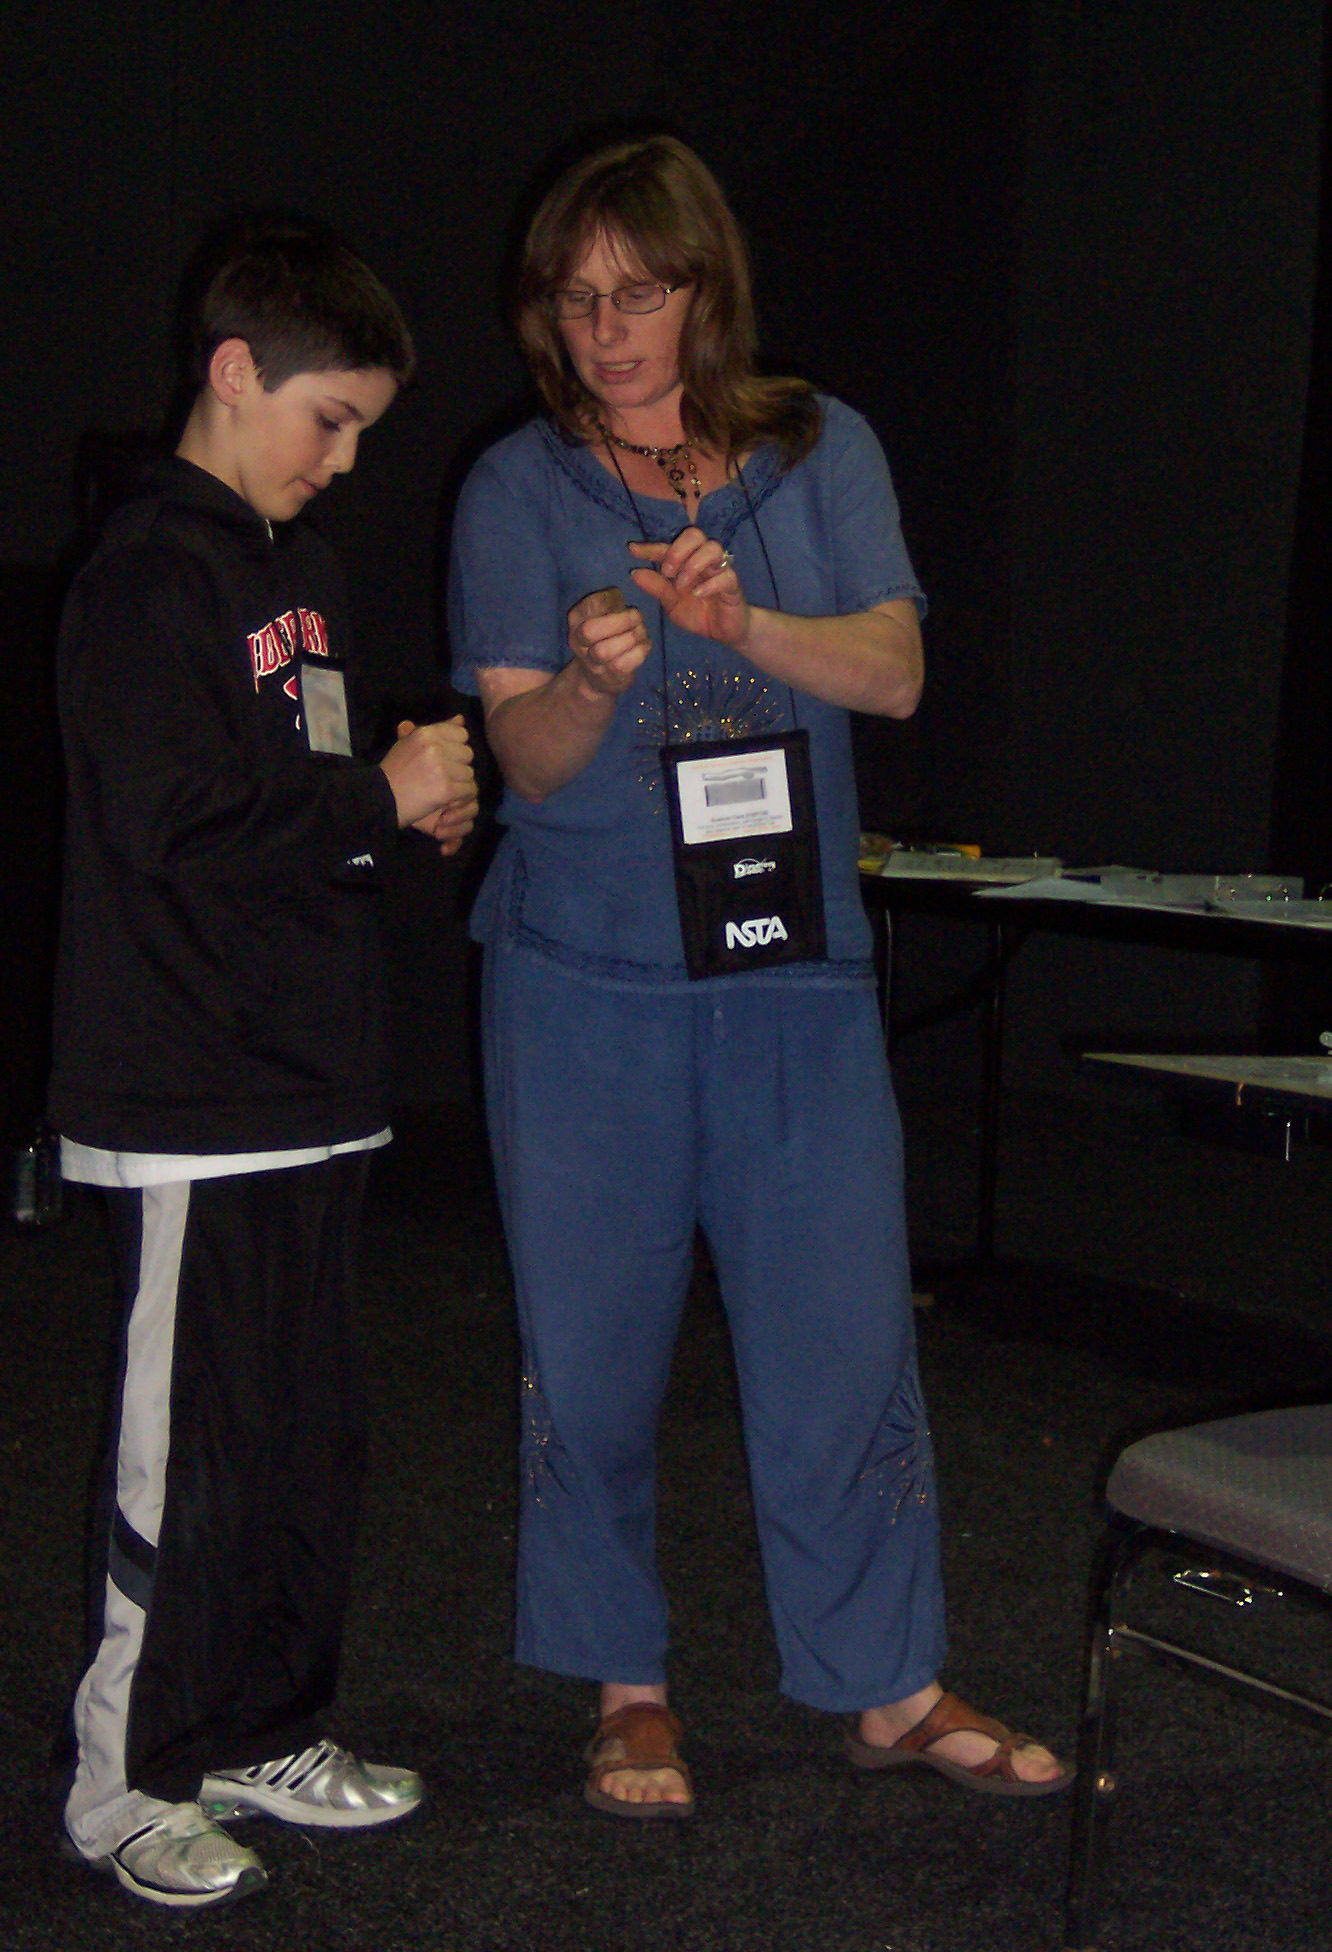 Thanks go to all the children who made it possible for their parents to attend the NSTA national conference by coming along with them! In addition to being a reminder of why we were there, these children often added to our experience by modeling activities in the presentations. This one even got his hands dirty helping Lisa Green (presenting with Candace Lutzow-Felling, Robin Coutts, and Emily M. Ford) classify a soil at the Outside the Classroom Walls: Creating a Backpack Lesson to Expand Student Learning session. The presenters are from the University of Virginia, State Arboretum of Virgina, Blandy Experimental Farm, and urged us to come see the backpack model in action.
Peggy
Thanks go to all the children who made it possible for their parents to attend the NSTA national conference by coming along with them!
Ideas sparkle at Intel Science Talent Search
By Lynn Petrinjak
Posted on 2010-03-22
NY Times columnist Thomas Friedman recently attended the 2010 Intel Science Talent Search Awards in Washington, DC. He listened to student presentations (including one which he freely admits was out of his scope) and talked with science teachers. He wrote:
In today’s wired world, the most important economic competition is no longer between countries or companies. The most important economic competition is actually between you and your own imagination. Because what your kids imagine, they can now act on farther, faster, cheaper than ever before—as individuals. Today, just about everything is becoming a commodity, except imagination, except the ability to spark new ideas.
NY Times columnist Thomas Friedman recently attended the 2010 Intel Science Talent Search Awards in Washington, DC. He listened to student presentations (including one which he freely admits was out of his scope) and talked with science teachers. He wrote:
More teacher talk
By Lynn Petrinjak
Posted on 2010-03-22
I didn’t get a chance to post on Saturday all the conversations with educators in Philadelphia, so I’m catching up a bit now.
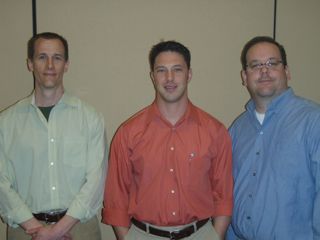
 and Natalie Smith")
Pamela O’Halloran (left) and Natalie Smith
“I had my 37th first day of school in August,” says Pamela O’Halloran, a middle school science teacher from Tulsa, Oklahoma. O’Halloran says she been attending NSTA conferences “for years and years and years,” explaining, “It still reinforces what I’m doing, some of things I’m doing is the right thing, all the inquiry. But it also gives you a little spark.”
She wanted to share the NSTA experience with new teachers at her school; this year she is accompanied by three early-career teachers, including Natalie Smith”
“I teach eighth grade physical science. This is my first year teaching,” says Smith. “[O’Halloran] thought it would be a good idea for us to come and get some ideas and get some hands-on experience. You know, just kind of see what it’s all like and talk to some other people that are in the profession as well.
“See all of the resources. Get some ideas about equipment we might be able to purchase, or something, you know, that we can make,” Smith continues. “A lot of times, they just say, ‘You can go down to the hardware store. You can go to your local grocery store and you can pick up these ingredients or these chemicals or whatever.’ You can do something in the classroom with a very small budget if you need to. I’ve gotten a lot of good ideas so far.”

Sandra Krutchik
I also spoke with Sandy Krutchik of Flannigan High School in Pembroke Pines, Florida. She teaches anatomy and physiology primarily to juniors and seniors. She was in the exhibit hall with some colleagues with a specific goal in mind. “We were looking for information on smart board technology…we were looking for ideas how to use [the boards] in the classroom,” she says. “We some ideas on how to incorporate ideas into the classroom.”

Teneka Coffey
Teneka Coffey, who teaches at Kipp Harmony Academy, a public charter school in Baltimore, Maryland, was attending her first NSTA conference. “I teach science to kindergartners. I came here because this is my first year teaching science,” she explains. “It just sounded like an exciting opportunity to connect with other science teachers and go to a lot of valuable workshops. My principal was supporting it and paid for the trip, so I’m here.”
She says her conference attendance will have an immediate effect on her classroom. “I went to several workshops yesterday. I received a lot of good materials, good ideas that I see I’m going to use, even on Monday with the unit that we were working on. One of those workshops I went to yesterday had a great activity that would go along with what we’re doing right now in the classroom,” Coffey notes. “It’s been very valuable. I’ve really enjoyed the exhibits and shopping and finding cool science stuff that I don’t find generally in the stores and around my area.”
I didn’t get a chance to post on Saturday all the conversations with educators in Philadelphia, so I’m catching up a bit now.
Looking forward
By Mary Bigelow
Posted on 2010-03-21

 I’m at the 30th Street Station (with free wireless), waiting for the train to go home. Philadelphia is a great place for a conference, and I enjoyed reconnecting with people and making new friends and colleagues. I have a list of new technology resources to try out, ideas for professional development, additional content knowledge, new thoughts to reflect on, and a few cool maps for my office wall.
Next year the conference heads to the West Coast. Mark your calendars for March 10–13, 2011, in San Francisco. California, here we come!
I’m at the 30th Street Station (with free wireless), waiting for the train to go home.
Sunday morning
By Mary Bigelow
Posted on 2010-03-21
Sunday morning is a tough time for a presenter. Early departures, church services, brunch dates, last minute sightseeing/souvenir gathering, or too much Saturday evening make it difficult for some to attend sessions at this time. But those die-hards who made it to the convention center this morning were treated to some excellent presentations.
Digital Cameras: An inexpensive tool for motivating, assessing, and enhancing instruction
Cameras in the classroom have come a long way from the Kodachrome days. Michael Kittel, Brian Gross, and Brian Heeney from Delcastle Technical High School in Wilmington DE shared some suggestions for teacher- and student-created photographs and videos: capturing teachable moments to review or debrief on, providing continuity between lessons, visually activating prior knowledge (and then re-activating after instruction), adding visuals to lab directions, illustrating misunderstandings, and showing examples of quality work. They walk around the classroom with their cameras to record those moments. They also showed the Eye-Fi wireless memory card that lets you upload photos instantly from your camera to your computer (no cables required). I know what I’ll suggest for my birthday next month!

Readers' Theatre in the Secondary Science Classroom
In working with elementary teachers, I was familiar with the Readers’ Theatre strategy to improve fluency and as a motivational tool. Students would take a role in a brief “play” and rehearse reading their parts (much like a radio play or a podcast). But Jill Purdy from Cedar Crest College in Allentown PA wondered how the strategy would help 9th graders who struggle with reading in science. She summarized her research on the topic, showing the positive results in fluency, comprehension of science topics, and attitudes. The small number of participants was conducive for a “seminar” setting. Lots of ideas to extend the practice were discussed: logistics in the classroom, using the strategy with ELL students, creating original “scripts,” and recording the performances as podcasts.
Wetlands Inquiry
So, you’re a presenter and your time slot is the last one of the conference. Will anyone come? Those who came to hear Judith Lucas-Odom from the Chester-Upland School District in PA were treated to a hands-on demonstration of how to help students make models to investigate watersheds, erosion, and point source and non-point source pollution. The activities are part of real-world investigations on water quality.
The presenter gave us directions for making a stream table with materials that can be found in discount stores. At first, I couldn’t visualize how the model would work (perhaps a lack of coffee was involved). But what made it real was actually creating the models ourselves. We found ourselves asking more questions: What would happen if…? Why did this happen? What does this represent? So the session ended with questions—perfect!
 |
 |
Sunday morning is a tough time for a presenter. Early departures, church services, brunch dates, last minute sightseeing/souvenir gathering, or too much Saturday evening make it difficult for some to attend sessions at this time. But those die-hards who made it to the convention center this morning were treated to some excellent presentations.
A Philly farewell
By Debra Shapiro
Posted on 2010-03-21

view from my office at NSTA Headquarters
I’ll be heading home soon after a wonderful time in Philadelphia. The food here is awesome; I loved my “fancy-schmancy” hotel (Loews Philadelphia); and I bought nearly everything there was to buy in the gift shops, which I now will have to try to cram into my suitcase. It will be a physics lesson….
Most of all, I will miss my “up close and personal” chats with science teachers. Normally, I only get speak with you on the phone and e-mail you from my office in Arlington, Virginia (right; don’t you love those file folders!)

Have a safe trip home, and I hope to see you next year in San Francisco!

Amen!
view from my office at NSTA Headquarters
Spend a little, gain a lot
By Debra Shapiro
Posted on 2010-03-21

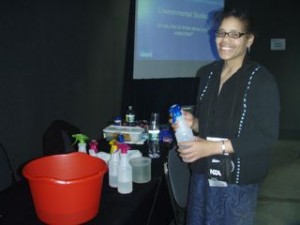
Ted Koehn with his arsenal of inexpensive/free materials
Last year in New Orleans, I attended the session Sixty Labs You Can Do with Little or No Budget (see related posts below). Last year, so many people were there that some had to stand and some of us had to sit on the floor. I decided to go again this year because I was curious: Who would come this time? How many, given the late time slot of 5 p.m. on Saturday afternoon? What would I learn that I missed last time?
Ted literally describes his 60 high school physics and chemistry activities in a fast-paced, one-hour session. All of the materials he uses are either free or very inexpensive, and he even will tell you the exact amount–to the penny–he spent to acquire them (“at least in Lincoln,” Nebraska—his hometown—he adds). He provides each audience member with a packet containing guides for doing each of the labs, and the hour was filled with the sounds of pages turning as the teachers followed along.
He covered chemistry labs on moles, acids and bases, the periodic table, solubility curve… (the clock was ticking: 1 lab…10 labs…15 labs…)
…using gumdrops and toothpicks to create models of molecules…buying 100 chromatography strips for $3…10 vials of pH paper for $10…using eyedroppers as titration tubes…(20 labs…30 labs…)
Then came the physics labs. How to construct four inclined planes using inexpensive plywood…getting free ball bearings (from a truck repair shop) that students can roll down the inclined planes…checking garage sales for bargain supplies…propping a curtain rod on some books to create another inclined plane…(35 labs…40 labs)
…getting softballs from the PE department to use to teach projectile motion…”Ohaus gave out free spring balances in the Exhibition Hall; did you get one?”…having students use old film canisters and loading them with different amounts of pennies to see whether they would sink or float in water…(50 labs…60 labs! Hooray!) The audience applauded enthusiastically!

As you can see, the 5:00 start time did not deter science teachers from showing up for Sixty Labs. One teacher commented, “He’s amazing. I’m exhausted—but it was great!” (You can find Ted’s e-mail address online in the Saturday/Sunday program.)
Longtime readers of NSTA Reports, NSTA’s monthly newspaper, may recall the headline of this post was once the name of a popular column in the paper. (And hello to the former Reports editors reading the blog, who will remember the fun we had coming up with the names for the newspaper’s columns.)
Ted Koehn with his arsenal of inexpensive/free materials
What free time?
By Mary Bigelow
Posted on 2010-03-20
 After the last session today was over at 6:00 PM, I went out for dinner. I didn’t try to eavesdrop on the nearby table, but when I heard science notebook, nature study, and rubric, I knew I was sitting near some teachers. They were from Montgomery County, Maryland, and an earlier session had them so excited, they were working right through dinner (on a Saturday night!). By the time they invited me to join them, they had a multi-page to-do list and preliminary sketches for a student notebook. I hope their colleagues and administrators appreciate their dedication and enthusiasm! I also hope they share their results at a future conference or in Science & Children.
After the last session today was over at 6:00 PM, I went out for dinner. I didn’t try to eavesdrop on the nearby table, but when I heard science notebook, nature study, and rubric, I knew I was sitting near some teachers.
Physics for all
By Mary Bigelow
Posted on 2010-03-20
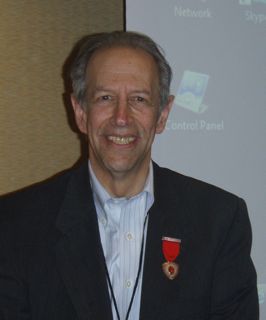
Arthur Eisenkraft
Arthur Eisenkraft (former NSTA president) asked an interesting question: Would Faraday have succeeded in today’s urban American schools? In many of today’s schools, Faraday might not have been eligible for a traditional physics class because of his lack of math background. Or this outstanding experimentalist might have been assigned to a class that did not have lab opportunities. Or because his family was poor, there might be different expectations for him.
He noted that “physics first” is often for 9th grade prodigies, not the general student population. He is passionate about physics for all—not just those who have studied higher-level mathematics. “Physics should not be the second math course of the day.”
He illustrated his discussion of how physics classes can be adapted with examples of key strategies: differentiation, scaffolding, and rubrics.
Arthur Eisenkraft
Nature study
By Mary Bigelow
Posted on 2010-03-20

Bridging the Outdoors with Science Education, ELA, Art, and Historical Perspectives
Sheri Amsel is a biologist and artist who created the Exploring Nature website. Her session focused on using nature trails and other outdoor venues as learning resources. She shared many of her materials, most of which are available on her website. She also emphasized the value of having students draw while they’re in the field. Most of the resources from her presentation are also posted on the NSTA Communities site.
A resource I’m going to try is Making Tracks At this website, you can find a nature trail in your state, or (better yet) you can enter a trail at your school or community. Then you list species found there and get a a customized, illustrated list that can be printed. I’m going to share this with a nature center in my town.
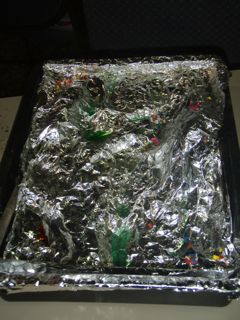
She also showed how nature can be brought indoors with activity boxes, which are about the size of a manilla folder box.The one pictured here has materials collected from a forest floor. At first, students may say “this is junk” but with a few prompts they begin to see artifacts from a rich habitat.
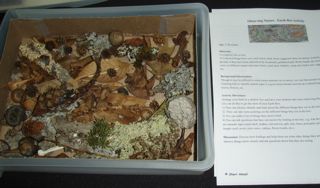
Bridging the Outdoors with Science Education, ELA, Art, and Historical Perspectives