
Disequillibrium
Combustion and a Jumping Flame
Science Scope—April/May 2020 (Volume 43, Issue 8)
By Cole Entress
Though the candle flame is a familiar example of a combustion reaction, neither candles nor combustion are well understood by most people (find out by asking someone to explain why the bottom of the exposed wick of a partially burnt candle is unburnt; see Figure 1). Driver et al. (1994/2015) reported that students generally did not understand combustion to be a chemical reaction between oxygen and another substance. Students can, of course, often identify that air is needed for things to burn, but only rarely can they explain how it functions in combustion. Indeed, as many middle-level students are still developing an atomic model of matter, many aspects of combustion can be confusing, from the conservation of mass to whether the wax in a candle burns or simply evaporates (Driver et al. 1994/2015). (Note: Einstein showed us that mass is not perfectly conserved. However, mass is close enough to being conserved that our measuring devices can’t detect the difference.)
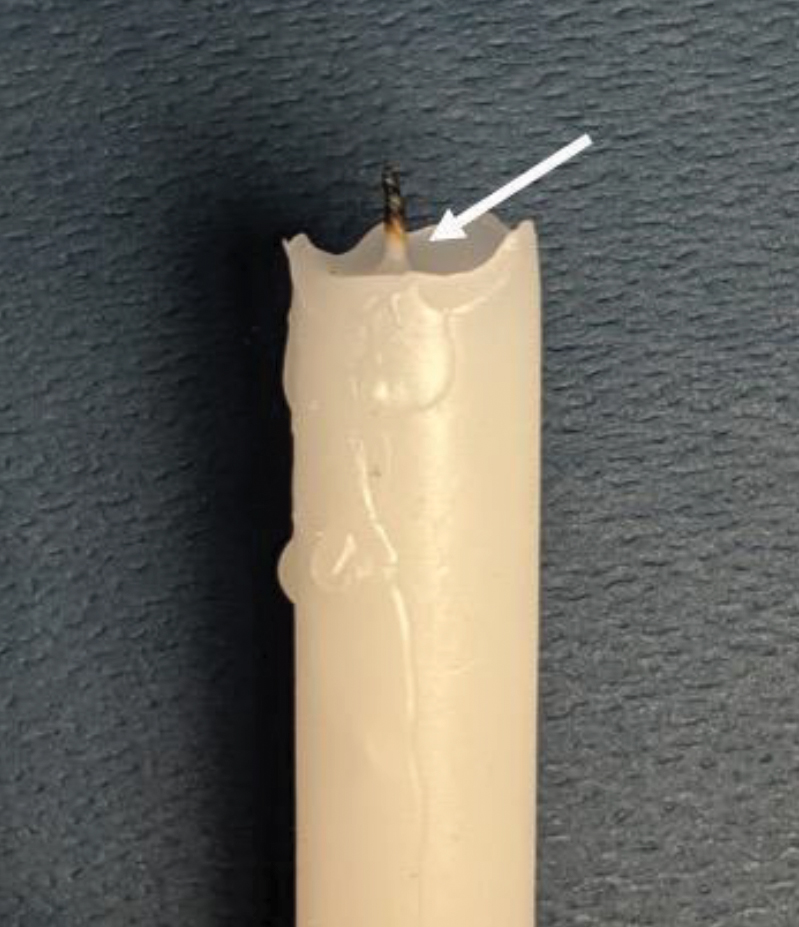
After burning, the bottom of a candle’s exposed wick remain unburnt (white arrow).
In this Disequilibrium column, we will use candles to explore matter and chemical reactions. The ideas explored in this Predict-Observe-Explain (POE) lesson (in the style of Haysom and Bowen 2010) are pertinent to the teaching of MS-PS1-2 (National Research Council 2013) and might serve as an introduction to combustion for students in the middle of a unit on chemical reactions.
Background
The chemistry and physics underlying the burning of a candle is complex and fascinating; interested readers should peruse Michael Faraday’s seminal 1860 lecture (see Resources) or the (dated but still good) Scientific American essay on the subject by Walker (1978). In a somewhat simplified description of the candle’s combustion, we first add heat by lighting the wick, usually made of specially treated cotton. The burning wick melts the hydrocarbon wax near it, and that liquid is drawn up the wick through capillary action. This wax is vaporized because of the high temperature near the top of the wick, and the vaporized hydrocarbon reacts with oxygen, producing (through a complex series of combustion reactions) water vapor, carbon dioxide, and energy (of both the thermal and luminescent varieties). The heat sustains the reaction by melting more hydrocarbon fuel and by creating a convection current that draws fresh air, including oxygen, up to the base of the flame. In this way, thermal energy, oxygen, and fuel—often called the combustion triangle—are supplied to the candle, producing a continuing (or chain) combustion reaction.
The overall combustion of candle wax can be represented by a chemical reaction (see combustion reaction in Online Supplemental Materials), in which atoms are rearranged into new compounds with properties different from those of the starting materials. The lesson that follows will work best when students understand what a chemical reaction is.
Introduction
Wearing safety goggles, use a long-stemmed lighter to light a candle on a clear demonstration table at the front of the room (a standard taper candle, as shown in Figure 1, works fine). Ask students to share their experiences with candles. Solicit a few general responses—as well as any observations students can make at a safe distance—and then ask: What’s really happening when a candle burns? What does burning mean? What does a candle need to keep burning—and what makes it stop? (Note: Following the template of Haysom and Bowen (2010), a printable worksheet for this activity has been developed for teacher use. See Online Supplemental Materials.)
Predict
Tell students that you’re going to perform a demonstration using the candle (adapted from Ford and Grundmeier 1993). You are going to blow out the candle and then try to relight it with the flame at various positions: on the candle wick, to the side of the candle wick, and above the candle wick. Ask students to record their predictions about the conditions in which the relighting would be successful. Facilitate a short discussion about students’ predictions, asking each student to support their predictions with evidence and reasoning.
Materials
- candle
- long-stemmed lighter
- drinking straw
- (optional) chimney or other wind-screening device, if your room is drafty.
Implementation notes
Relighting a candle without touching it requires you to ignite the “smoke” (still-evaporating wax) that rises from the candle after it is snuffed out. Putting in a few minutes of practice the day before performing the demonstration for students can greatly improve your technique. In addition, the following conditions also increase the chance of success:
- The candle needs to burn for a few minutes before you begin your trials; you want plenty of hot hydrocarbons at the base of the wick.
- Do not trim the candle’s wick. In fact, slightly longer wicks are better.
- Blow the candle out precisely. I find that blowing through a standard straw allows for a brief, directed puff of air.
- Know the airflow in your room. A drafty room can blow the smoke aside. If your room is very drafty, you might consider putting a clear windscreen around part of the candle. (Ford and Grundmeier 1993 suggest a glass chimney.)
Observe
Have students observe as you do the demonstration. After each trial, have students record their observations while you relight the candle, giving the flame a few seconds between trials to stabilize. The trials give the following results (see Figure 2):
- Directly touching the lighter flame to the wick—candle relights
- Candle flame held to the side of the wick—candle does not relight
- Candle flame held a few inches above the wick—candle relights.
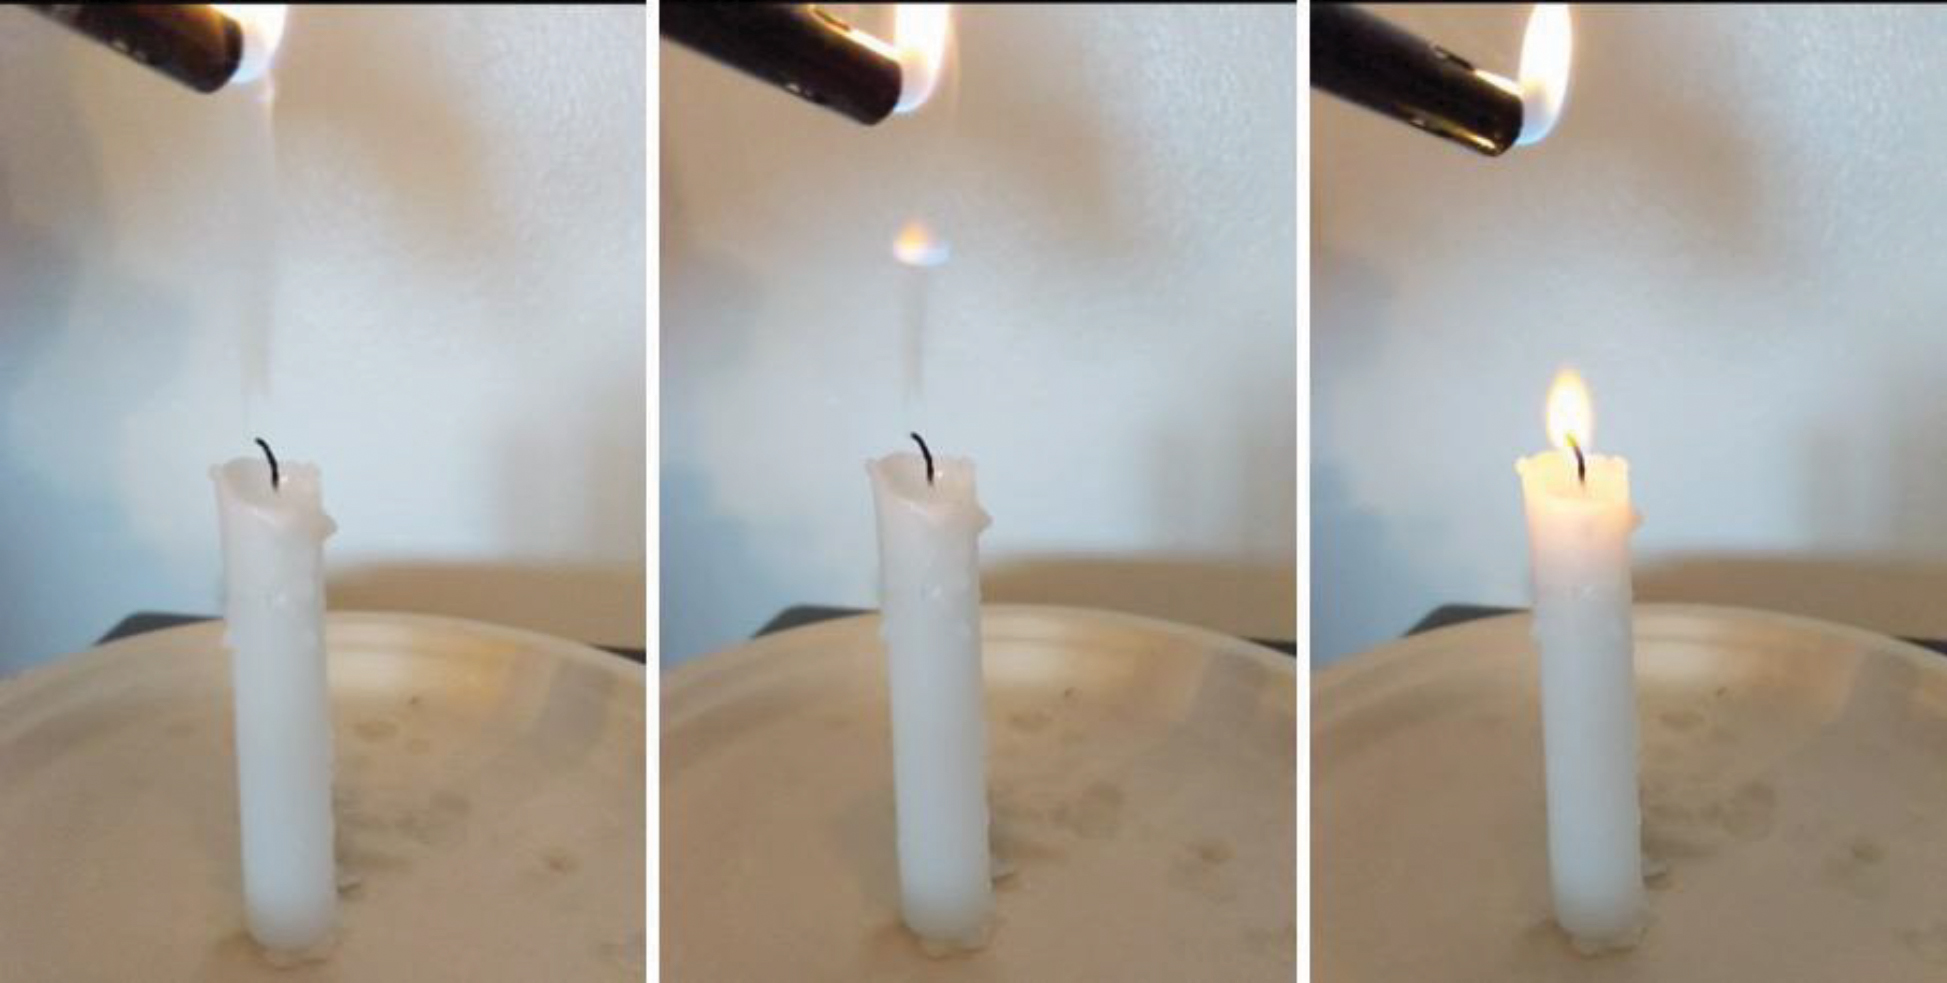
By placing a lighter flame into the plume of smoke (evaporated hydrocarbons) coming from a recently extinguished candle, a flame can be made to “jump” down the column of smoke and relight the candle (full video of this process is available in Resources.
Students almost never predict the final, counterintuitive outcome. Their fascination can be deepened if you take a slow-motion video of the relighting (see Resources for an example) because they can watch the flame travel “down” the candle smoke and back to the wick. This demonstration takes a little bit of practice to get right (see Implementation Notes). NEVER try a demonstration for the first time in front of students.
Explain
Ask students to try explaining these results. Use a Think-Write-Pair-Share strategy to surface some of students’ changing ideas. Press students to incorporate the principles of chemical reactions and try to make sense of what’s happening on the atomic level. Students are unlikely to “reinvent” all of what we know about combustion reactions, but they can do a lot of sophisticated sense-making. You might ask, for instance, for small groups to create diagrams on a dry-erase board of the moment the flame jumps, labeling any molecules they think are important.
Eventually, you will want to introduce the notion of a combustion reaction, describing the role of fuel, oxygen, and thermal energy. Direct students to revise their diagrams so that they explain the “jumping” flame in terms of a combustion reaction, including the products and reactants.
Extension
Now, pose the following question: Why does a lit candle go out when I blow on it? Frequently, students will inaccurately claim that it is due to the carbon dioxide that we breathe out. However, exhaled air is only about 5% carbon dioxide and nearly 15% oxygen, making this explanation insufficient. Students might also posit that your breath acts as a chilling wind that extinguishes the flame by lowering the temperature. If this were true, however, it would not be possible to relight the candle at a distance, as in the demonstration. In fact, the puff of exhaled air moves the vaporized wax away from the hot area of the wick, interrupting the chain reaction and stopping the burning.
Follow-up
This lesson can be extended in many ways. Additional demonstrations (see e.g., Walker 1978) can illustrate other aspects of the combustion triangle or help students isolate the products of a combustion reaction. Alternatively, if you want your students to think about reaction rates, you might ask students to experiment with how candle diameter, wick material, or composition affects the rate of combustion (see Resources). Such an investigation could be turned into an engineering project with the goal of designing long-burning candles at low cost. Advanced students may enjoy reporting on the difference between candle flames (which are called diffusion flames) and the solid blue, so-called premixed flames we see in gas stovetops.
Conclusion
With a few low-cost, everyday materials, students can be inspired to think deeply about the familiar phenomenon of a candle’s flame. An understanding of candles, and combustion more generally, can provide insight into everything from car engines to climate change!
Safety notes
Candle flames and lighters present a clear burn risk and should be handled only by the teacher. Flames should never be left unattended. Work in a clean area with no flammable objects nearby to minimize the risk of fire and ensure your room meets all fire-prevention standards. No part of the activity should be ingested.
Cole Entress (cole.entress@gmail.com) is a doctoral student in science education at Teachers College, Columbia University in New York City.
Chemistry Phenomena Physics Middle School