
The Online Teacher
Engaging Students in Online Learning Using Teacher Demonstration
Science Scope—January/February 2021 (Volume 44, Issue 3)
By Denise Wright
Demonstrations that are phenomena based are used to motivate and engage students in science learning. When instructing in the traditional classroom, teachers often demonstrate scientific phenomena by performing experiments in front of their students, during which time students predict, think critically, and explain the science that is taking place in front of them. Demonstrations also play an important role in a remote learning environment. One of the advantages of a remote learning environment is that all students can easily witness the scientific phenomena on screen. I have conducted live experiments and activities, in both Zoom and Google Meet (see Resources). Each of these video conferencing platforms work slightly differently, but successful science demonstrations can be performed in both of these distance- learning platforms. Here we explore the technology tools needed for scientific demonstrations that take place in an online setting.
Preparing the demonstration
In preparation for conducting live demonstrations, you will need some sort of document camera to project the demonstration. You can create a document camera setup using a cell phone, the USB cable for your cell phone, a tripod, and a light source. In addition, I purchased a 3-foot cell phone tripod ($20) and table ring light ($20) from Amazon (see Resources). Using the tripod, I am able to point my cell phone downward onto my work space. I prefer to use a ring light to brighten my work area (see Figure 1), although a desk lamp can be another alternative to light the space. Using your phone’s USB charging cable, plug the cable into the computer’s USB port (the other end of the cable is plugged into the phone). The image that the phone captures is now displayed on your computer screen. This document camera setup can be used for a variety of instructional tasks, including showing students how to balance chemical equations, labeling scientific diagrams, and using mobile science apps in a remote learning setting. In addition, I find projecting my writing using the document camera to be similar to a traditional classroom setting in which I write on a white board to explain a concept in class.
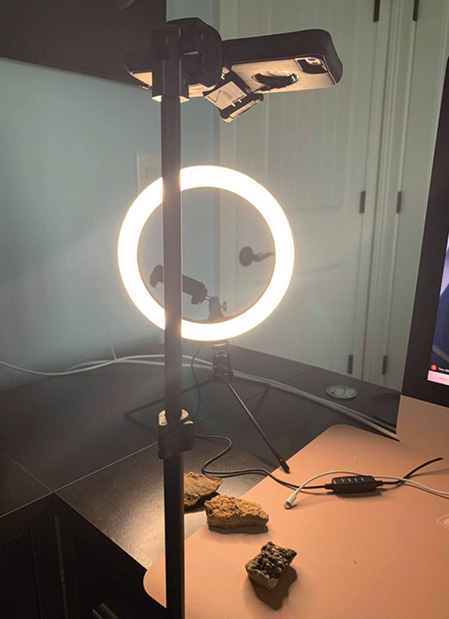
A ring light is placed on the desk, a cell phone tripod holds the phone in the downward position, then the camera app is used.
I have used both Google Meet and Zoom to hold live demonstrations. To do so, you will need to download the Google Meet or Zoom app onto your phone (at the time of this writing, Zoom was only compatible with iPad and iPhone). In addition to Zoom and Google Meet, you can purchase screen mirroring apps such as Reflector Teacher and AirServer (see Resources). These apps work with bluetooth and Wi-Fi. The advantage of using these apps is that your device does not have to be plugged into your computer screen. This makes placing your device on a tripod easier because a cord is no longer required to be plugged into your device.
Exothermic and endothermic reactions in Google Meet
In one of my remote lessons, I demonstrated exothermic and endothermic chemical reactions. I used a digital temperature sensor since I can share the graph it produces through the use of screen sharing. If you do not have a temperature sensor, you can still use a traditional thermometer and have a student add the temperatures to a spreadsheet that can be shared with the class. For the exothermic experiment, I used two teaspoons of Road Runner Ice Melt (calcium chloride) mixed with 50 ml of water. The calcium chloride salt reacts with the water, causing it to become warmer, and is a good example of an exothermic reaction. For the endothermic reaction I used two tablespoons of sodium bicarbonate (baking soda) and 50 ml of water. The sodium bicarbonate causes the water to become cooler and the water temperature falls, demonstrating an endothermic reaction. Students will find it interesting that calcium chloride and sodium bicarbonate are the chemicals found in hot and cold packs (hot packs contain calcium chloride and water, while cold packs contain sodium bicarbonate and water). The cold or hot pack is activated by shaking it or breaking it up, causing an endothermic or exothermic reaction to occur when the chemical mixes with water.
When I am ready for the remote demonstration, I enter the Google Meet wearing my lab safety gear, press the record button, and wait for the arrival of the students. Now I am logged into the class Google Meet on my computer and cell phone device. I shut off the microphone and camera on my cell phone when in the Google Meet because otherwise there will be an echo during the meeting. I usually post a warm-up question such as, “What are the signs of a chemical reaction?” I find that starting a remote learning session with a discussion is a good strategy for leading into the demonstration. Just before conducting the experiment, I insert a link to a Google doc lab data sheet inside the chat (students use the document to record the experiment data). All students click on the link and make a copy of it in another tab on their own computer (see Resources for the lab data sheet).
Next, we review the differences between exothermic and endothermic reactions With my cell phone plugged into the USB port on my computer, I then select the “share my screen” option on my cell phone, which allows my phone screen to be viewed by all students in the Google Meet. I open the camera option on my cell phone and place my phone inside the tripod mount facing the camera down toward the experiment (see Figure 2). Students are now able to view the beaker and can see the thermometer on the screenwhile having their own personal Google doc lab data sheet open to record the temperature changes at one-minute intervals for five minutes. I begin the experiment, and students watch as I add the sodium bicarbonate to the water. In real time, students view the temperature on the digital thermometer decreasing because of the graph on screen (see Figure 2). I tell my students that my hands (which are holding the beaker) are feeling colder and ask them to type into the chat the type of reaction they are witnessing. Sometimes middle school students become so engaged during the live experiment and ask so many questions that they forget to write down the data, so at the end of the experiment I review the collected experiment data so they may create their graph when working offline.
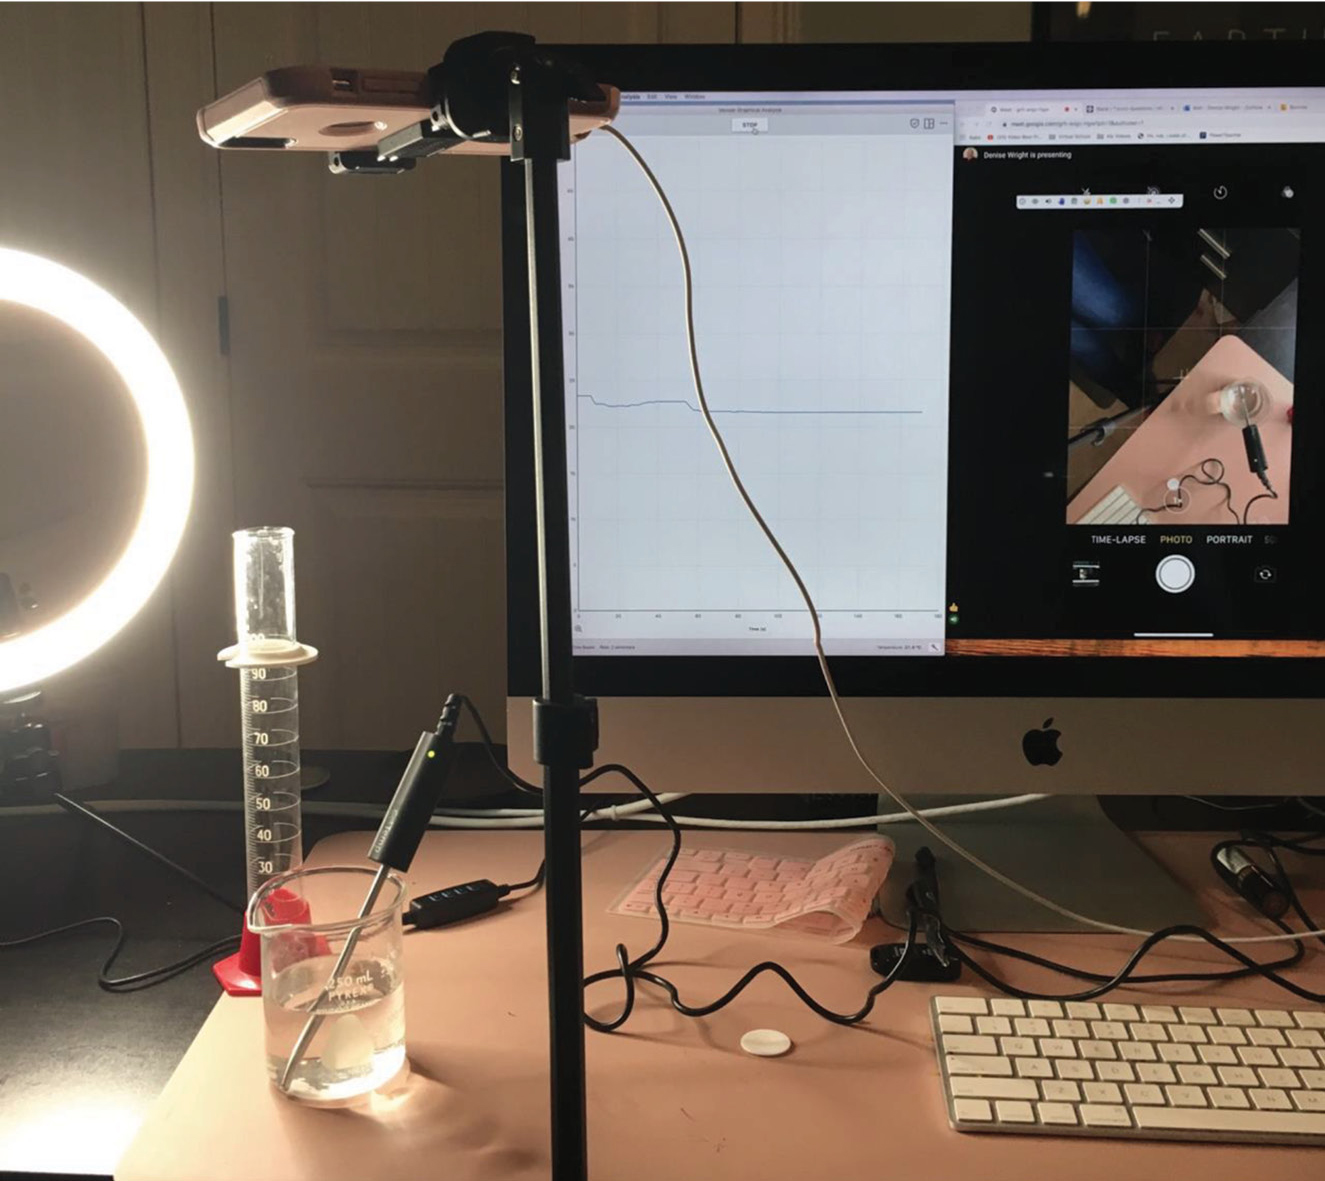
A beaker of sodium bicarbonate, water, and a thermometer sensor is placed on screen so students may view their teacher performing the endothermic reaction in real time.
Next, I complete the exothermic experiment. The students watch the experiment take place as I am using my cell phone again as the document camera. As they are recording the data in one-minute intervals, I am asking students to unmute their microphone and tell me what they are witnessing. Students state that the temperature is going up. I reply, “Yes, it is !” They enjoy my enthusiasm and passion when hearing me describe the science taking place directly on their screen. Once the live session is complete, I ask students to graph the data, answer the lab questions, and summarize their observations as an offline assignment. If they were not able to attend the live session, then students should view the recording under the “Recorded Live Sessions” on the course landing page.
As a follow-up to the lab activity, I use a free technology tool called Flipgrid. Flipgrid allows students to have asynchronous conversations via video and is an excellent technology tool for building a sense of community in your classroom. Students use Flipgrid to state the difference between an endothermic and exothermic reaction and how they knew this was occuring during our live session. I also ask students to conduct an internet search to identify another example of an endothermic or exothermic reaction that occurs in everyday life. Students usually mention cooking an egg, photosynthesis, using a cold pack, and baking bread as examples of endothermic reactions. For exothermic reactions, students usually discuss the concept of combustion or an explosion because they give off heat energy. In addition to creating their Flipgrid post, I require students to respond to at least one other classmate.
Rock and mineral demonstration in Zoom
I recently used the video conference tool Zoom to teach about the formation of igneous, sedimentary, and metamorphic rocks. I began by posting on the screen: “How is a rock different from a mineral?” and “Why are not all rocks the same?” The remote class began with students unmuting their microphones and discussing and comparing rocks and minerals. During this discussion, students shared stories about traveling to the Smithsonian Museum in Washington, DC to view their mineral collection; traveling on vacations to explore caves that contained many rock formations; and visiting the desert with its dry, rocky landscape. We then discussed the three types of rocks and how we are able to classify rocks on the basis of their formation.
Next, I plugged my phone (which had the Zoom app installed) into the USB port on the computer. Using my computer, I shared my screen by selecting the phone/tablet as the screen to share. My device was now ready to be used as a document camera with students (see Resources). I placed my device on the tripod with the screen facing upward. For this Zoom video conference, I had previously gathered my personal rock and mineral collection and placed it on my table. I placed the rocks and minerals under my cell phone screen and zoomed in using my camera, which allowed students to view details such as the pieces of rock, sand, bones, and shells in the sedimentary rocks (see Figure 3). I then discussed and demonstrated the different characteristics of a mineral. Students were able to view the streak left when I ran the mineral calcite across a streak plate, watched as my fingernail scratched the talc to demonstrate the hardness test, and saw bubbles arise as a drop of hydrochloric acid was added to calcite. In preparation for our next live meeting, I asked students to look through their home to determine if they had a mineral or rock that they could bring to our next session as an on-screen “show and tell” (if students couldn’t find a sample, they could look up and submit an image found online). Students were encouraged to take a picture of their rock or mineral sample and upload it to a class bulletin board on Padlet (see Resources). Students posted pictures of minerals such as quartz, amethyst, and calcite and rocks such as sandstone, limestone, and basalt (see Figure 4). I was amazed to see how excited students were to share their rock and mineral samples during the next live remote session. Students that felt comfortable turning their camera on and talking were able to show their rock/mineral sample on screen and discuss it with our class. They did not have to share if they did not feel comfortable talking on screen, but I did ask everyone who had a sample to post it on our class padlet.
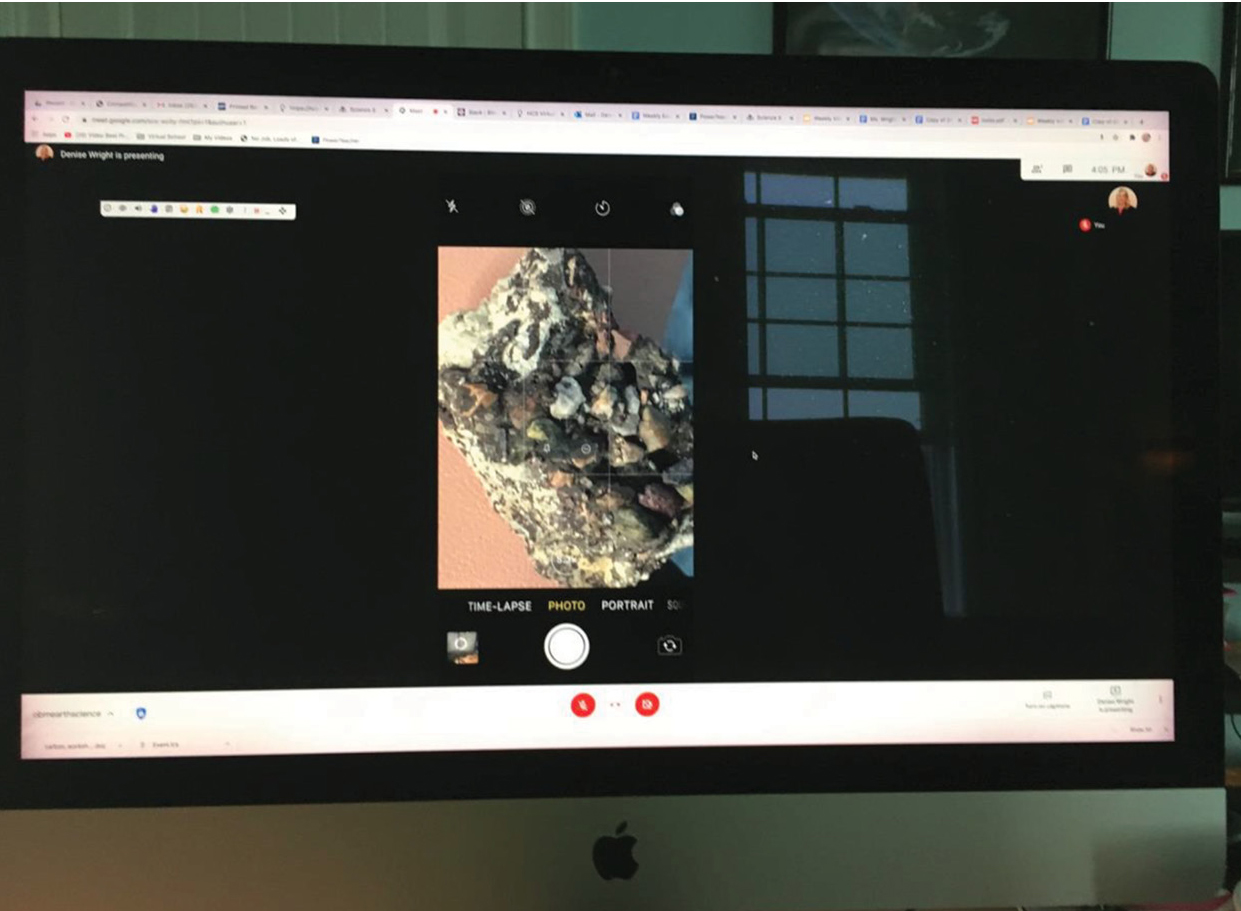
View of sediments on the conglomerate rock. I used the Zoom camera feature on my cell phone and screen share.
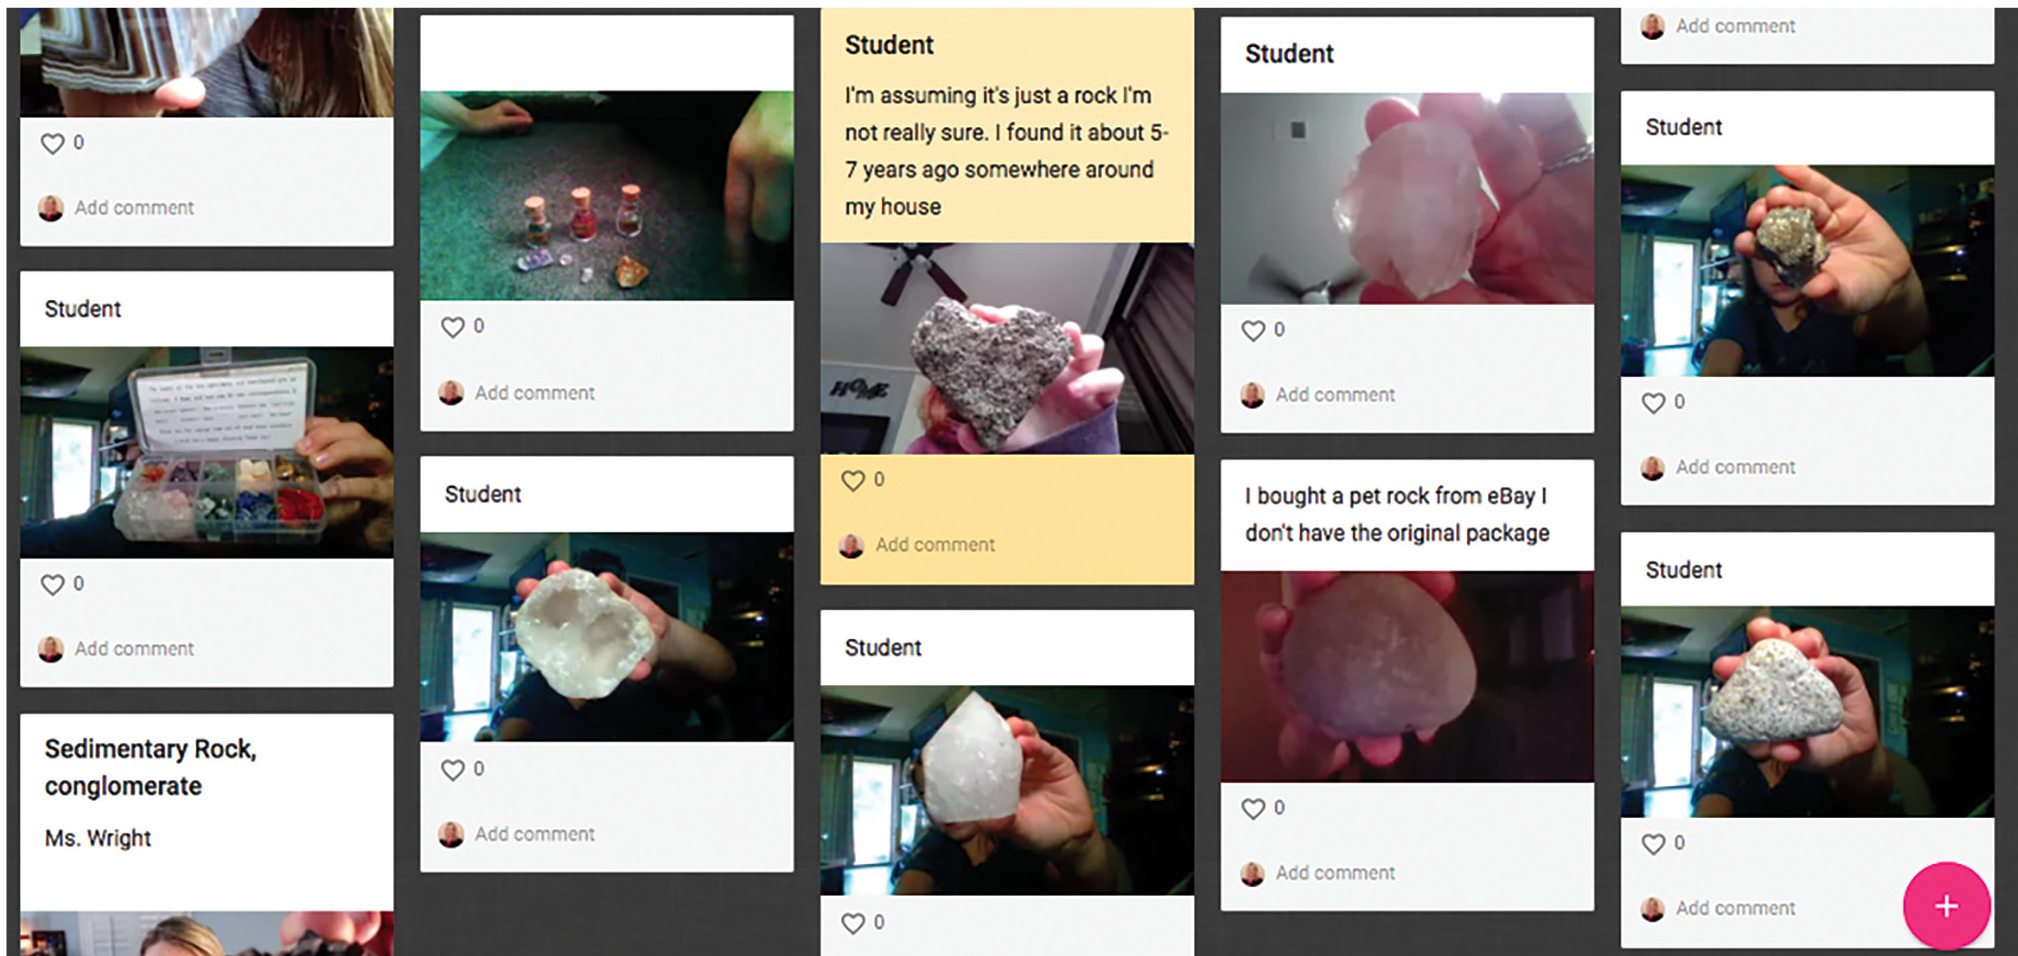
Students shared their rock and mineral samples from home on a padlet.
After this, students were placed in pairs and then split into small groups using Zoom breakout rooms. Each pair of students was assigned to a specific rock or mineral with a number that matched their breakout room on a padlet. For this breakout session, I had Zoom randomly assign students into pairs for five minutes, with each pair responsible for researching their assigned rock or mineral. As they were talking, I popped into several of the breakout rooms. When we returned from the breakout session, the students shared what they had learned when researching the rock or mineral. If a group had a mineral, they discussed its streak, luster/shine, hardness, and density. If they had a rock, they discussed how it formed and why the texture may have looked like bubbles or glass based on the rate at which it cooled. This activity reinforced the content about rock and mineral formation and required collaboration by students.
Conclusion
Interactive science teacher demonstrations can be successfully conducted in a remote learning environment. These demonstrations can help students experience relevant, meaningful, and memorable learning. In time, students will become more motivated to attend your interactive distance learning sessions and learn some great science along the way. •
Resources
AirServer—https://www.airserver.com/
Google Meet—https://meet.google.com/
How to make an improvised document camera using Zoom and your iPhone or iPad—https://www.unr.edu/tlt/instructional-design/instructional-technology-resources/web-conferencing/zoom/document-camera-hack
Lab data sheet—https://docs.google.com/document/d/1cv5mhfYOUcFCGkWHWcMsAhAwjMWrYsa42OokY1dN6G4/edit?usp=sharing
Padlet—https://padlet.com/dwright30/rd07uc2c3qx19h8h
Reflector App—https://www.airsquirrels.com/reflector
Tripod and ring light—https://www.amazon.com/Control-Brightness-Dimmable-Ringlight-Photography/dp/B07SKKHB8N/ref=sr_1_4?dchild=1&keywords=KeShi&qid=1607047427&sr=8-4
Zoom—https://zoom.us/
Denise Wright (ienjoyteaching@gmail.com) is a middle school STEM Educator at Horry County Schools located in Myrtle Beach, South Carolina. Her experience includes teaching in an online setting. You may contact her on twitter: @DenisecWright or at dwright@horrycountyschools.net with any questions or suggestions you may have for future columns.
Teaching Strategies Technology Middle School