
Preschool Early Childhood Elementary Informal Education | Daily Do
Where Did the Plant Come From?

Biology Crosscutting Concepts General Science Is Lesson Plan Life Science Science and Engineering Practices Preschool Early Childhood Elementary Informal Education Grade 2 Grade K
Sensemaking Checklist


Introduction
Today's task, Where Did the Plant Come From?, engages preK and K students and their families in science and engineering practices and uses the thinking tool of patterns to make sense of the idea that plants need water and sunlight to grow, and the idea that different types of plants have many parts in common.
Young students and their siblings can plant and care for their sprouted seeds indoors or outdoors. They might spend the summer months wondering and noticing the following: How big might the plant grow? How many leaves might it have? Where will the new seeds come from?
Preparation
Materials
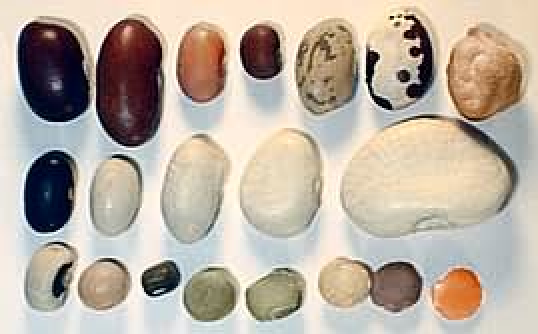
Variety of large, dried seeds such as:
- kidney beans
- pinto beans
- black beans
- mung beans
- peas
- corn kernels
- green beans
- paper towels or napkins
- plastic bags (snack-, sandwich-, or quart-sized) or clear glass jars with lids (any size)
- water
- picture of each seed type (optional)
- picture of a plant grown from each seed type (optional)
- stickers or small adhesive notes (optional)
A few days before engaging students with this task, choose one type of seed to sprout ahead of time (directions below). Students can observe the sprouted seed and ask questions. You can use these questions to collaboratively generate ideas for investigations.
(Note: Make sure all of the seeds you're using sprout in about the same amount of time.)
Investigation
SORTING SEEDS
Place all the seeds in a clear plastic bag so students can see there are many different kinds of seeds in the bag. You need enough seeds to be able to provide a small handful of seeds to each student.
You might say to students, "I found this bag of seeds but they're all mixed up. Would you help me sort them?" Ask students to put like seeds together. You might give students a paper mat with drawn circles on which to place like seeds together.
As you walk around the room, ask students about the choices they are making.
- Why did you put this seed here (point to a seed in a pile) and this seed here (point to a different seed in a pile)?
- What are some things that are the same about all these seeds? (point to a pile of seeds)
- Why did you put this seed and this seed (point to two seeds in the same pile that are a little different) in the same pile?
- What questions do you have about these seeds?
Once students have sorted all of the seeds, you might ask students to share their ideas about how the seeds differ from one another. You might ask the students to tell the class what they told you when you were walking around the room. Students have likely noticed the sizes, shapes, and colors are different.
Next, ask students, "Can you think of one thing that is the same about all the seeds? Tell your idea to someone near you." Students might say that all the seeds are hard. Some might say you can eat them. Some others might say that all seeds grow plants.
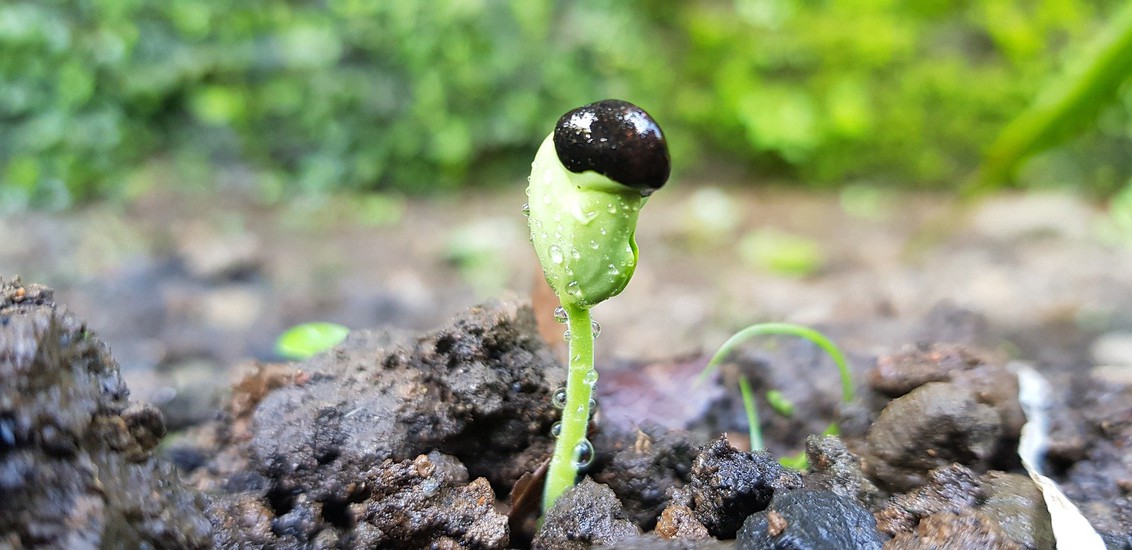
EXPLORING SPROUTED SEEDS
Share a few of the seeds (seeds should be all of the same type) you sprouted. (Blot them dry first.) You might say, "Look! Some of the seeds in my bag sprouted!" Share the sprouted seeds with students. Ask them to be gentle when holding and sharing them with others.
Let the students look at the sprouted seeds. If you have magnifying lenses, consider helping students use them to observe the seeds. (Families at home can take a picture and enlarge it for students.) As you walk around the room, listen for students' questions and observations about the sprouted seeds. Students might say,
- It's sprouted!
- These are roots.
- I see a leaf.
- It's so small.
- Why did it sprout?
- Is this a plant?
- Will it get big?
- Will all these beans sprout?!
- Can we make all the beans sprout?
Say to your students, "We have a lot of questions about these sprouts! Why do you think these seeds sprouted?" Accept all ideas. Listen for students to say that the seeds need to be wet and/or need sunlight. You might say, "Nia thinks the seeds need water to sprout. Who agrees with Nia?"
(Note: Plants do not need sunlight to germinate, but do need sunlight to grow. It's acceptable if students don't make the distinction in this task.)
Ask, "Do you think we can make these other kinds of seeds sprout? Why do you think so?" Accept all ideas. Some students may not have experience with gardening to share, so you might ask them to share their experience with eating fruits or vegetables with seeds.
Say to students, "Many of us think plants need water to sprout. Should we find out?"
SPROUTING OUR OWN SEEDS
This next part describes how students are setting up the investigation. You may choose to do some of the setup ahead of time or assist students with the setup.
Give each student 3 or 4 of the same type of seeds (this is important because it's unlikely that all the seeds will sprout). Vary the type of beans from student to student.
Consider asking students to draw a picture of their seeds, either in their student notebook or on a blank sheet of paper, using crayons or pencils. Gently guide students to only draw what they see. Help students write the day and date on the picture.
Give students a damp paper towel (should not drip when you hand it to students) and a plastic bag. Show students how to fold the paper towel to fit inside the bag.
Show the students how to place their beans between the paper towel and the side of the bag (so the beans are visible). Help students seal their bags and write their initials on them (use a permanent marker). Place the bags in a common area in the room.
You might create a poster with one column for each type of seed students are sprouting. At the top of each column, paste a picture of a seed. Point to the first seed picture. Say, "If you think this seed will sprout, please come up and put a sticker (or adhesive note) in this column." Hand students a sticker/adhesive note to add to the chart. Help them post one under the other. This will help students notice patterns in predictions (data). Continue until students have made a prediction about all of the seeds. You might ask students to share why they think a particular kind of seed won't sprout.
INVESTIGATING OUR SPROUTED SEEDS
Allow students to observe their seeds every day; you might ask them to choose one seed to draw each day or every couple of days. As students observe their seeds, ask them what they think is happening. When they share their ideas (claim), ask them to point to the place on the seed that makes them think that (evidence).
When the sprouted seeds develop their first real leaves, ask students to draw the sprouted seed. Gently guide them to draw what they observe (for example, if their sprout has only one leaf, they should only draw one leaf in their picture).
Assign partners to students; each pair of students should represent two different kinds of seeds. Ask students to compare their sprouted seeds. As you walk around the room, you might ask these questions:
- What is growing from this seed?
- Can you find something that is the same/almost the same in this plant (point to one student's sprout) and this plant (point to the other student's sprout)?
- Can you find something that is different in this plant (point to one student's sprout) from this plant (point to the other student's sprout)?
You might assign students different partners and ask them to compare their sprouts. Can they still find something that is the same and something that is different?
If you and your students made predictions about which kinds of seeds would sprout, you might return their attention to the class poster. You can ask students which types of seeds sprouted and mark their responses on the chart (write the word sprouted next to the picture, for example).
Ask students, "What are some things we noticed are the same about our plants?" Record students' observations on a poster; you might label the poster "Plants." Observations might include these: Plants came out of the seeds; have roots, leaves, and stems; and the leaves are green.
Next, ask, "What are some things we noticed that are different about our plants?" Differences might include the plants from different seeds, the plants have different sizes, and the leaves have different shapes.
Consider showing students pictures of different plants, bringing different plants into the classroom, or taking the students on a walk outside (bring the plant poster with you). Ask students, "Do you think this plant grew from a seed? Why do you think so?" or "Is this a plant? Why do you think so?" Help students use their own experience with their seeds, sprouts, and young plants to support their ideas. You might choose to share the formative assessment probe Is It a Plant? to find out what characteristics students are using to decide if something is a plant.
If you have potting soil available, you might ask students to plant their seeds and continue to observe the plants over time.