
In Flight With Paper Airplanes
An exploration with elementary engineering
Science and Children—February 2020 (Volume 57, Issue 6)
By Laura Katchmark, Elisabeth McCabe, Kristen Matthews, and Michele Koomen

What better way to engage fifth-grade students in science and engineering practices than to use paper airplanes to encourage them to question, explore, create, and test designs! This multi-day unit draws from a fourth-grade curriculum (Pearson 2012) aligned with the Next Generation Science Standards (NGSS Lead States 2013) used in teacher education methods classes and taught to grade 5 students. In this article, we share an integrated unit that includes reading selections about Amelia Earhart and the forces involved in paper airplane flight, an overview of how we used paper airplanes in an experimental design process, and how we helped students develop conclusions based on the claims, evidence, and reasoning framework (CER; McNeill and Krajcik 2012).
Introduction
Our 45-minute introduction lesson is designed to acquaint students with the principles of engineering, gravity, and the design process. We started by asking students what they know about paper airplanes and flight, using a Know, Wonder, Learn (KWL) chart. Some student notes revealed they knew that airplanes were made from a sheet of paper, needed wings to fly, needed someone to throw them, and can travel far. They wondered about gravity, how to prevent a paper airplane from making loops, and airplane size and weight.
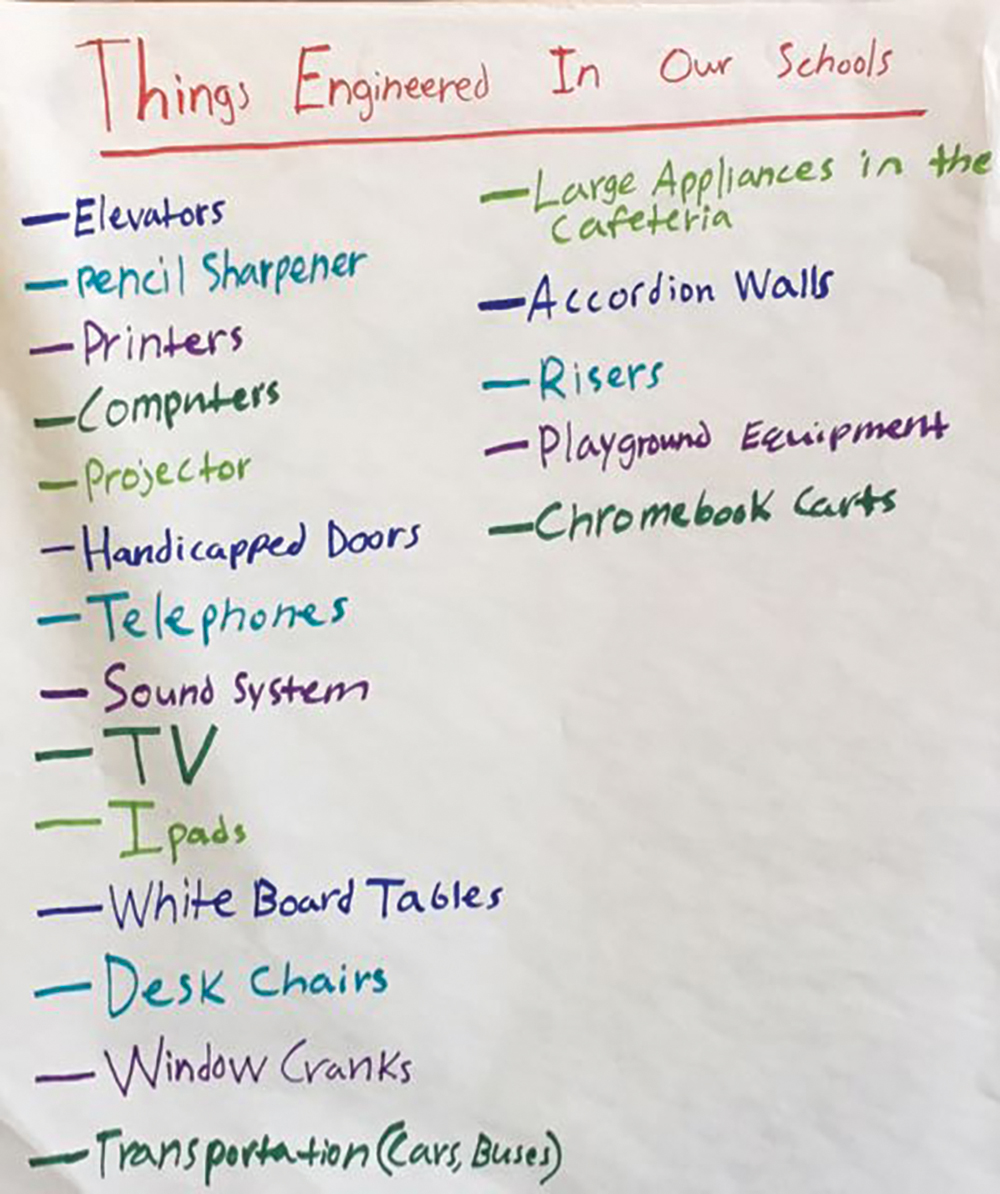
Next, we asked students to think about the work of an engineer (e.g., What does an engineer do?). We discussed how an engineer might design, develop, and test new products. Any product, like smartphones, computers, washing machines, and even classroom furniture, had to be engineered and tested. To understand how much of our world is “engineered” and to incorporate movement, we took a “silent” engineering walk through the school to look for engineered items. Students recorded examples they observed on a sticky note that later we transferred to a class list (Figure 1). Once we regathered everyone, we focused our discussion on how each example was part of an engineering process of trial, test, and redesign.
Things engineered list.
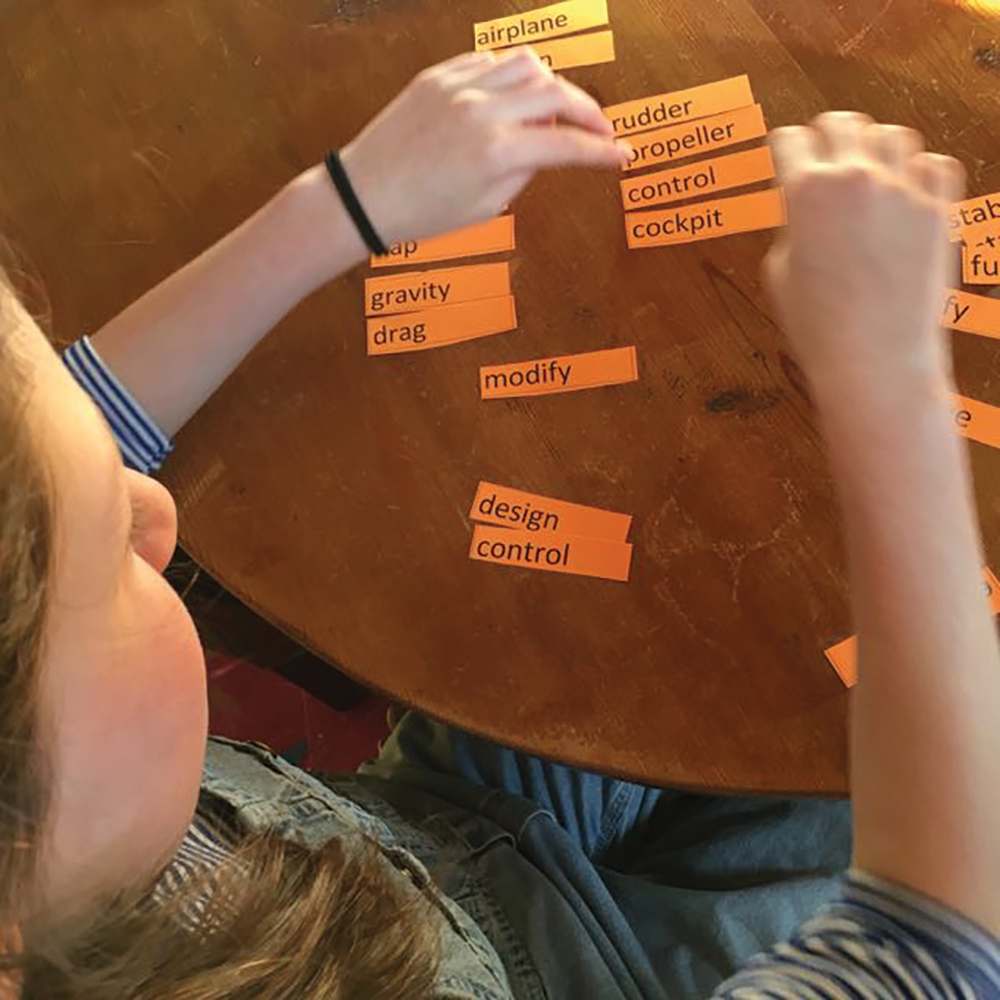
Next, we told students that we would explore the design process of engineering by making paper airplanes. We used a shared reading to develop concepts about the forces that would be involved in the flight of a paper airplane (see Supplemental Resources). Before we started the reading, we had students work with a partner on a word sort, a vocabulary strategy that allow students to develop relationships among words and reasoning skills of classification and deduction (Zygouris-Coe 2015). Partners sorted the words into groups related to parts of the airplane (Figure 2). As the shared reading proceeded, we stopped to discuss some of the key concepts (lift, drag, gravity, and thrust) and uncover the meaning of words unfamiliar to students. We emphasized how paper airplanes fly down as a result of gravity.
Conducting the Mini-Investigation
Students really looked forward to the day that we would begin the actual scientific and engineering study (Pauley, Weege, and Koomen et al. 2016)! We started this 45-minute lesson with an overview of the main goals of the unit: to make and test a control paper airplane, to make another paper airplane with one change (a testable variable), and see how that flight compared to the control. In this lesson, we introduced the students to the mini-investigation sheet that they would eventually complete (see Supplemental Resources).
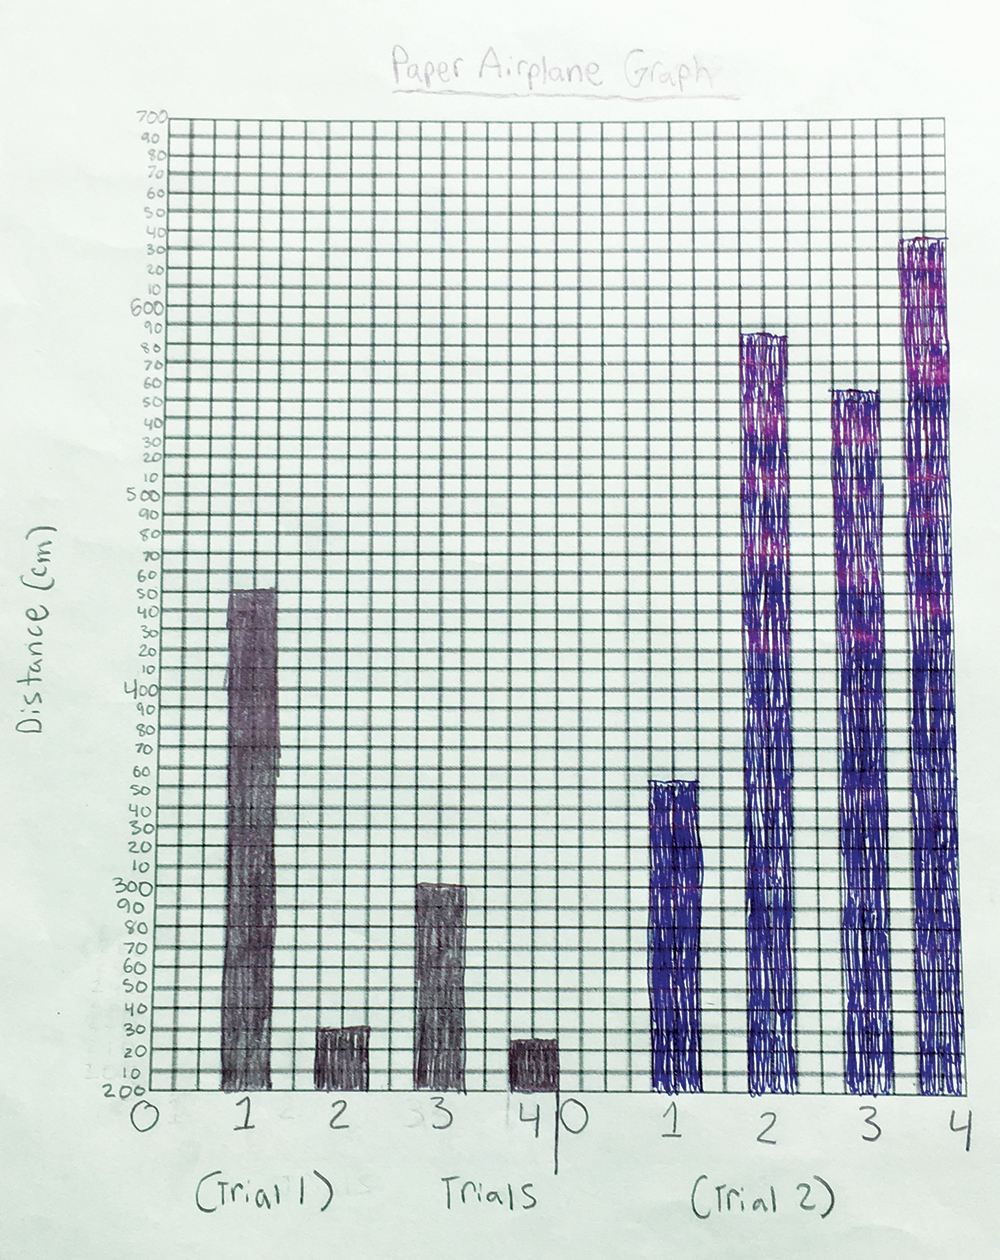
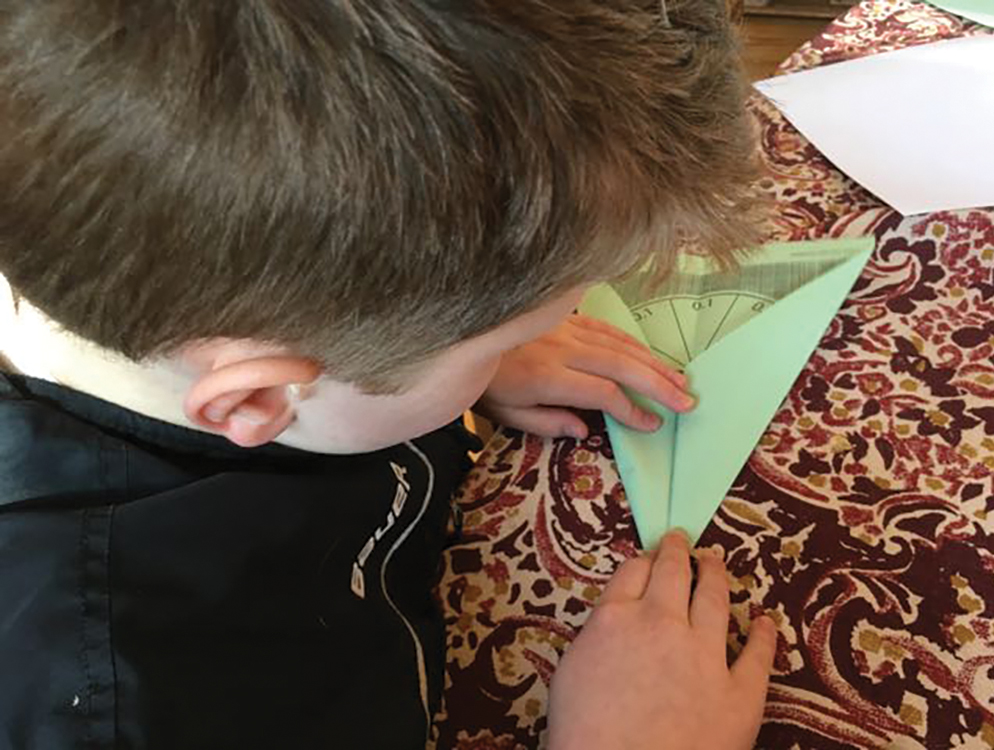
We modeled how to make a basic dart airplane and talked about safety and handling of the paper airplanes. We outlined behavioral expectations and classroom management techniques, including how to throw the airplanes safely in the air and not at each other, the importance of throwing paper airplanes one at a time, and using safety googles during the flight. In our class, students worked together in small groups (of three or four students) where each group made one paper airplane; however, individual students could each make one and then as a group choose the one that they thought might perform better. We spent some time talking with students about how this first paper airplane would be their control and how they would measure the distance travelled over three trials. A control is important in science and engineering investigations because it offers the investigator the opportunity to compare across variables. We found it was very important to give students time to “pilot” throwing their airplane in a consistent manner. By doing this, we were able to have the students actually model what worked and what didn’t versus us just telling them. For example, some student groups figured out and then demonstrated to the class how to get the most accurate measurement by laying metersticks end to end or throwing the plane with the arm and plane at a right angle to the floor. We instructed the students on how to make a data table on the back sheet of the mini-investigation (Figure 3) and to collect both qualitative data (observations of flight behavior) and quantitative data (measurement of distance travelled) that we used as formative assessment. We concluded this part of the unit by having students jot down a few notes again on that first page of the mini-investigation sheet about how they might modify and improve their plane’s design to increase the distance travelled.
Sample graph.
The Design Process
We began the design process lesson (45-minutes) by having the fifth-grade students refer to their mini-investigation sheets to talk together in their groups about some of the modifications and improvements that they might make to increase the distance traveled of the paper airplane. Adding rudders; using different lengths, sizes, or weight of paper (office paper, cardstock, cardboard, or wax paper); or adding weight using paper clips or clay are some of the variable design modifications students have tested. After the students talked for a bit in their groups, we found it helpful to pull the students together as a whole group to share some of the ideas that were emerging about a possible design change using prompts such as: What worked well with the first model? What didn’t? What changes can be made to yield different results or Why do you think a particular change will produce those results?
After the group discussion, the students continued working on their mini-investigation sheets within their small groups to craft a research question, form hypotheses, and lay out their plan. Students used the question frame (How does _____ affect ____?) to develop their research question. For example, Molly’s group question was “How does material affect distance?” We taught the students to identify multiple hypotheses or the possible outcomes of their investigation (Pauley, Weege, and Koomen 2016). We talked about how important it is to identify a null hypothesis or the possibility that there will be no effect between the variables. In Molly’s group, there are three possible outcomes:
H1: The control will travel the farthest.
H2: The cardboard plane will travel the farthest.
HO: The material will not affect distance.
Once the groups decided on their one design modification to test, they completed the mini-investigation sheet, with an eye to being consistent with the first set of trials with the control (i.e., same position for the launch and same person). We wrapped up this part of the unit by asking each group to share the variable they decided to test, which also served as a formative assessment.
Design Modifications and Testing
The next sequence of this unit allowed students time to construct their group’s modified airplane within a 45-minute lesson. We found it helpful for students to first review their mini investigation sheet and to keep in mind that they were testing the independent variable (the design modification that they will be comparing to the control). Next, each group constructed the new plane with its variable modification. The students tested their new design by running three trials as they did earlier in the unit, collecting both qualitative and quantitative data. We found that students need ample time to work and inquire to ensure accurate and comparable results. At the end of this part of the unit, student groups should have completed all three trials.
Working with paper airplanes sounds unthreatening; however, there are some things to take into account when teaching this unit.
Students should wear safety goggles when they are testing the airplanes in flight.
Use adequate spaces to encourage safety for all students (i.e., hallways, extra rooms, classroom).
Outline expectations for throwing airplanes (i.e., one person in the group throws one plane at a time down the runway; paper airplanes are not thrown at or over people).
Analysis and Conclusion
The final leg of this unit is where the students compare the experimental data against the control data, focusing on the analyze/interpret and conclude/report sections of the mini investigation sheet. To do this, students need to review the data tables from each of the two tests. As they review their data, we guide them with questions such as: “What do you notice about your two sets of data? How are they similar? How are they different? What patterns do you see?” (see Supplemental Resources). Students write down the answers to these questions in the analyze and interpret section of their planning sheet. For example, Jorge and his group noticed a pattern in distance traveled when using different-size paper for their planes: “The size of the paper can affect the distance it travels.”
Next, the students identify the claim that was supported by their evidence and circle it on their mini-investigations sheet. To communicate their conclusion, we use the claims, evidence, and reasoning (CER) sentence frames modified by Julie Jackson and colleagues (2016) based on the research of McNeill and Krajcik (2012).
I claim ________ (claim: what the student knows/answers to a question or solution to a problem) because ___________ (evidence or data that support one of your hypotheses). I know I am right because ______ (reasoning: scientific concept, rule, or principle) (Jackson, et al. 2016, p. 65).
CER can be a little complicated for fifth graders, so we model how to use the frames. For example, Ellery and her fifth-grade group, wrote “I claim that my re-designed paper airplane is faster than my control because after three trials it went farther than my control by an average of 37 cm (supporting hypothesis 2). I know I am right because my re-designed paper airplane weighed less than my control which had less of a pull of gravity” (see NSTA Connection).
Ellery tied the outcome of her group’s investigation to one of the key disciplinary core ideas of the unit: gravity. These written conclusions became part of our summative assessment using our rubric (see Supplemental Resources). To conclude, we returned to the KWL chart and asked students to reflect on what they had learned through the activities about paper airplanes and what makes them fly. The various colors of the sticky notes represent each stage of the KWL process.
Amelia Earhart
Engineering is a field with one of the worst gender gaps in all of the sciences (Kanny, Sax, and Riggers-Piehl 2014). This unit creates an opportunity to address this disparity by highlighting the work of the pioneer aviator and champion of women’s rights: Amelia Earhart. Amelia Earhart was an American aviator who was the first woman to solo fly a plane across the Atlantic Ocean. She broke many records for airplane travel during her lifetime. Amelia disappeared in the South Pacific Ocean in July 1937 while trying to fly her plane named Electra around the world with her navigator Fred Noonan. She was declared dead on January 5, 1939.
We include a supplemental reading about Amelia Earhart that provides an overview of her accomplishments. To foster vocabulary development, we recommend using a word sort or the Five Most Important Words strategy (Zygouris-Coe 2015). This strategy promotes deep understanding of words within a text and their context. First, students write down five words in a graphic organizer. Next, they use their own words to define the five selected words. Finally, they explain why the word is important in the reading selection. This strategy invites a student to explain what the words mean and why they are important for his or her understanding.
Reflections on Unit Taught
Drag and Gravity. As a paper airplane moves through the air, it pushes against the air, creating resistance or drag. If you want a paper airplane to fly far, you need to design a paper airplane with as little drag as possible. When we throw paper airplanes, they do not keep flying continuously. Instead, they fall down to the ground because of the force of gravity. Gravity is an invisible force that pulls objects to the center of our planet Earth. Objects with greater mass (like Earth) pull more than objects with less mass (paper airplanes). Keeping the paper airplane’s weight to a minimum will help fight against the pull of gravity.
Thrust and Lift. In this unit, student pilots use their muscles to thrust (forward movement) the paper airplane forward. Lift occurs as a result of the air below the paper airplane wing pushing up more than the air above the wing of the airplane is pushing down. The difference in pressure is actually what makes the paper airplane fly. The forces of thrust and lift help the paper airplane make a longer flight.
When the four forces are balanced they achieve a longer flight. Planes like the basic dart are designed to be thrown with a lot of force so they overcome gravity since they do not usually have a lot of drag or lift.
Versatility and adaptability are strengths of this unit. For example, when Laura was teaching this unit, she had only 25-minute segments to fit in a unit that was designed to span five 45-minute lessons. To maximize class time, she pre-folded the paper airplanes and measured the area of the room set aside for conducting the data collection. Additionally, we found it valuable to have students communicate their findings and conclusions with other groups at the end of the unit. We did this using the jigsaw approach, where students come together in groups, with each group member representing a different primary investigative group. In this way, students are informally modeling sharing of results using their mini-investigation sheets, similar to what scientists do when they share their findings at a conference. For example, Ellery (above) talked about what she learned by redesigning her paper airplane and the role of weight on gravity.
ACKNOWLEDGMENTS
We are grateful for the review of the physics content of the manuscript by Professor Chuck Niederriter at Gustavus Adolphus College. This work was supported by a grant from the National Science Foundation (DR K-12-1417777). Any opinions, findings, conclusions, or recommendations are those of the authors and do not necessarily reflect the position or endorsement of the funding agency.
INTERNET RESOURCES
Basic dart http://www.foldnfly.com/1.html#Basic-Dart
What is gravity? https://spaceplace.nasa.gov/what-is-gravity/en/
SUPPLEMENTAL MATERIALS
Amelia Earhart background info
Further reading about Amelia Earhart
Further reading about paper airplanes
Aerospace NGSS Three-Dimensional Learning Elementary