
Methods & Strategies
The Power of Observation
Practical art-based exercises to improve how we learn science
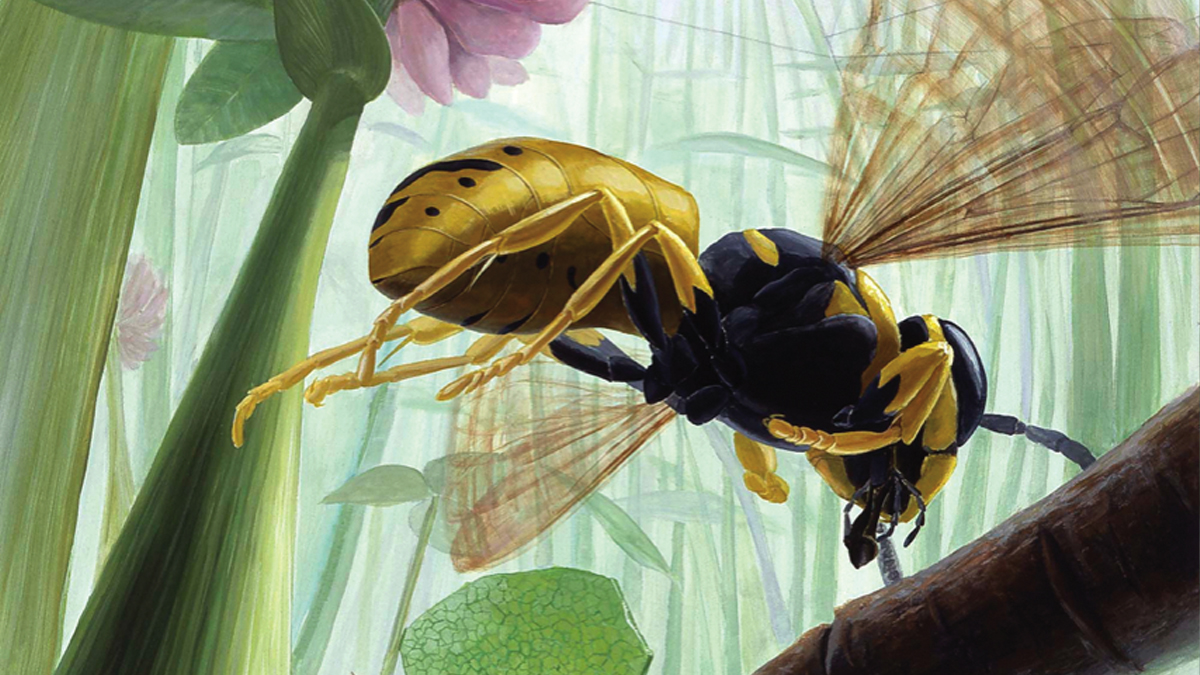
Illustration © Sally J. Bensusen/Visual Science Studio
Art and science share several significant practices. Both involve exploration. Both use experimentation. Both endeavor to discover. And both share the act of careful observation. Observation is a concentrated study requiring attention to the characteristics of an object, a scene, or a situation: light, shape, texture, pattern, color, detail, and changes of these over time and under varying conditions. As with any skill, the ability to observe well takes constant practice. By keeping a small sketchbook (or “field journal”), for instance, a student can draw objects from nature on a daily basis and add notes of his or her observations. Over time, the student can learn to differentiate between similar life forms, recognize patterns in the natural world, and develop models of how nature works.
Drawing practice is a good way to improve the ability to concentrate and enhance curiosity, to see the world more expansively, more analytically, more objectively and in detail that would otherwise slip by unnoticed (Brew, Fava, and Kantrowitz 2012). Drawing is what humans do naturally. Treated as a “program running in the background,” receptive young minds provide a natural place to apply this kind of training. Additionally, communicating through verbal description and focused activities can also heighten the experience of observing.
Observation Challenge
For the last few summers, I have been asked to participate in a professional development program on biodiversity hosted by the Smithsonian Science Education for Teachers in Washington, D.C. There I introduce K–12 teachers to a type of art that is traditionally used in the service of science, that is, scientific illustration (see Additional Resources).
There are as many types of scientific illustration as there are sciences. As a point of introduction, I show the teachers a few examples of scientific illustrations from various sources, including some of my own works, sketches to final art, to show the stages for how this art is created (Figure 1).
Scientific illustrations stages.
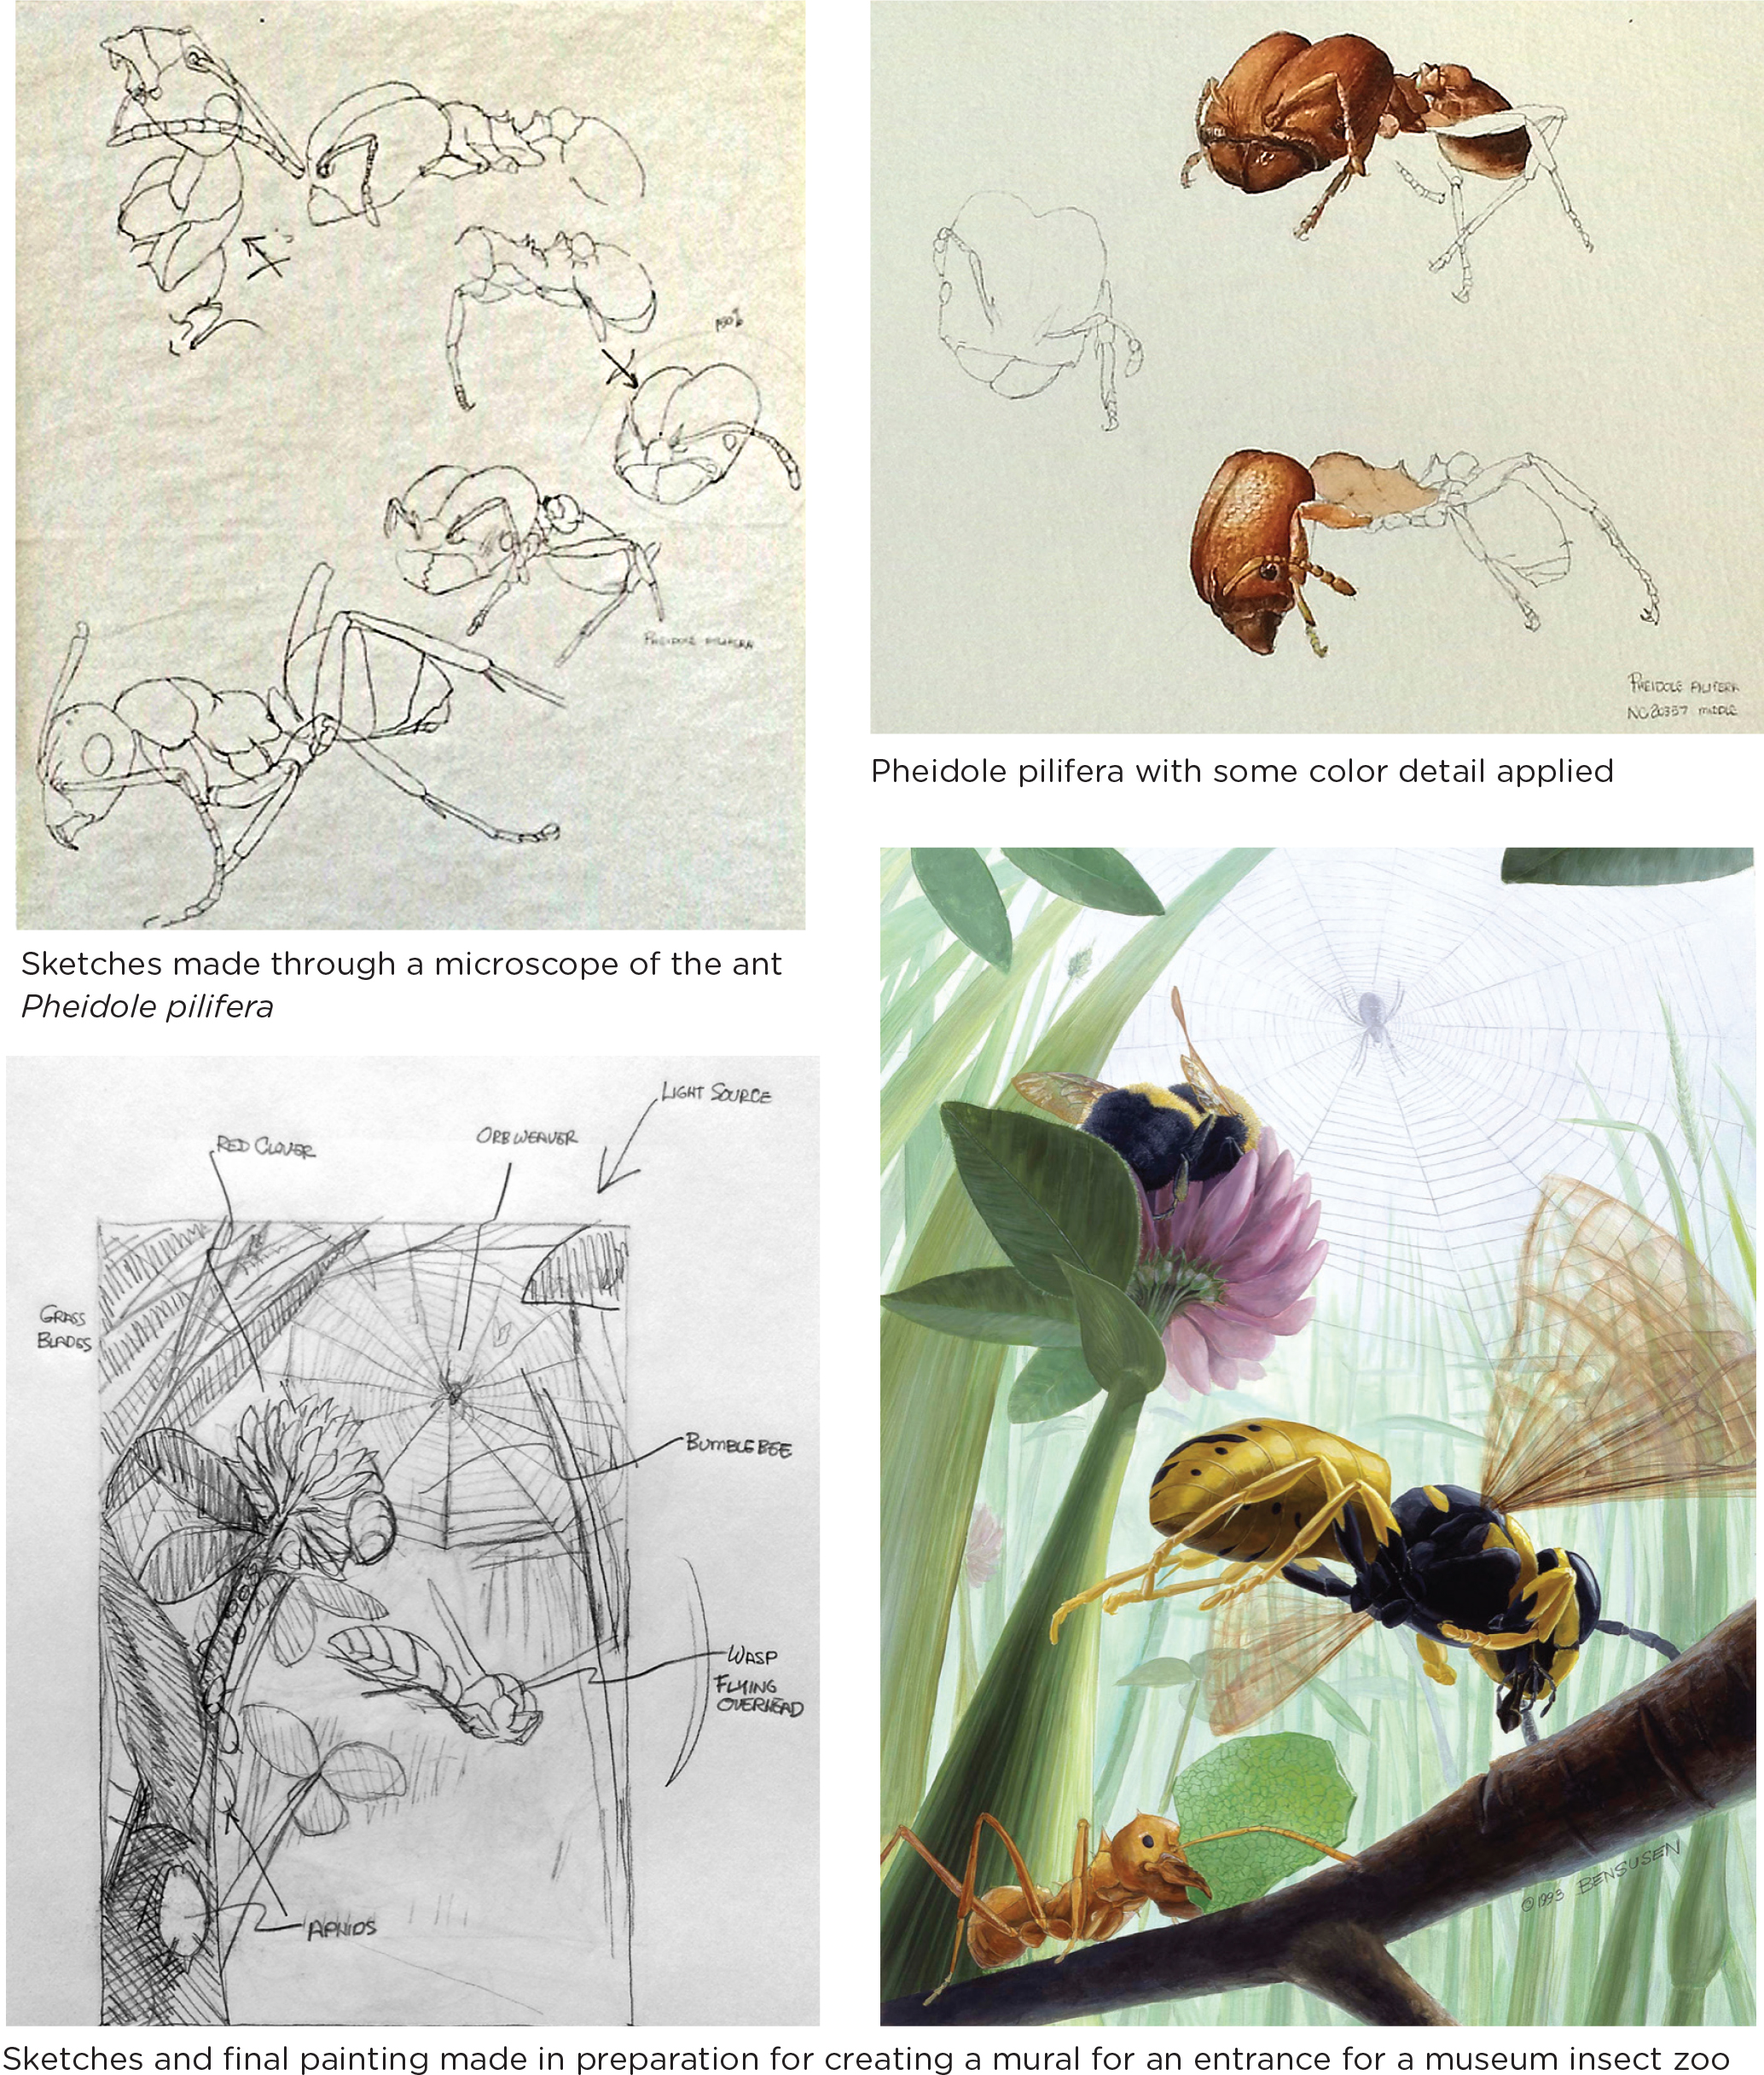
Scientific illustrations stages. © Sally J. Bensusen/Visual Science Studio
The host wanted me to give the participants a hands-on experience. It wouldn’t be possible to offer the participants a drawing class in a short, three-hour workshop. I could, however, simulate the experience of working as a scientific illustrator by teaching the participants how to see in very much the way that a trained scientific illustrator would, by employing some exercises that are helpful in developing better observing skills. Skilled observation is key in scientific illustration and it also plays a key role in scientific pursuits.
During this workshop, I treated the participants as stand-ins for their own students. They would see firsthand how these activities work and understand what their students would experience with these practices in their own science classrooms. The exercises were meant to be fun, while secretly guiding the participants toward learning how to see in new, more critical and detailed ways. The first steps in this direction were to switch off their internal critics. This experience was not about learning how to draw but to practice visually recording what one observes, both accurately and without judgment. Variations on these exercises are encouraged based on grade level, but they will work for any age given a few minor adjustments.
Learning How To See—Exercise #1: Speed Drawing With Toys
Setup
In this exercise, there is no “art” created in this exercise, no resulting beautiful drawings. The speed of the activity does have a dual purpose: (1) to turn off the mind’s critic and (2) to push the participant to focus on only the most important general aspect(s) of the object under study—shape, relative size, orientation, for instance—and then move on to the next object very quickly, without overthinking.
The local party store provided a wide range of small, very inexpensive toys, some with familiar shapes and some appearing more abstract: noise makers, erasers, pencil sharpeners, and so on. What they looked like was irrelevant. In fact, the more unrecognizable they were, the better it served the exercise (Figure 2).
Examples of objects collected for the activity “Speed Drawing with Toys.”
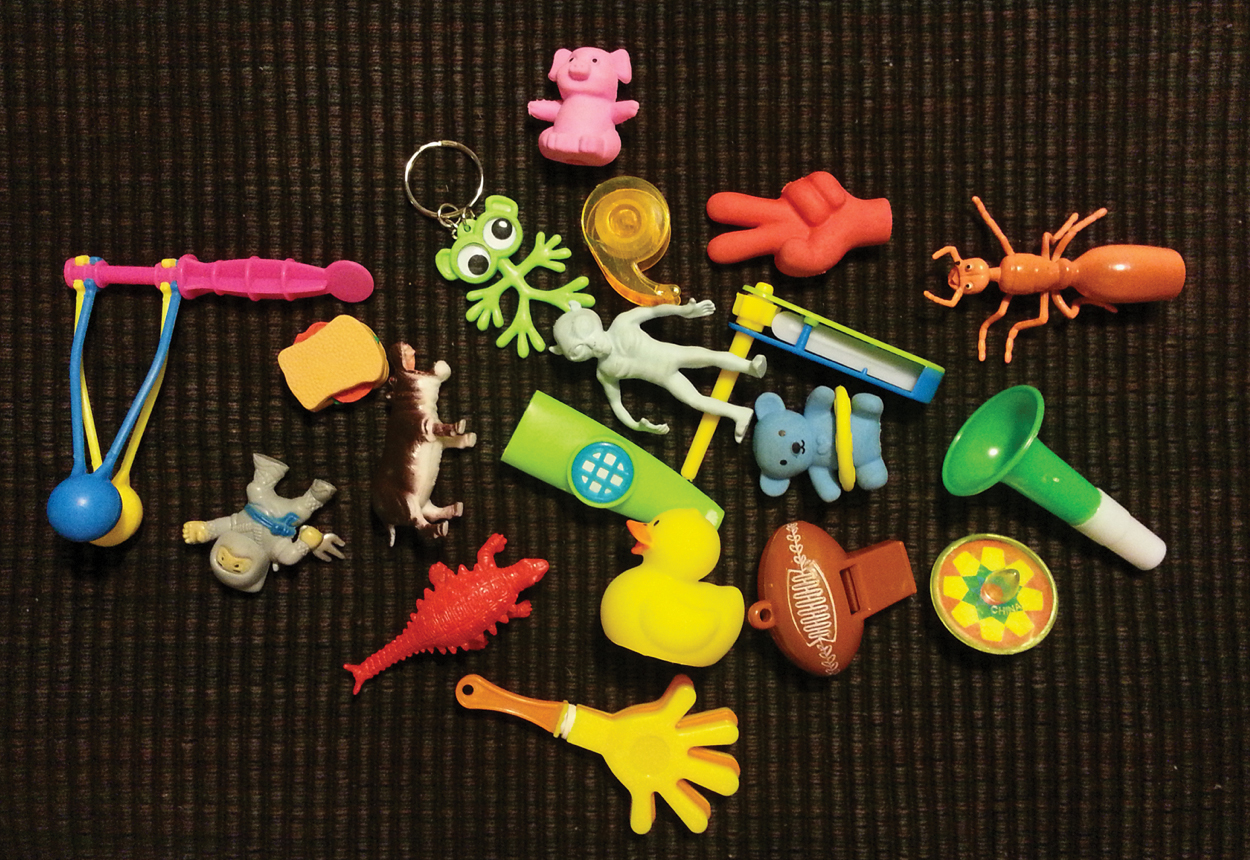
Examples of objects collected for the activity “Speed Drawing with Toys.” © Sally J. Bensusen/Visual Science Studio
For the week, the hosts had issued to each participant a small, unlined field journal (roughly 5” × 8”) and pencils. The journals were employed during this workshop.
The Activity
Everyone was handed one toy. The participants were given 10 seconds to draw the object in front of them and then to pass it to their neighbor on the left. (Not surprisingly, there were some gasps from the group, which told me that many participants were expecting to make complete drawings of their toys, rather than taking a simpler focus.) The real aim of this exercise was to learn how to relax into a short timeline, to concentrate on only a couple of aspects of these objects and then to move on to the next drawing without judgment.
After we began, I called time in 10 seconds. Each participant passed his toy to his left. We started again as soon as things settled down. We did this for about six cycles (Figure 3).
Science teachers practice speed drawing with toys (Exercise #1).
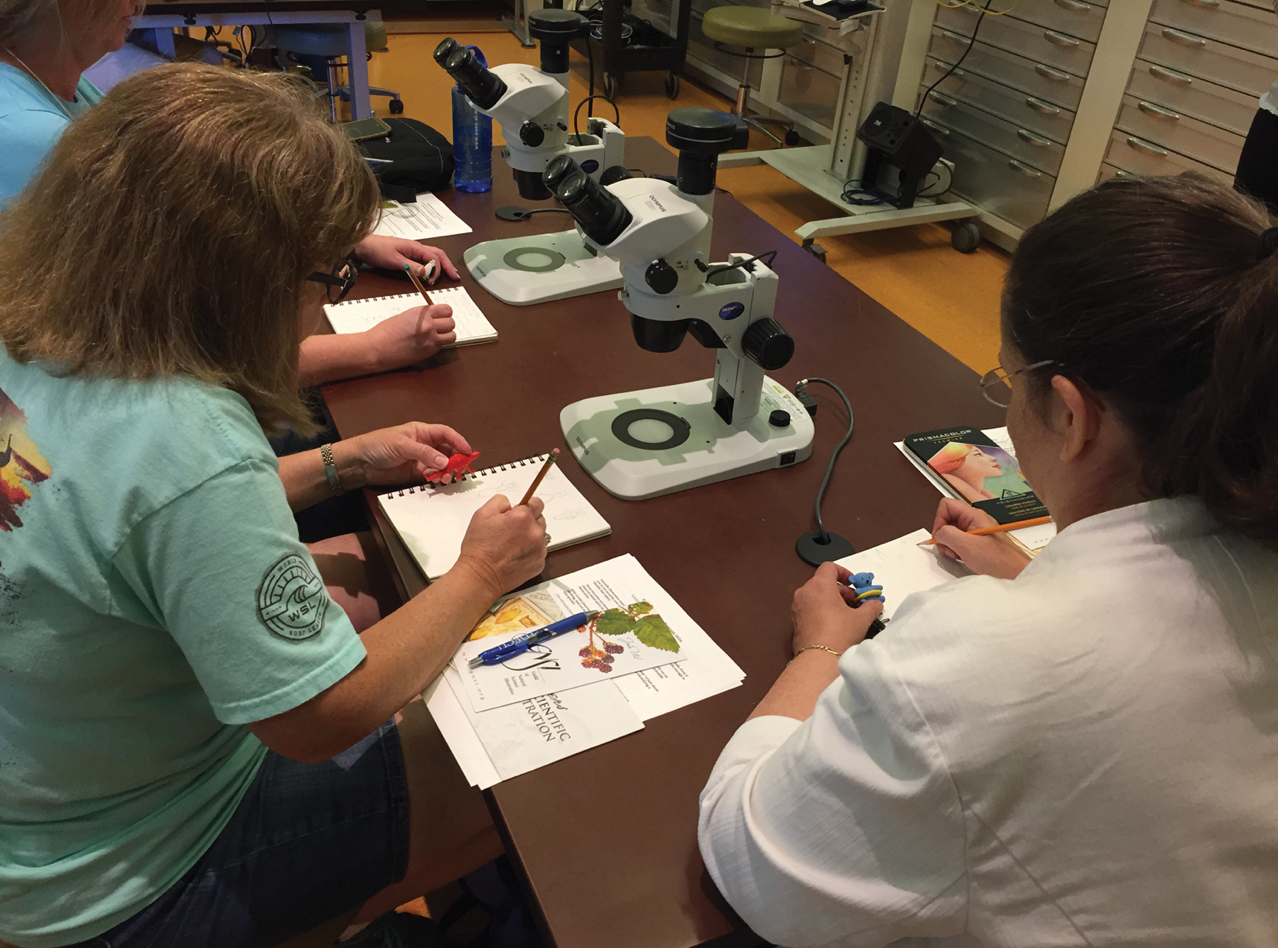
Science teachers practice speed drawing with toys (Exercise #1).
Smithsonian, used with permission
(It is helpful to assign one person as a “runner” who retrieves the toy from the last participant at the back of the room and runs it to the first participant at the front of the room between cycles.)
Discussion
After we completed the exercise, I asked the participants how many of them felt more stress as we repeated the exercise. Two hands went up. (Many people have high expectations in a drawing class and this can be counterproductive. It was important to be able to eliminate that preconception through this brain-training exercise.) I then asked the opposite question: How many of them became more relaxed as the exercise was repeated? About half the class raised their hands.
I would make one adjustment to this exercise for young children: increase the drawing time to 30 seconds or even a full minute. The use of funny toys will help keep them engaged for several cycles, as well as the challenge of making drawings within a very brief period of time.
Exercise #2: Reverse Pictionary
In the original game of “Pictionary,” one player produces a drawing that represents a word. The other players have to guess what that word is. The activity described below uses the opposite strategy.
In “Reverse Pictionary,” players attempt to describe an image to another player who draws the description. As in the case of “Speed Drawing,” the short length of time assigned to this exercise is intended to force the non-drawing members of each group to really focus on their image. The more focused they are, the more thoroughly they can describe the image. The person selected to draw serves as the team’s “quality control” as to their level of success.
The Activity
We broke the class up into four groups of four or five participants. They were instructed to select someone in their group to serve as “pencil pusher,” that is, the group member who would take on the task of drawing for the group. The other members in each group were given a sealed envelope containing a photo clipped from a magazine. They were instructed not to show the photo to their pencil pusher.
Each group received a different image, so that the other groups wouldn’t be distracted by hints voiced by the neighboring groups. The images contained random subject matter: an ancient clay figure; a pottery fragment; two Easter Island heads in a field; a blob fish. (Photos can be of any subject, though it’s best to keep the image simple.) They had 15 minutes to complete the task.
A participant’s drawing from the Reverse Pictionary exercise. This was from the clay figure group.
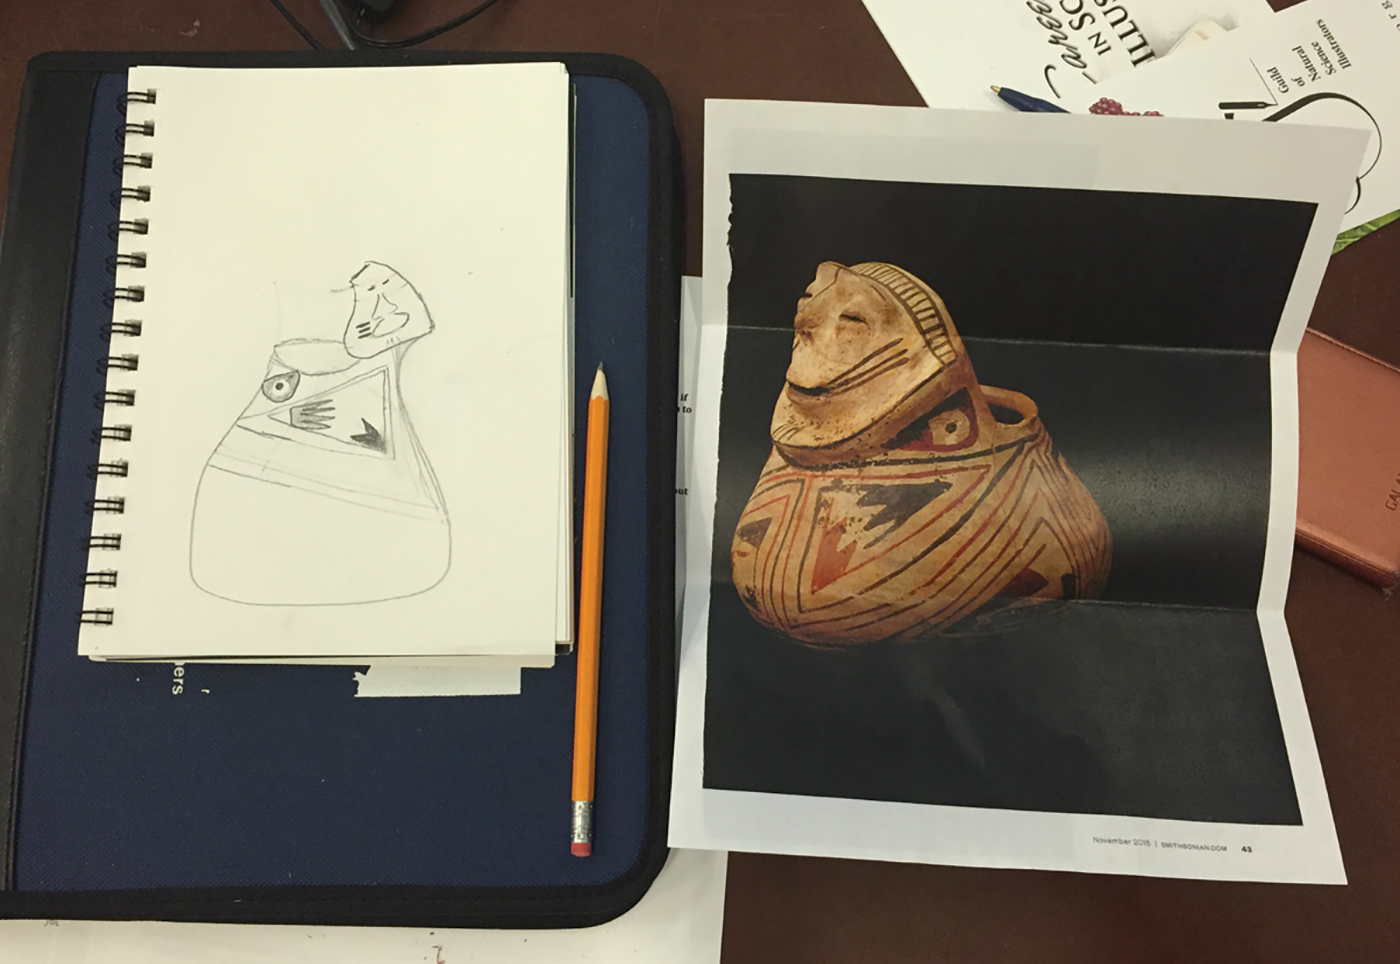
A participant’s drawing from the Reverse Pictionary exercise. This was from the clay figure group.
Smithsonian, used with permission
Discussion
Not surprisingly, there were varying degrees of success between the groups, depending on the complexity of the image:
- The group receiving the photo of the clay figure approached the problem by beginning with simple shapes and their placement on the page, gradually refining the shapes and adding increasingly more detail. They did a fine job of describing the image and were able to develop an almost exact representation (Figure 4).
- The group with the photo of the blob fish also used a similar technique, describing general form first, then finer detail of line and shape. They obtained excellent results as well.
- The group that received the photo of the two Easter Island heads had five members and chose two participants to act as pencil pushers, leaving three describers. They used a method involving a grid system, whereby both the describers and the pencil pushers divided their papers into nine sections. The describers then tried to explain what shapes and lines appeared in each section. This was an excellent approach to what was a very complex image. This group had the most difficult time.
- The group that received the photo of the pottery fragment did surprisingly well in using a similar grid approach.
In retrospect, the exercise might be more effective by choosing more similar images, so that no one group had an image with a higher degree of difficulty. The group that received a photo of Easter Island heads had more of a challenge, which may not have been entirely fair, at least for the time allotted.
For much younger participants, it’s also important to weigh the challenge of timing with the difficulty of the task. The younger the student, the simpler the images used in the exercise. It’s a learning tool that is couched in fun. Success is weighed in degrees, which will be obvious to the participants after time is up. Repeating the exercise on a regular basis can help improve the ability to observe and also to describe the photo when students obtain more experience.
Follow-Up: Applying New Skills
The final activity during the workshop involved drawing museum specimens from a selection of objects requested in advance. We provided 10 stereomicroscopes to use with the smaller specimens. We prepared in advance a collection of preserved plants, birds, various insects, a few arrowheads, and shells, and we had also collected a wide range of live leaves from various trees. This is where the participant could (perhaps without realizing it) apply his or her new, sharpened observing skills to the relaxed task of drawing. During this period, there was no judgment or criticism about the quality of the drawings produced. It was purely an exercise in recording observations. The point of this practice was not about making beautiful works of art, but in accurately recording observations of the objects each participant chose to record on paper.
In contrast to the previous exercises, this was almost a meditation, easy to become absorbed in the seeing and visual recording (Figure 5).
Participants try their hand at drawing from museum specimens.
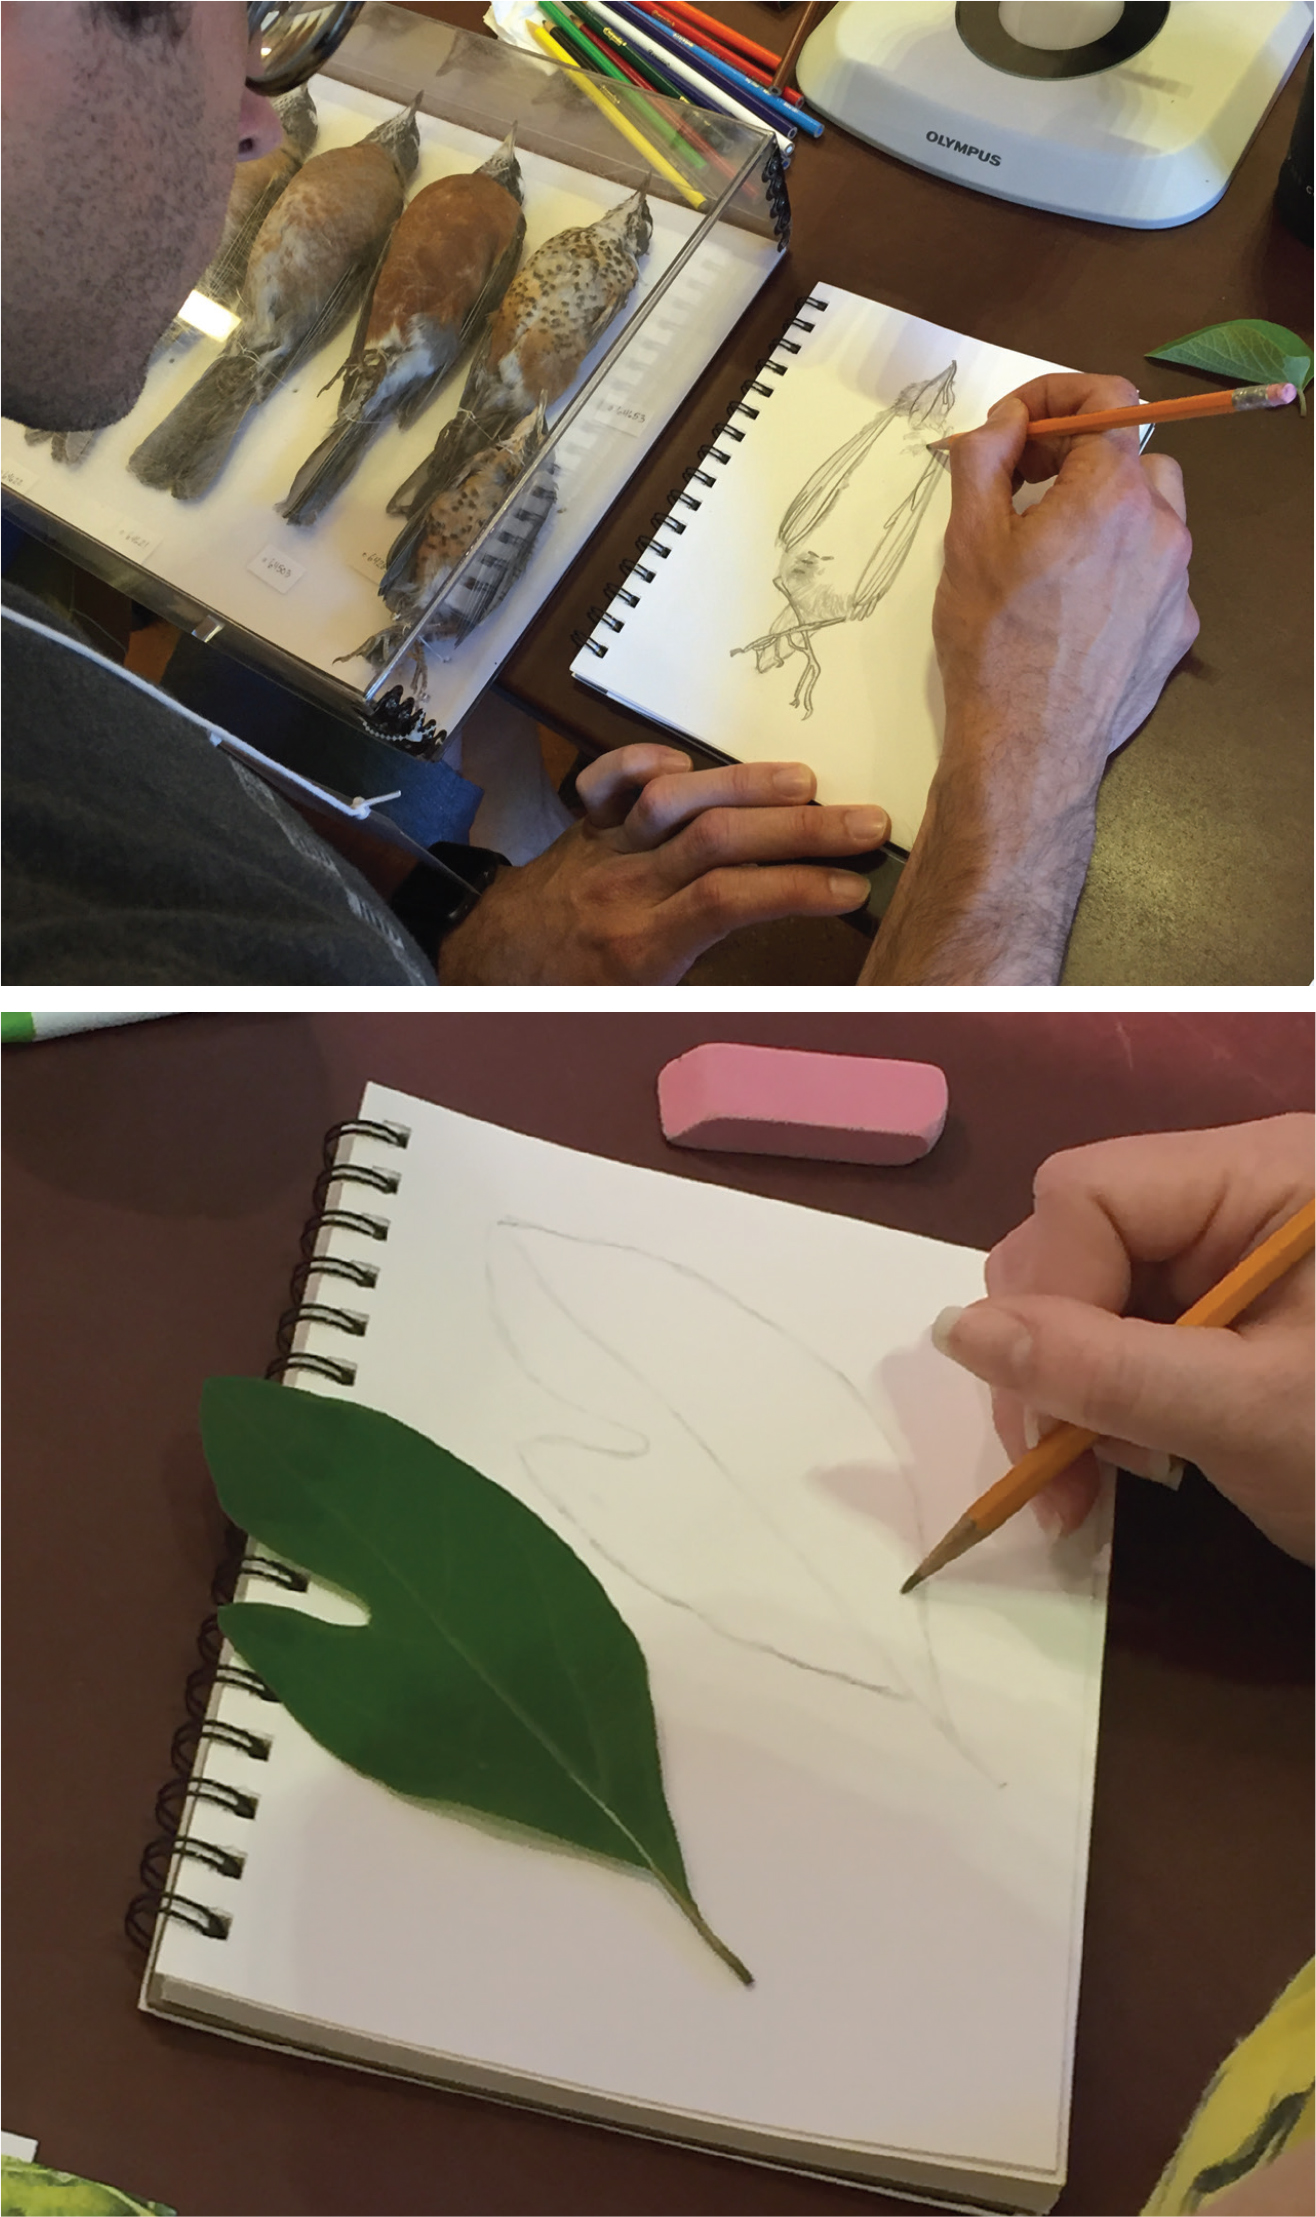
Participants try their hand at drawing from museum specimens.
Smithsonian, used with permission
Conclusion
The program host collected responses from the teachers about their experiences during the workshop. The question they were asked was: “What ideas or concepts did you take away from Wednesday’s session?”
- I absolutely loved this session! It helped me in understanding drawing objects in biology to reluctant students.
- This was an incredibly useful session, I’d like to do more work around illustrating all scientific processes.
- I liked the 10 second drawing. This is a good “icebreaker” to build confidence with student drawing.
Taking it to the Classroom
Observing activities that are fun will help motivate a greater commitment to the task of learning in the science classroom. Make it a game. There are several other activities published and posted on the internet that will serve this purpose (see Resources.)
Repeated practice through the act of drawing trains the brain to focus, to become more adept at observation. Encourage drawing in the science classroom. On a regular basis, drawing can help students retain information for each lesson, thereby improving learning.
Try having each student learn to keep a field journal and make entries every day. Consider linking drawing practice with a life science lesson, for instance. The subject matter is easily obtainable and costs nothing; just walk outside. Compare similar life forms, various types of leaves, tree branching habits; draw insects from various angles, leg sections, body variation, different types of antennae. Name the parts alongside the drawings. Describe them in writing. Have students invent their own insects and write in their journals how their insects live, what they eat, how they move.
Observation exercises in the science classroom further boost learning in expansive ways. Drawing is a great way to get them involved. It’s active engagement in learning by doing and it’s also a personal contribution to the class. Start students as soon as possible—the younger, the better.
Teaching Strategies Elementary