
feature
Discovering the Formation of Sound
First-grade students explore sound through a variety of makeshift instruments

Source of Sound
Although the following content is more complex than that required for a first-grade student to know, it is helpful for the teacher to be familiar with concepts of sound for those students with extra questions or needing a challenge!
Sound is produced when vibrations travel through objects and create sound waves. We are able to hear sound waves because the vibrations continue to travel into our eardrums, causing them to vibrate as well. Sound can vary depending on the size and speed of a sound wave (Dorling Kindersley 2020).
The volume, or loudness, of sound can be altered when you increase or decrease the amount of space between sound waves. The space between sound waves is known as amplitude (National Center for Families Learning 2020). For example, guitars have strings that are plucked to create vibrations that travel and produce sound. If a string is plucked with a lot of energy and strength, then the sound will be loud. This is because the distance between each wave is bigger. On the other hand, if a guitar string is plucked gently then the sound it creates will be softer. This is because the distance between each sound wave is smaller (National Center for Families Learning 2020).
The pitch (how high or low a sound is) can be changed by the speed of a sound wave. The quicker a vibration travels, the higher pitched the sound will be. The slower a vibration travels, the lower pitched the sound will be. Let’s look at a guitar again for an example. Guitars have strings of various lengths. If a longer sting is plucked, then it will create a lower pitched noise because the vibrations have a longer distance to travel. The longer travel distance will consequently cause the sound wave to move slower. In contrast, the shorter guitar strings will create a higher pitched sound because it has a shorter distance to travel. The shorter distance allows the sound wave to travel faster (National Center for Families Learning 2020).
When exploring and introducing sound, students need to understand that there are multiple aspects that work together to create sound. In this single class lesson, students work through an inquiry-based challenge to discover how sound can be manipulated and altered through these elements. By investigating how to manipulate sound, students are able to build on the idea that vibrating matter can make sound (1-PS4-1, NGSS Lead States 2013).
Investigation of Sounds, Pitch, and Volume
To begin the lesson, I asked the students to give examples of objects and organisms that make a noise. Students offered examples of different things that make sound, such as dogs, music, and cars. I displayed pictures of a cat, alarm clock, microwave, and trumpet on the board and played their accompanying sounds. To gauge their preexisting knowledge about the creation of sound, I asked the students what makes sound. Expected responses were about the dog’s bark or car’s horn, and other noises that the children heard at home or outside.
To further engage the inquiry process, students were presented with a challenge. Before the task began, I gave the instructions of the challenge (Figure 1). Students were challenged to work together in their groups and experiment with their instrument to make different sounds, volumes, and pitches. The instruments include the following: egg shakers, miniature plastic guitar, plastic microphone, and a hand-clapper (Figure 2). The instruments chosen for this challenge were purchased from a local discount “dollar” store. Students were reminded that instruments must remain in their hands or on the desks at all times, and to make sure to be respectful of their groupmates’ space when manipulating the instruments. Students were encouraged to take turns, listen to one another, and ask questions of their peers (CSS.ELA-Literacy.SL.1.1), reinforcing their collaboration skills (NGAC and CCSSO 2010).
Data collection sheet.
Investigating Sounds, Pitch, and Volume
Instructions:
In your group, it is your group’s mission to investigate the instrument you are given. Work together to answer the following questions:
- What is the instrument?
- Can the instrument make sound? If yes, how does it make sound?
- Can you change the sound of the instrument? If so, how?
Data Collection:
What is the instrument? __________________
|
Questions |
YES/NO |
If yes, how? |
|
Can the instrument make sound? |
|
|
|
Can you change the sound of the instrument? |
|
|
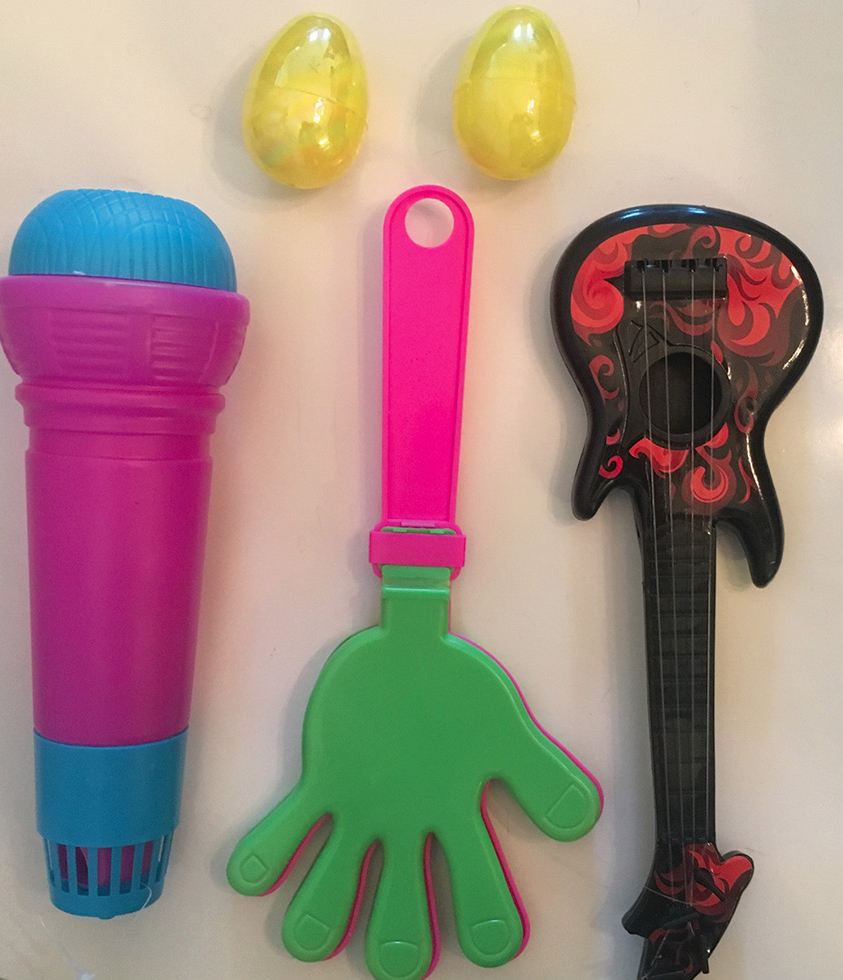
Instruments used in the activity.
The challenge required students to work in groups of three to four, which could easily be adjusted depending on class size or student needs. For this activity, the groups were determined by students’ science skill levels. The variety of skill in each group allowed for students to learn through their peers and helped students that may struggle at first with making connections between the instrument and sound.
After each group received their instrument, the challenge began. Students were instructed to use three minutes to explore the sounds and characteristics of the sounds made by their instrument. After the three-minute timer went off, each group shared their findings with the class. Students described to the class their instrument and demonstrated the sound that it made. The microphone group explained to the class that the sound with this instrument was their voice. When they spoke into the microphone, they could alter the pitch and volume of the sound by the way they altered their voice. The egg shaker group demonstrated the different noises that the shakers made. The plastic eggs were filled with either dry spaghetti noodles or with pinto beans. The pitch of the shaker depended on what the shaker was filled with—spaghetti noodles created a higher pitch while pinto beans make a lower pitch. Students were able to recognize the difference in how high or low the sound was (the pitch). I recorded the student observations on an anchor chart. On the anchor chart, I had a picture of each instrument. Beside the image, I wrote a bulleted list of the characteristics described by each group. The students identified the instrument, what it was made of, and how it produced the sound (strings, amplification of vocal cords through microphone, shaking of eggs). The anchor chart provided a visual comparison of each instrument and how it worked.
Explaining the Characteristics of Sound
As the students explained their initial discoveries of their instruments to the class, it allowed the students to learn from one another. Students made observations about the difference in sound that each instrument made. Additionally, students explained how their instrument made sound and demonstrated the sound. Using the words provided by the students to describe their instruments, I connected these concepts back to the vocabulary words pitch, volume, and sound. I explained that when the students were describing the differences between the pinto beans and spaghetti noodles, for example, they were actually describing the sound’s pitch. The group discussed how sounds are actually created through vibrations. I explained that sound travels through waves, which we can’t usually see. To give them a visual representation, I used a tuning fork to create sound, and dipped it in a tray of water so that the students could see the water move. When the sound waves move, it causes our eardrums to vibrate, creating the noise that we hear as the vibrations send a message to our brains. Higher pitched noises result from fast-moving vibrations, while lower pitched noises have slower vibrations.
Experimenting With Sound
Once students had a basic understanding of sound, I asked the students to think back to their instruments and evaluate how the pitch and volume of their instrument could be altered. The students briefly discussed the question with their group for two minutes. Then, I had each group verbally share how the pitch and volume of their instrument could be altered and why. After students shared their hypotheses, they regrouped to test their theories, allowing the opportunity to plan and carry out an investigation, a science and engineering practice, as well as the opportunity to investigate cause and effect (NGSS Lead States 2013). To alter the pitch of the egg shakers, students had to make the connection between the material inside the shaker and the pitch that it made. Spaghetti noodles made a higher pitch because it was a small, narrow surface that the sound waves vibrated on. Pinto beans made a lower pitch because they have a large and wide surface. To alter the volume of the egg shakers, students had to change their speed and force of their shaking motion. In order to create a loud sound, the shakers had to be shaken hard and fast. Similarly, to alter the volume of the hand-clapper, students had to move it faster. The speed and force that the students put into their motion causes the vibrations of the sound waves to change, which then causes the sound it produces to be different. To change the volume and pitch of the plastic guitar, students needed to examine the pitch that each string made. Additionally, the amount of force they put into plucking a string would affect the volume of the sound that it created. Last, students with the microphone needed to make the connection between the sound of their vocal cords and how they amplify within the microphone. Students had the control to change the pitch and volume of the sound by the way that they spoke into the microphone.
Assessing Student Understanding
Students’ background knowledge was assessed at the beginning of the lesson by having the students identify familiar sounds and explain what created those sounds. At the first-grade level, students’ understanding of sound is constructed through what they have experienced. Therefore, expected student responses for the creation of sound are limited to the instrument, creature, or object. For example, a student said that the cat is creating the sound by purring.
As I began to explore the true formation of sound with the students, I informally assessed them by observation. I did this by listening to the students’ descriptions and explanations of the instruments. Later, I continued to informally assess through observation when students were challenged to hypothesize and test how their instrument’s pitch and volume can be altered. Written assessment of the students’ understanding was conducted by having the students complete the data collection handout. I was able to review the written responses and gauge the students’ grasp of the concept.
At the conclusion of the lesson, students were formally assessed through an exit slip (See Supplementary Resources). On the exit slip, students were required to identify two things that they learned during the lesson. Additionally, students had to match the following terms to their definitions: vibration, pitch, volume. I was able to review the exit slips to gauge the overall effectiveness of the lesson.
Opportunities for Differentiation
There are several opportunities for teachers to differentiate this lesson to meet the needs of their students. The teacher might have the students use an application such as SeeSaw or FlipGrid to record the information from the data sheet with a video; they can also model how they manipulated the instrument to change the sound. The exit slip may be adjusted to include one thing learned during the lesson, rather than two. The teacher might also vary the types of instruments used, depending on student interests and needs.
Conclusion
Sound is all around us, and it is one of our key senses. Students need to learn about sound and how it is created in order to have a better understanding about the world around them. Through this lesson, students were able to explore different instruments and experiment with the sounds that they make. Students will now be actively aware of the sounds around them and will continue to explore them. ●
Supplemental Resources
Download the exit slip at https://bit.ly/36L0uqh
Although the following content is more complex than that required for a first-grade student to know, it is helpful for the teacher to be familiar with concepts of sound for those students with extra questions or needing a challenge!
Michelle Andrus is a fourth-grade teacher at Maryville Elementary in Georgetown, South Carolina. Catherine Scott (cscott1@coastal.edu) is an associate professor at Coastal Carolina University in Conway, South Carolina.
Inquiry Interdisciplinary Physical Science Early Childhood Elementary Grade 1