
feature
Moon, Math, and Literacy
Interdisciplinary connections through a space science study in preschool
Science and Children—November/December 2022 (Volume 60, Issue 2)
By Candi Clevinger, Alissa A. Lange, and Elizabeth Schock
Sometimes when we look up into the night sky we see a big glowing ball; other times when we look up into the night sky we might see a tiny sliver of the Moon. One of the first things that children notice about the sky is the Moon. This can lead to questions such as, “Is the Moon only out at night? Does it follow me? Is it made of cheese?” These questions can be a springboard to a study of space science that confronts misconceptions, builds knowledge, and supports children’s curiosity about the world around them.
Children can see the Moon with the naked eye and often are curious about the Moon and other objects in the sky, like the Sun and the stars. However, there is sometimes disagreement in early childhood about whether studying space is appropriate for young children. Our view is that space science certainly can be a great fit in preschool, especially when we focus on children’s interests and on what is observable.
The series of connected learning experiences that we describe formed an integrated unit of study that incorporated math, science, art, and literacy. This study engaged children who had different learning preferences. Some children adored a creative make-your-own constellation, while others were drawn to a crater science investigation. In this article, we introduce our space science study—starting with how children’s interests were at the core—outlining interdisciplinary links and including a detailed description of the making Moon craters activity.
Starting the Space Study
This study of space took place in a prekindergarten classroom with children ranging from 3 to 5 years of age but could easily be adapted for older children. The lessons were part of a thematic unit on outer space that developed after the class had learned about weather. During the topic of weather, one child announced that the Sun was in space. This led to the discussion of what other objects we find in outer space, initiating many investigations. The Next Generation Science Standards cover grades K–12, so our lessons are an introduction to the disciplinary core idea of Earth and Space Science and a foundation that students can build on as they get older.
Throughout our study, we discovered many things, such as:
- The Sun does not move in the sky as students had originally thought
- Earth spins and orbits the Sun
- Earth has something called gravity that keeps us from floating around
- The Moon and stars can usually be seen at night.
Children questioned how rockets move, what would happen if we touched the Sun, if astronauts can see a rainbow from Earth when they are in outer space, how do astronauts stay on the Moon and not float away, and how people managed to get pictures of the Moon. This led to a deep dive into the Moon, its surface, and craters.
Making Moon Craters
The Moon may be visible during the day and night, but it is most easily noticed in a night sky. Looking at the Moon on a clear night, we can see different coloration in the Moon’s surface. A closer look at the Moon reveals that some of this coloration is made from craters.
We devoted two days to our lesson on the Moon. On the first day, we read Man on the Moon by Anastasia Suen (2002), a story about the first humans landing on the Moon. We discussed the surface of the Moon and looked at pictures of the Moon. When investigating Moon craters, we began by making “Moon sand.” There are a variety of recipes for homemade Moon sand found online, the one we chose called for 5 cups of play sand, 2 cups of cornstarch, and a cup of water. The children assisted in measuring out the ingredients. Our measuring cup only went to 4 cups, which gave us the chance to throw in some addition as well.
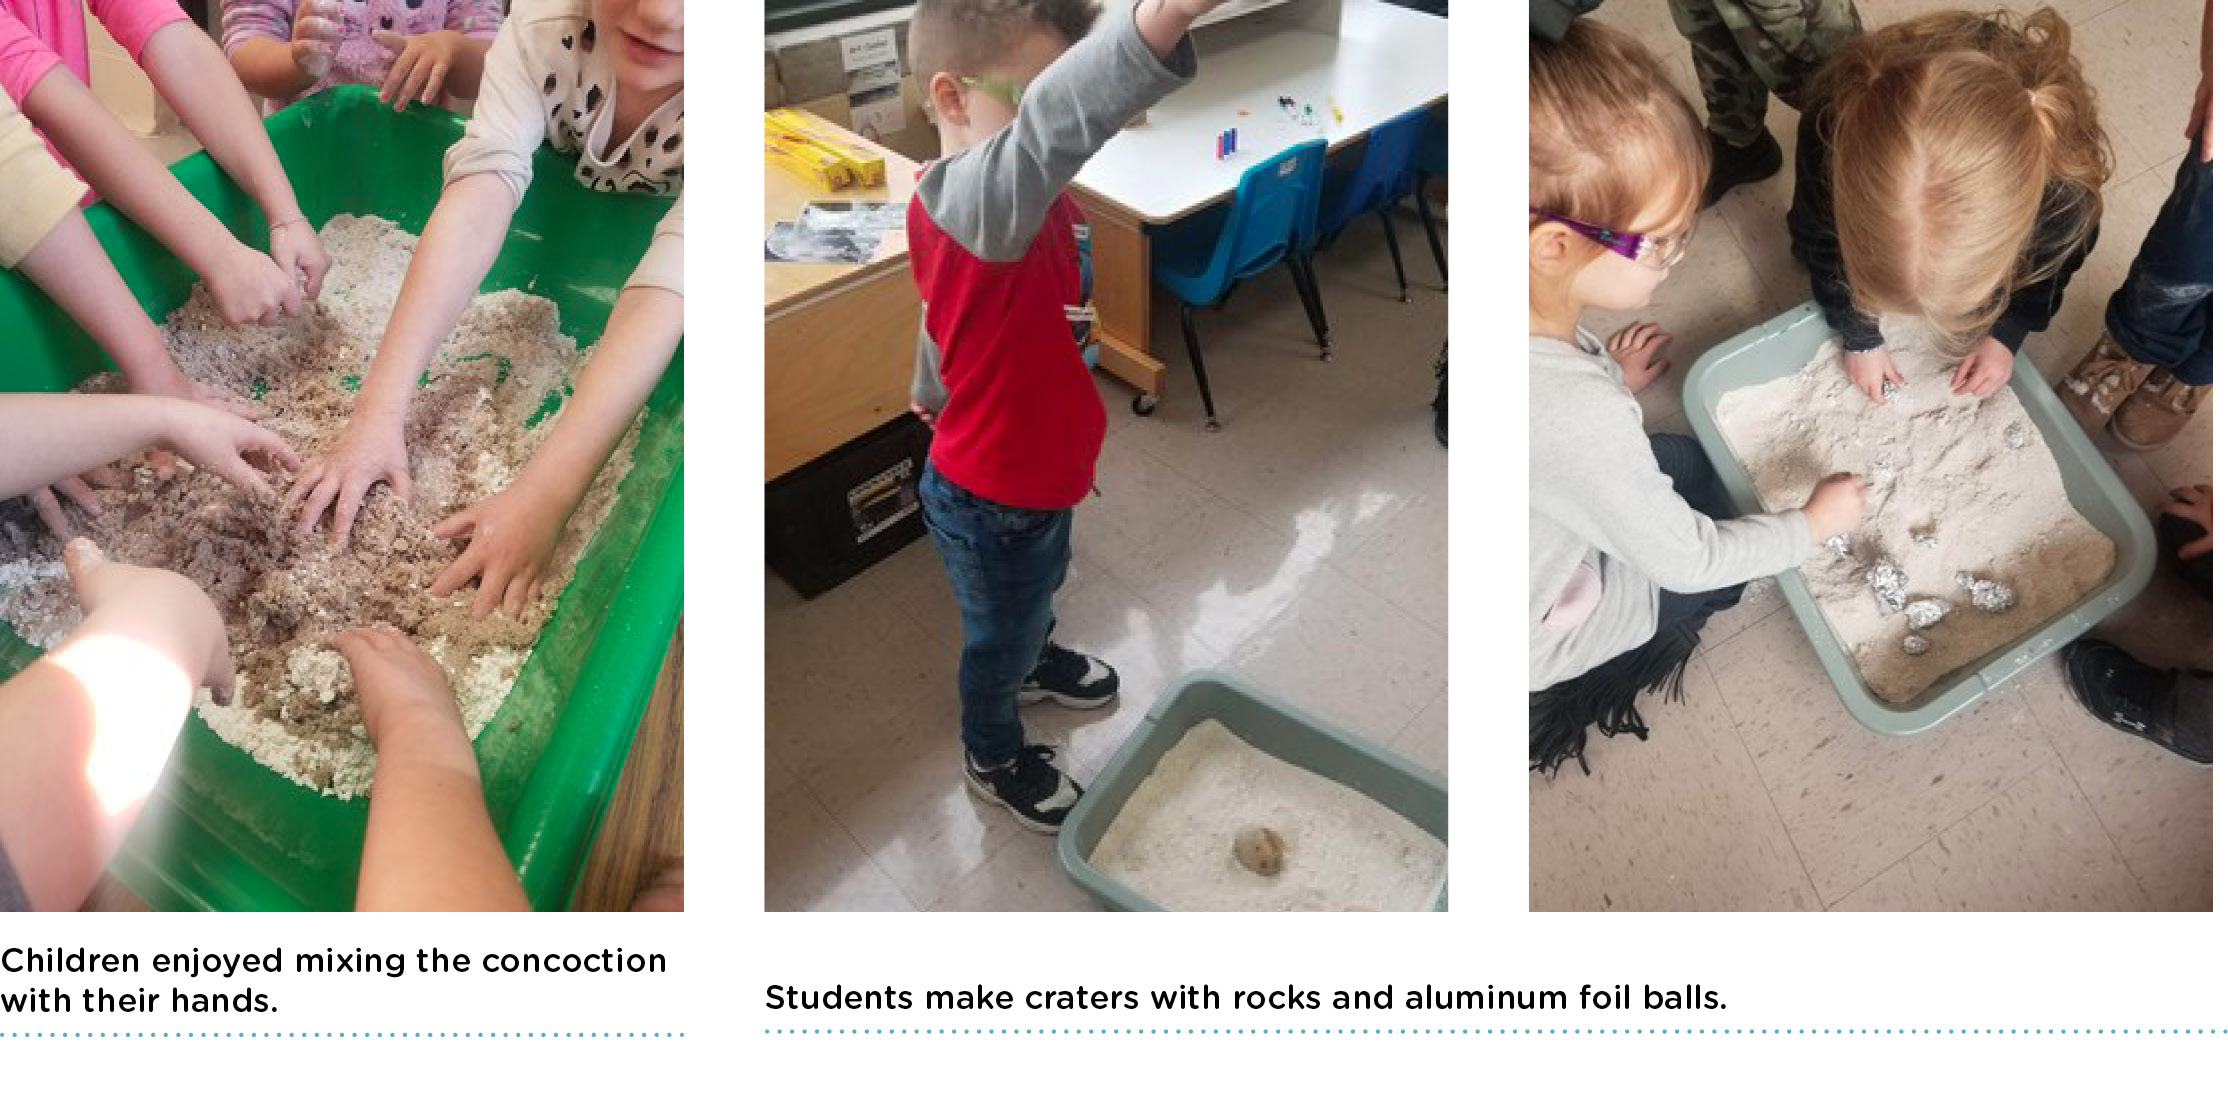
All ingredients were placed in a large bin. For safety precautions, children washed their hands before and after taking part in the Moon sand activity. Children gathered around and enjoyed mixing the concoction with their hands. We talked about the properties of the Moon sand for a bit, how the texture was grainy like sand, and how it held its shape when pressed or squeezed. This was an important key to making Moon craters.
In the planning stages of this lesson, the teacher experimented with various materials to make the craters. Play sand, flour, Kinetic Sand, and the homemade Moon and sand were tested. The Kinetic Sand would not hold its shape long enough to compare the craters or to measure them. The sand and flour each made pronounced craters but was a bit dusty, and the craters were easily brushed away while picking up the rocks. The Moon sand proved to be the best material for this investigation.
The following day, we discussed the Moon in greater detail. We revisited our pictures of the Moon from Earth and of the surface of the Moon and discussed what we saw in the pictures. The children noticed the variation of colors in the Moon, holes all over the Moon’s surface, and noticed footprints left behind from the astronauts. This led to the discussion of the atmosphere of the Moon, how it does not have weather like we have on Earth, and that the footprints stay because there is no wind to blow them away or cover them up. The conversation introduced many new words to the children’s vocabulary: craters, asteroids, meteors, and atmosphere. Looking at the pictures more in depth led to more questions: “What is the Moon made of? Why is the Moon different colors? How did the holes get there? What does it feel like on the Moon?” We then read What the Moon is Like by Franklyn M. Branley (2000), which helped answer some of the children’s questions. We used the Moon sand that we made the previous day to explore how the craters came to be.
Safety
Before the hands-on activities, the teacher discussed safety with the children. The teacher discussed handling the rocks safely with the children and the importance of keeping the Moon sand inside the container. Because we were using real rocks, some were rather large, and it was important that the children understood to stand back and not get in the way of the rocks falling. As an extra measure of caution, only one child was allowed to participate in creating the craters at a time. The remainder of the students stood at a distance. Additionally, the container of Moon sand was placed on the floor to allow everyone to see and to keep the children from climbing on the table to get a better view. The teacher ensured that children washed their hands with soap and water before and after using shared supplies. Children also wore protective eyewear when creating the craters in the Moon sand. Child-sized safety glasses were worn to protect their eyes in case the Moon sand flew up as the rocks landed in the sand.
Prediction, Investigation, Math
The teacher began the investigation by asking children to make a prediction about what would happen when the rocks were dropped into the Moon sand. Children shared a variety of answers: “The rocks will splat. They will make a hole. The rocks will sink.” The teacher chose two rocks of differing size and weight to begin the experiment, held each rock about two feet from the ground, and carefully dropped each rock into the Moon sand. The teacher then retrieved the rocks and allowed the children to see the results. The children noticed the rocks made indentions in the Moon sand and that the smaller rock made a smaller indention. Each child then took a turn with the rocks.
We talked about what would happen if we held the rocks up higher. Everyone then had another turn holding the rocks at chin height, which differed for each child. As the rocks hit the Moon sand, we observed how the sand would seem to form a ring around the larger rocks, creating a splatter of Moon sand around the rock. We then compared it to the craters in the real Moon, noticing how some craters were much larger than others. Connecting to what we read earlier that morning, the children concluded that the large craters on the Moon were formed by larger meteors. Once our experiment in our small group was complete, the children were given aluminum foil to make their own meteors in various sizes. The aluminum foil rocks were then placed in the Moon sand for the children to have self-exploration later in the day.
Assessments for the activities were informal and formative in nature. The teacher checked for understanding throughout the activities through observation and by asking questions related to the topic and activity. For example, “If we had an even larger sphere, what size would the ‘crater’ be in our Moon surface model?” As needed, scaffolds could be added, such as, “Would a larger rock leave a larger or smaller crater?” In addition, more formal assessments could be added to assess understanding of crater sizes or impact speeds. Children could match images of different-sized craters with images of different sized rocks, or “asteroids.” A checklist could be used to assess whether children could explain that a larger crater on the Moon could be caused by (1) a stronger force (impact) of the asteroid (rock), or (2) a larger rock (asteroid). Assessments could also be added to evaluate vocabulary understanding or comprehension of informal math measurement through basic diameter comparisons.
To extend this lesson even further, children could use standard and nonstandard units of measurement to measure and compare the craters made from different heights and even from different velocities. For older children, a scale could be used to weigh the rocks so they could correlate the weight of the rocks to the depth of the crater. Children could also record their findings in a science journal to incorporate writing. Children could experiment with a variety of materials for making the surface of the Moon, such as flour, modeling clay, or plain sand, as well as a variety of materials for their meteors, such as aluminum foil, rubber balls, and rocks of varying density. Children could also zoom in to the surface of the Moon using Google Moon, or they could use their new knowledge of the Moon and its surface to create their own Moon models.
Home Connection
A great home connection is to do some tracking of the Moon at night using a Moon journal. Try to view the Moon at the same time each night. Have children make a drawing or get a parent’s help to draw. An extension is to see if children can spot the Moon during the day. Find a time you can see the Moon in the daytime and take children outside to observe. (Safety Note: Be sure the Sun is not nearby, so children can look into the sky safely.) Children will discover that the Moon is not only out at night. It is just easier to see at night.
More Science and Play
Our study extended far beyond the Moon. Children were interested in the movement of Earth and the Sun, so we used flashlights to mimic these movements. Flashlights were shown on objects at different angles to model the Sun rising and setting, which made a variety of shadows. Students used a flashlight and globe to reenact the Sun shining as Earth rotated on its axis, changing from day to night. Children made connections between weather on Earth and the Moon and how the craters—and footprints of humans who have walked on the Moon—are still there because the wind does not blow them away. There is no wind!
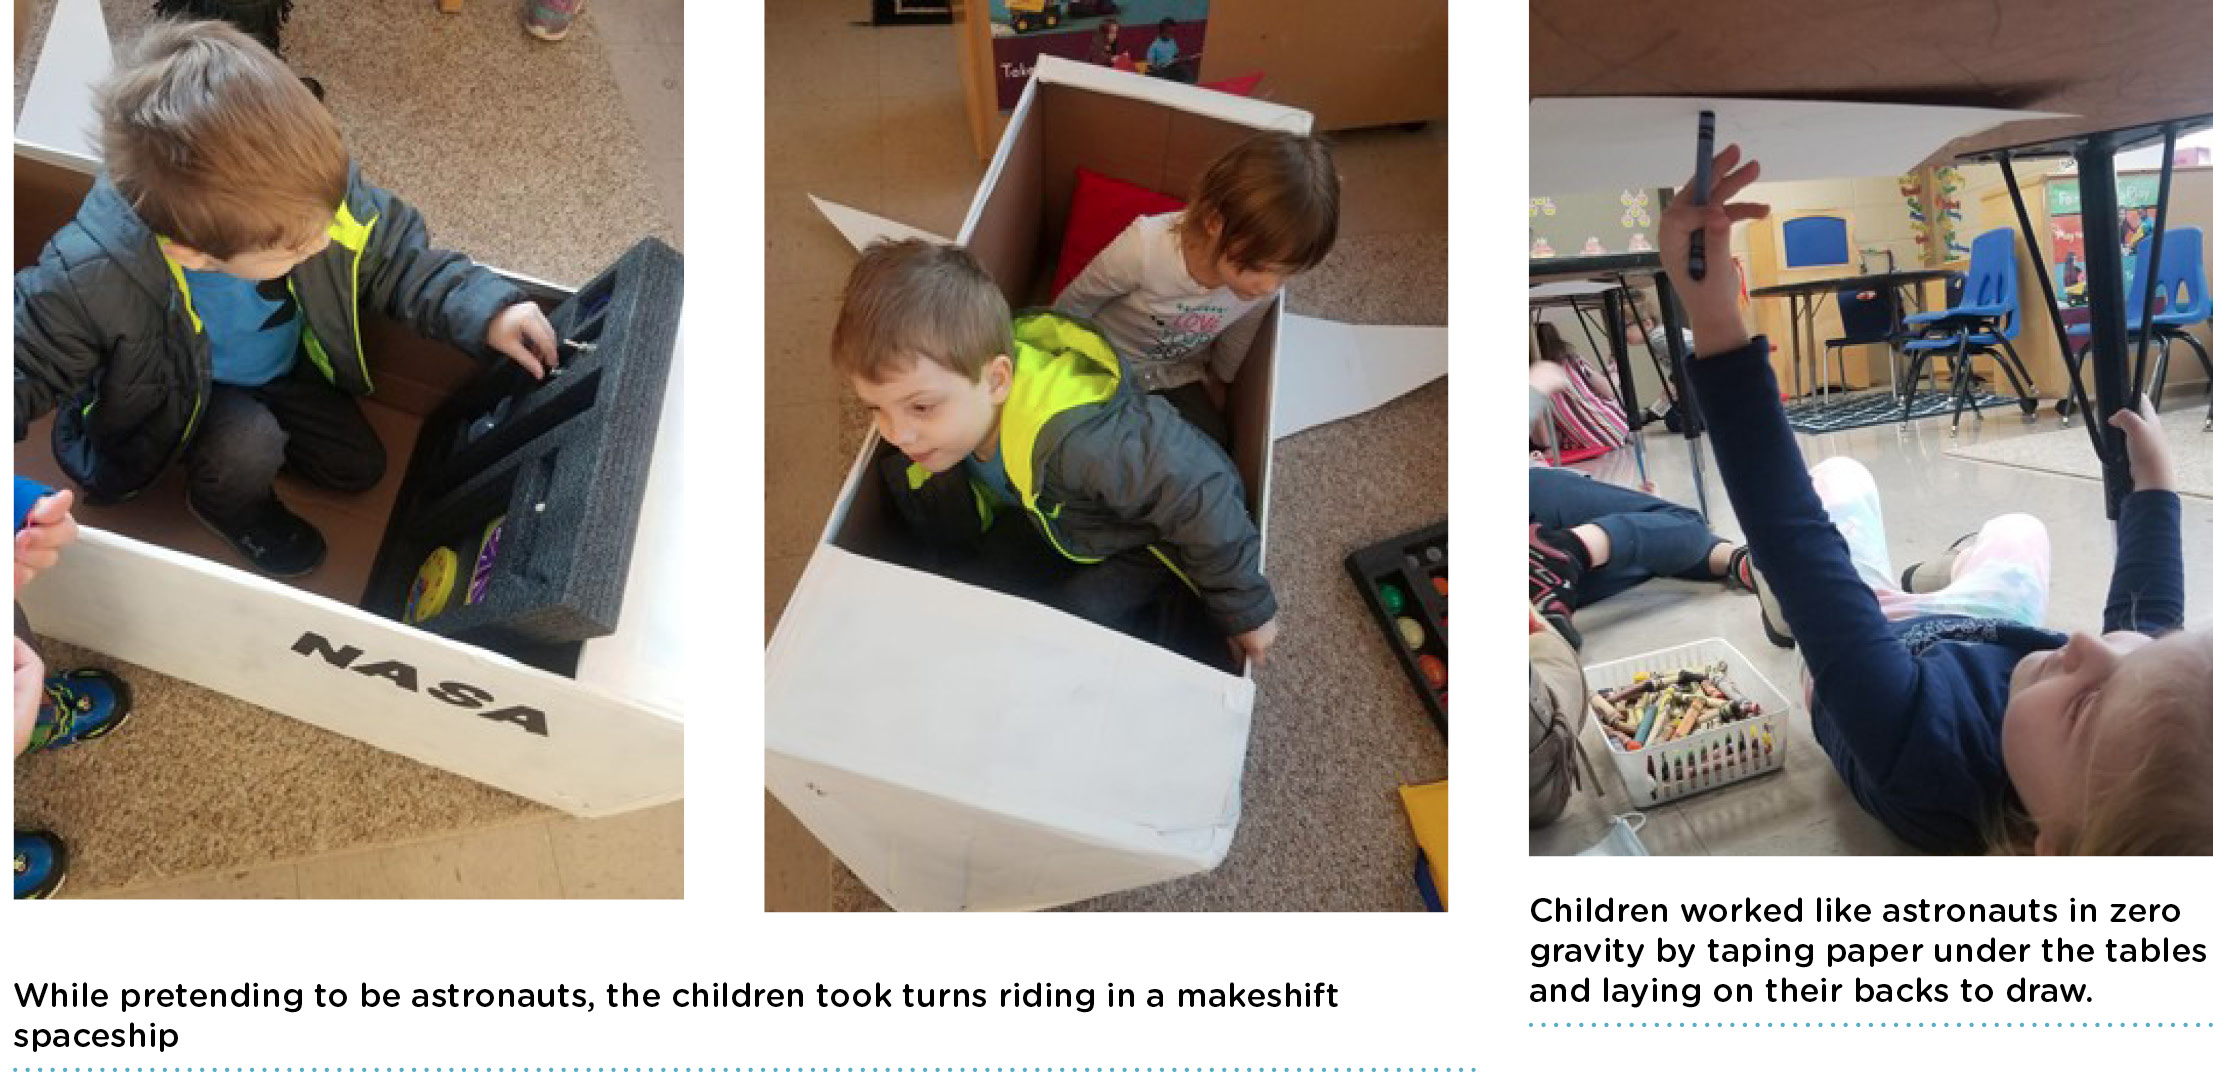
Children at this age often bring their new knowledge into their play, such as during centers. To foster this stage of learning, we pretended to be astronauts and took turns riding in our makeshift spaceship, pretending to launch rockets from the control panel in Houston, and flying our spaceship to the Moon. Once landing our pretend spacecraft on the Moon, we collected rocks to take back to our rock box laboratory on Earth.
Literacy and Art Links
The space science study involved many opportunities for authentic early literacy and language links. Children read books, used new space science vocabulary, and represented their predictions and observations using writing or drawing. These writing and documenting experiences were expanded into creative drawing as well. Children worked like astronauts in zero gravity by taping paper under the tables and laying on their backs to draw. Children were also given star stickers and construction paper to create pictures of their own constellations.
Wrapping Up
Hands-on, minds-on experiences such as this classroom enjoyed around space science have the potential to hook children’s interests in science and stick with them for years to come. The children began with observations and questions they had, and the teacher built from there. Through these connections, children made meaningful use of literacy, math, and art to understand the science and to confront misconceptions. Foundational classroom activities like this can be the start of a lifelong interest in and appreciation of the world all around us—and the universe above.
Print Resources
Branley, F.M. 2000. What the Moon is like. HarperCollins.
Cooper, F. 2013. Max and the tag-along Moon. Philomel Books.
McDonald, J. 2016. Solar system. Doubleday Books.
Mitton, T., and A. Park. 2000. Roaring rockets. Kingfisher.
Shetterly, M.L., and L. Freeman. 2018. Hidden figures. HarperCollins.
Suen, A. 2002. Man on the Moon. Puffin Books.
Online Resources
Google Moon: https://www.google.com/Moon
NASA SpacePlace: https://spaceplace.nasa.gov/menu/parents-and-educators
Solar System Exploration: https://solarsystem.nasa.gov/planets/saturn/overview
U.S. Naval Observatory: https://www.cnmoc.usff.navy.mil/usno/
Candi Clevinger is a first-grade teacher at South Central Elementary School in Washington County, Tennessee. Alissa A. Lange (langea@etsu.edu) is the coauthor of Teaching STEM in the Preschool Classroom: Big Ideas for 3-to-5 Year Olds and director of the Early Childhood STEM Lab at East Tennessee State University. Elizabeth Schock is a kindergarten teacher at Meeting Street Schools in Charleston, South Carolina.
Astronomy Earth & Space Science Interdisciplinary Literacy Elementary