Middle School | Daily Do
Why Do We See Two Mountain Ranges?
Crosscutting Concepts Is Lesson Plan NGSS Phenomena Physical Science Science and Engineering Practices Three-Dimensional Learning Middle School Grades 6-8
Sensemaking Checklist


Introduction
In today’s task, Why do we see two mountain ranges?, students engage in science and engineering practices and use the thinking tools of patterns and cause and effect to make sense of science ideas about reflection.
This activity can be used to support student sensemaking in the Daily Do Can water change the path of light?
Experience the Phenomenon
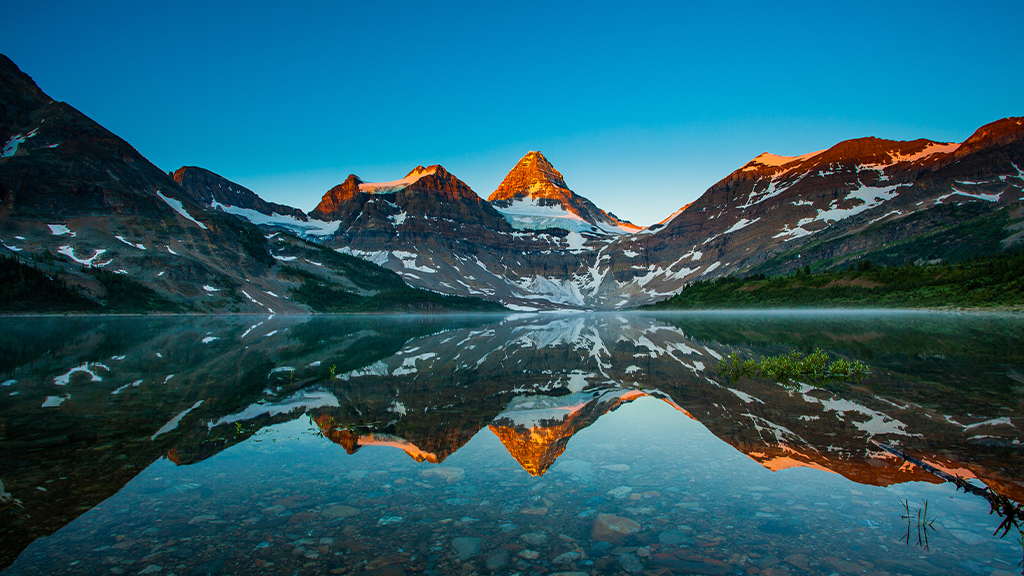
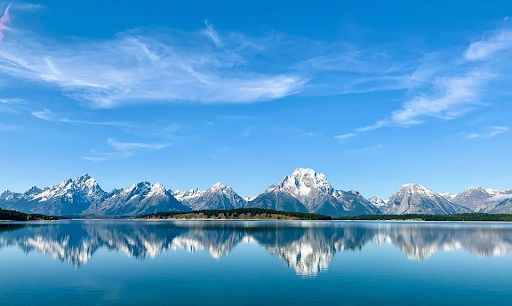
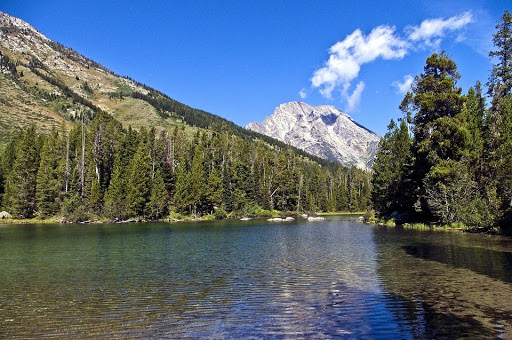
Share the first image (mountain range) with students and ask them to make and record observations. Then introduce the second image (close-up of single mountain peak from same mountain range behind low hill) and ask them to identify similarities and differences in the way the image of the mountain(s) appears in the water.
Next, ask students, “What experiences do you have that might help you think about his phenomenon?” Give students two or three minutes of independent thinking time; ask students to record their ideas. Consider pairing students or assigning them to small groups to share their experiences with each other. Ask students to tell why the pictures make them think about the experience they are sharing. As you move around the room you might ask:
- Can you say more about that? (Students are talking about rough and smooth surfaces.)
- What do you mean when you say the word “_____”? (Students are talking about reflection, absorbing, etc.)
- What do you think you would see when the surface was smoother/rougher? ...when the sunlight is brighter/dimmer? ....when the sun is higher in the sky/lower in the sky? (Students bring up the idea/part of the idea while sharing.)
After students have shared their ideas with their group, ask them to individually create a model to explain why the images of the mountain(s) in the water aren’t the same (why we don’t see a “clear” image in both instances). You may have to redirect students to think about the images of the mountains if the difference in scale between the pictures is distracting. As you move around the room, you might ask:
- What are the parts (components) of the model?
- What is the source of the light?
- How are you representing light? Why?
- How are the light and mountain interacting? How are the light and water interacting? How can you represent this interaction on your model?
- Does all the light bounce/reflect (use the students’ language) from the mountain/water? How can you show this on your model?
- Where does the light move after it strikes the mountains? After it strikes the water?
- How does your model explain why we see a clearer image in this instance (first picture) and a blurrier image (second picture) in this instance?
Have students return to their small groups. Ask them to share their models and note similarities and differences between their model and group members’ models. If you are working remotely, consider asking students to upload a picture of their model to a shared workspace (e.g.,Google Slides, Jamboard, Padlet) so they can see each other’s models. Tell each group to create a list of similarities and differences to share with the class.
Create a class list of similarities and differences. You might use a check mark to note similarities and differences common between groups (each time the same similarity is shared, add a check mark). Students will likely disagree on how the light is interacting with water in each instance. They may also disagree on the amount of light leaving/bouncing/reflecting off the mountain and water (all, most, some) and how to represent this on their models.
Say to students, “We disagree on how the light off the mountain interacts with the different water surfaces causing one image to be clearer than the other. Should we investigate this first?”
Investigation
Materials (per student group)
- flashlight
- stuffed animal or other object (to “spotlight”)
- 6-8 aluminum foil squares (about 10 cm x 10 cm)
You might say to students, “I heard many of you say the water surface in the first picture was like a mirror. Would someone say more about that?” Many students will likely describe a mirror as something that bounces or reflects light. You may want to ask, “What do you mean when you say the word reflection?” and “Who has a different way of thinking about reflection?” Consider recording students’ ideas about reflection on the board (or other public space) and representing reflection in words and picture/symbols.
Place one of the stuffed animals or other fun object in the middle of the room and ask, “Let’s use this [object] to represent the observer in our model. How can we design an investigation to find out if smoother surfaces (materials) reflect light onto our observer better than rougher surfaces?” Show students the materials available to them.
Note: Students may not have included an observer (eye or camera lens) in their initial model. This is OK. They will likely add an observer when they revise their models.
Give students independent thinking time to record ideas for an investigation. Then, ask them to return to their small groups. You might give each student in the group one minute to share their ideas, and then 30 seconds for the group to ask questions. When all the students in the group have shared their ideas, ask them to collaboratively design an investigation to find out if some surfaces reflect light onto the “observer” better than others. As you move from group to group, ask students,
- How will you keep the test fair?
- What data will you collect?
- How will you measure and record data?
- How might you quantify your measurements?
Most students will likely plan to “spotlight” the observer (reflect light from the flashlight onto the observer using the different materials) and compare the brightness of the spotlight created by the different materials. To quantify their data, students may suggest measuring the width of the spot or using an app to measure the brightness (light intensity) of the spotlight. You may choose to first approve groups’ investigation plans before providing them material. Allow groups time to conduct their investigations.
Ask students to identify patterns in their data. Bring the class back together and ask them to share the patterns they identified. Students will likely share that smoother surfaces reflect more light onto the observer than rougher surfaces (rougher surfaces “spread out” the light). Ask students, “Why does a rougher surface cause the light to spread out?” Ask students to think independently and record their ideas using words, pictures, and/or symbols. Then, ask them to turn to a partner and share their ideas.
Bring the class back together again. Draw a smooth surface and a rough surface on the board (or other public space). Ask students to share their idea or their partner’s idea about how a rough surface causes light to spread out. You might ask before capturing their ideas on the model, “How should I represent a ray of light? How should I show which direction the light is moving?” As you add students’ ideas to the model, ask students to show agreement/disagreement using the “thumbs up/thumbs down” strategy.
Revise Models
Return to the two different images of the mountain range; give students independent thinking time to revise their models explaining why the image of the mountain in the water is clearer in one image than the other. You might ask them to note changes/additions in a different color pencil (or to use a highlighter to indicate additions/changes) and cite relevant evidence from their data to support each addition/change.
Bring the class back together and refer them back to the list of similarities and differences created at the start of the lesson. Ask students, “Based on your partner conversations, is there anything we should remove from the differences column? Why do you say so?” Students will likely say we agree on how the smooth surface reflects light and how the rough surface reflects light. They may also add that they agree an observer needs to be included in the model. If preconceptions were included on the similarities list, ask students if anything on the similarities list should be removed and why. It’s OK if preconceptions persist; use them to inform future lessons.
Ask students, “What are we still not in agreement about?” Students will likely say the amount of light that is reflected from the mountain and/or water compared to the amount of light shining on/striking them. Say to students, “I hear we are wondering if all the light striking a surface is reflected. Should we investigate that next?”
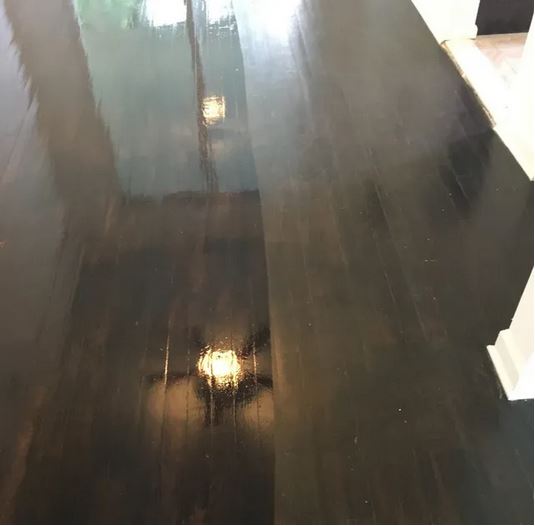
You might consider presenting the following image and prompt as a formative assessment. “The right side of the floor has been worn by people walking on it and you can’t see the overhead lights’ reflections. The left side of the floor has been waxed and you can see the reflection of the overhead lights. Why can’t you see the image of the overhead lights on both sides of the floor?” Encourage students to use words, pictures, and images to explain their thinking.