
Engineering Encounters
The Sixth E
Incorporating engineering into a 5E learning cycle on matter
Science and Children—February 2020 (Volume 57, Issue 6)
By William Thornburgh, Justin McFadden, and Brian Robinson
The Next Generation Science Standards (NGSS) have placed an emphasis on the incorporation of engineering practices into K–12 science instruction. When teachers (and other non-engineers) hear the word engineering, it can lead immediately to thinking about building things or mathematics. Although real-world engineers do build things and use mathematics, the engineering practices identified in the NGSS are the basic skills that students can develop to “think” like an engineer. When these practices are introduced at a young age and strengthened over time through the learning progressions of the NGSS, students have the opportunity to obtain the skills that real engineers (and scientists) use in everyday work.
This article details a sequence of physical science lessons that would be part of teaching matter in the second-grade classroom. The goals of these lessons are: (a) to be hands-on and have students actively involved (e.g., observing, experimenting, recording data); (b) to incorporate engineering practices; (c) to have students communicating with their peers; and (d) to connect individual components of the lessons with a real-world problem, asking students to think about their results and design a solution to an identified problem (like engineers do!).
Teachers will need to consider the amount of daily/weekly time they can dedicate to science instruction, but we have included timeline suggestions. Also consider how your students are working through and understanding the individual components of the lessons and how to best formatively assess students when making decisions about moving forward. At the conclusion of this sequence of lessons, students will have completed an engineering design process.
Implementing the Lesson
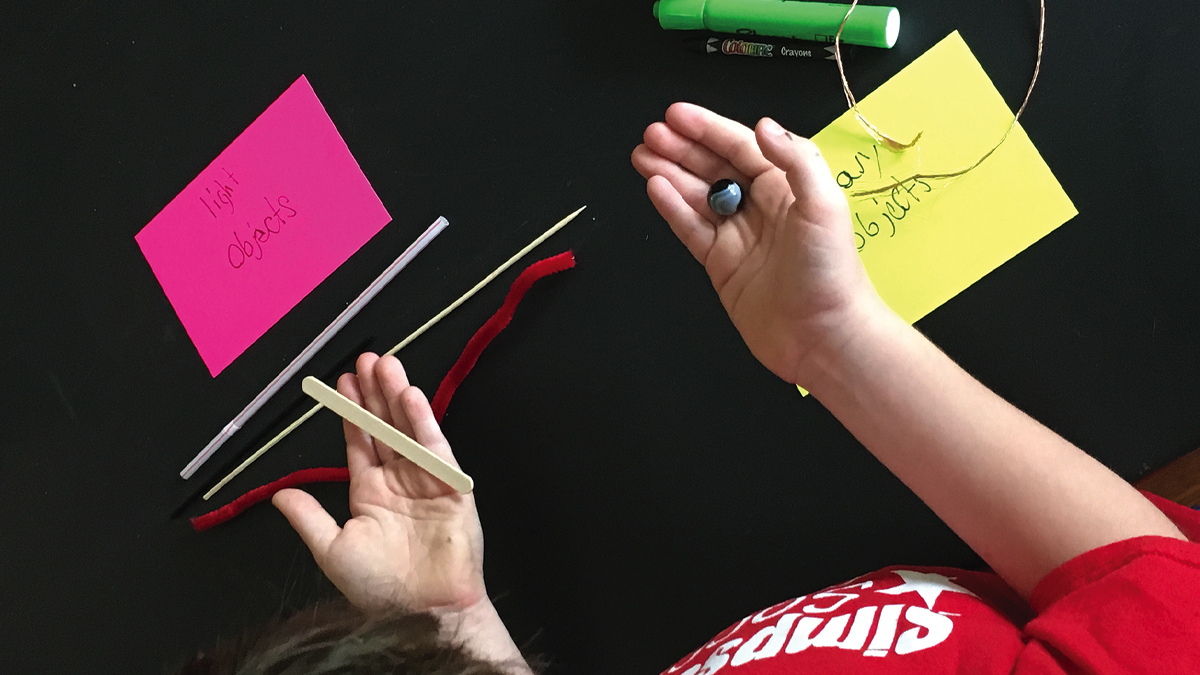
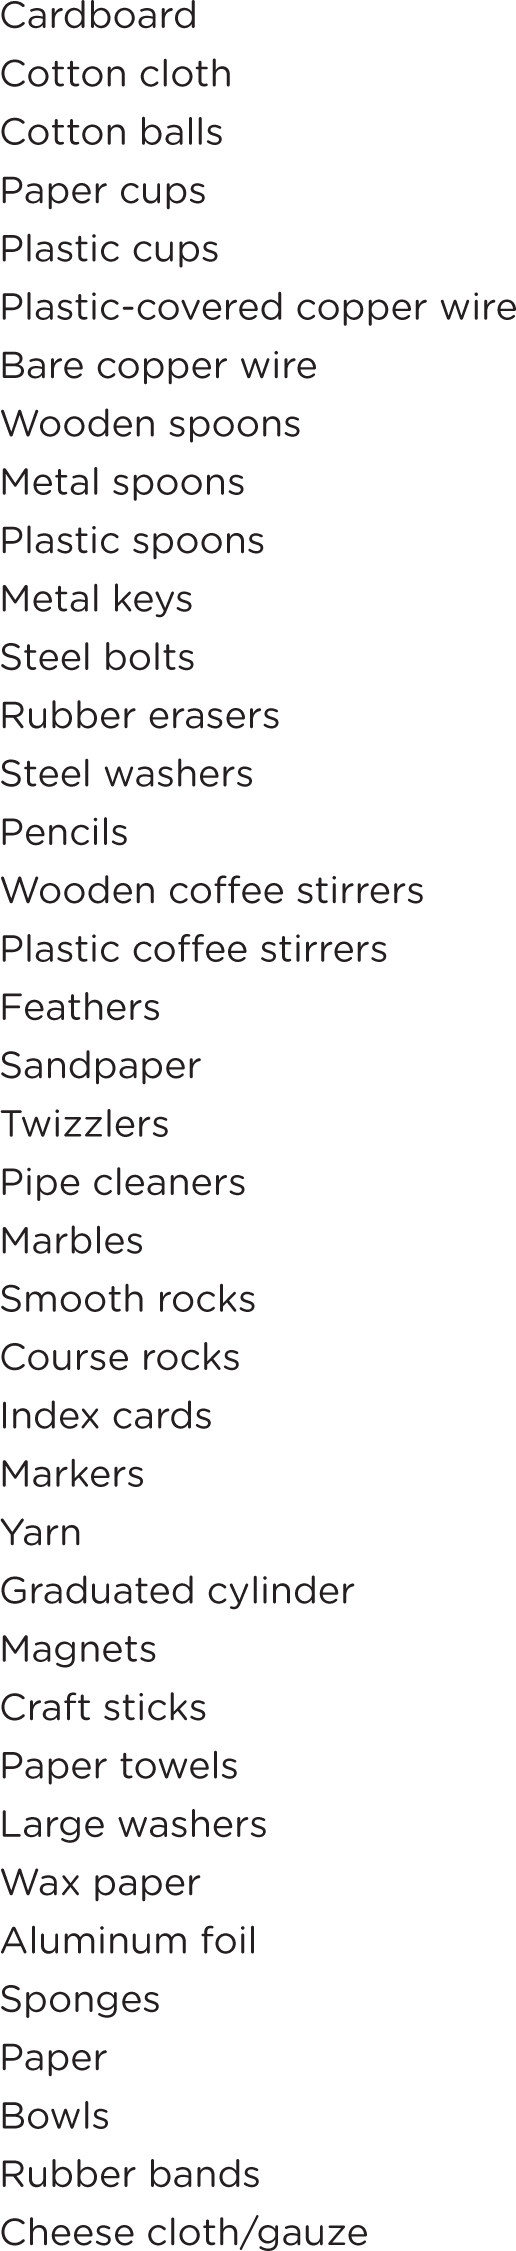
This series of lessons will begin with the whole class. Eventually, small groups of students will be formed and a container of various items distributed to each group (Figure 1); however, teachers are free to replace or remove materials based on budget, time constraints, and knowledge of their students.
List of materials.
For additional ideas, Adams and Feagin (2017) describe a similar lesson with first-grade students, but the aim of that article was to have students eventually classify matter by its extensive and intensive properties to demonstrate performance expectation, 2-PS1-1. Extensive physical properties of materials are dependent on sample size and are helpful for describing an object but not helpful in identifying it because the sample size may change (e.g., mass, volume, length). Intensive physical properties of materials are independent of the sample size and generally, disclose some essential quality of a substance, despite the amount of the sample size.
This sequence of lessons clusters that same performance expectation and builds on it to have second-grade students demonstrate 2-PS1-2, which involves analyzing data obtained from testing different materials to determine which materials have the properties that are best suited for an intended purpose (see Connecting to the Standards). The 5E instructional model (Bybee et al. 2006) guided our planning and activities during this sequence of lessons.
Engage (30 Minutes)
A demonstration was conducted with commonly used objects relevant to students’ lives, namely balls from various sports (e.g., baseball, basketball, golf). This demonstration acted as an introduction to the classification of materials by their observable properties and testing materials to determine which materials have properties suited for an intended purpose.
The sports balls were shown and passed out so students could feel each one—observing how the properties of each ball are similar or different. Remind students that unlike in PE class, they will not be throwing balls but using them for a science activity. Students were encouraged to think about the different sports and how they are played. This helped students make connections between the properties of each ball (the material) and how sports are played (the intended purpose).
An optional activity for having students visualize a specific sports ball, its properties, and the construction process is to show them a video of how the ball is made (e.g., a baseball). In addition to asking students to only think about the sport, a supplemental activity could be to show students video examples of various sports being played in case students are unfamiliar with the sport (e.g., Ping-Pong).
Example questions asked during the Engage phase included: “Which sport needs a ball that bounces?” “Which sport needs a ball that travels a long distance?” “Why would a golf ball travel farther than a Ping-Pongball?” Students completed a turn and talk with their elbow buddy for each question and their answers acted as a formative assessment for students’ thinking and knowledge.
Students began to notice that similar sized sports balls were very different (e.g., tennis ball and baseball; golf ball and Ping-Pong ball) and began asking why they “behaved” differently when they look alike. With teacher guidance, this whole-group discussion helped students understand that the properties of sports balls are important to understand based on the goal of each sport. This was an appropriate place to introduce the following terms and students were asked to record each in their science journal:
Matter is the stuff around you.
Objects are things that can be seen or touched.
Materials are the matter from which a thing is or can be made.
Properties are qualities or characteristics of something.
Students eventually recognized that objects are made of certain materials and those materials have specific properties, which leads to objects having a certain function.
Explore and Explain (45 Minutes to 1 Hour)
The exploration activity began by placing students into small groups of three or four. We based groups on cluster seating, but teachers should use their favorite grouping strategy (e.g., skill level, by interests, equal gender representation, or social/collaborative grouping). Each group was given a container of objects containing various materials (see Figure 2), and students were asked to complete a classification challenge by placing each object into a group based on similar characteristics. Initially, student groups were allowed to come up with any number of groups possible based on the criteria that they established. To facilitate student thinking, we provided a few classification examples but did not tell the class what characteristics to use. During this activity, remind students that objects should remain on the desk at all times.
Student classification.
When students finished classifying all objects, they were asked to explain how groups were created for their classmates. Students observed the similarities and differences in how objects were classified by other groups, and we noted that the majority of students grouped objects by their extensive properties, which is common for students in this age range (Krnel, Glazar, and Watson 2003). The extensive properties most commonly used were weight, size, and length, which makes sense because they are easily observable for students of this age. For the few groups who classified objects using intensive properties, color and hardness were the properties identified. Since there was no specified purpose for classifying the objects in a certain way, students’ actions were not right or wrong… just different based on their thinking.
Once groups had an opportunity to share with classmates, the objects were re-sorted using different criteria than the first time. We encouraged students to use new and different ideas than those already shared by their classmates—we hoped to move students beyond extensive properties and into intensive properties (e.g., color, hardness, density). While the groups reclassified objects, we moved throughout the room, listened to conversations, and asked strategic questions (using “why and how” questions) for on-the-spot formative assessment. If groups did not have new ideas about how to classify objects or were not able to include all objects within their classification system, we reminded them of the earlier discussion about matter, objects, materials, and properties, and that they could return to their science journal for assistance.
Again, students were given an opportunity to explain how objects were reclassified to the whole group (e.g., based on similar observable properties (extensive or intensive) or having the same function). By giving multiple chances at grouping objects based on similar characteristics, we were able to formatively assess students’ understanding of observable properties and the changes that were made from the first attempt to the second attempt (or third or more depending on your students and your goals) at classifying objects.
Although there were many classification systems students came up with, below is an example of a change in classification system from the first attempt to the second attempt. Compared to using the location where objects would be found (a criterion identified by Russell, Longden, and McGuigan 1998) in their original grouping, this group was able to re-classify objects based on hardness in their second classification attempt.
Classification attempt #1:
Objects found in school— cardboard, plastic spoon, rubber eraser, pencil, pipe cleaners, index cards, markers, yarn, craft sticks, rubber bands
Objects found at home— cloth, cotton balls, cheese cloth/gauze, cups, wires, wooden and metal spoons, keys, bolts, washers, paper towels, coffee stirrers, sandpaper, wax paper, aluminum foil, sponge, bowls
Objects we play with— feathers, Twizzlers, marbles, smooth and coarse rocks
Classification attempt #2:
Objects that are soft— cotton cloth, cotton balls, rubber erasers, feathers, Twizzlers, pipe cleaners, yarn, paper towel, sponge, rubber band
Objects that are in between— cardboard, cups, index cards, wax paper, aluminum foil, paper bowls, plastic stirrer, sandpaper
Objects that are hard— copper wires, spoons, keys, bolts, washers, pencil, wooden stirrer, marbles, rocks, markers, craft stick
Elaborate (30–45 Minutes)
We wanted to push students beyond sports balls and household objects by showing images and videos of various real-world objects (e.g., a bridge). Students were less familiar with certain objects and/or what they were made of, but they worked together and provided reasonable explanations based on knowledge gained during the first 3Es of this sequence of lessons. Students were asked to think about their surroundings and what they have observed outside of school, write answers in their journal, and do a think-pair-share with the student sitting across the table. Then, they were asked to do the following: (a) identify the object and how it’s used; (b) describe what the object is made of; and (c) explain why it’s important to be made a certain way, or describe why it can’t be made of a different type of material. The students named five objects that had a certain function and described their structure OR named objects that have certain functions and described a structure that would not work for its intended purpose.
Examples of students’ answers included:
“Windows are made of glass (or plastic) so you can see through them.”
“Windows are not made of wood because you would not be able to look through them.”
“A spoon is made of metal (or plastic or wood) so it doesn’t break when you are using it to pick up food.”
“A spoon can’t be made of butter because it would be too soft, or melt, and not be able to pick up food.”
After a first round of student work, we provided other examples (e.g., a desk, dishes, bones) to further elaborate on the real world and elicit student thinking. Evaluating students’ examples and their explanations provided another formative assessment of students’ understanding of observable properties of objects, matter, and material properties. During this second round of examples, students were able to correctly identify that objects needed to be made of certain materials so they could be used the right way. For instance:
“Bones in the leg are hard and strong because they have to support us.”
“A desk has to be hard or it can be difficult to write/draw on. I tried drawing with a pillow under my paper and my pencil went through the paper.”
“I was using a Styrofoam plate at a cookout during the summer— when I put my hamburger on it, the plate flipped over and I dropped my food. So plates need to be able to hold the food you put on it.”
Engineering (20–30 Minutes/Per Station)
Further engagement with this content and elaboration to deepen understanding occurred through a series of laboratory stations where students tested different materials to determine which have properties best suited for an intended purpose. This is where the transition between performance expectations (2-PS1-1 and 2-PS1-2) occurred and the engineering design process was introduced. We wanted our students to experience an activity where they could conduct experimentation, collect data, and then use their data to design a prototype of a product, like engineers would in the real world.
The laboratory stations can take many forms and teachers should make decisions based on their needs and what properties they want students to test. This is also an area where open or guided inquiry would put experimental design in the hands of students, or teachers could explain to students how they want the testing to be conducted. At this age-level, most teachers would likely prefer to give explicit instructions to students rather than allow true inquiry, which is why we would suggest trying each activity in advance and determining how to best complete each station most efficiently before students are asked to do the same.
The following are stations that we used, but these could be adapted depending on teachers’ goals, available materials, and how students will be assessed. Based on our evaluation activity, the three characteristics tested by students were strength, absorbency, and flexibility. Safety goggles for eye protection should be worn during station work, and students should be reminded to not play with (or eat) materials.
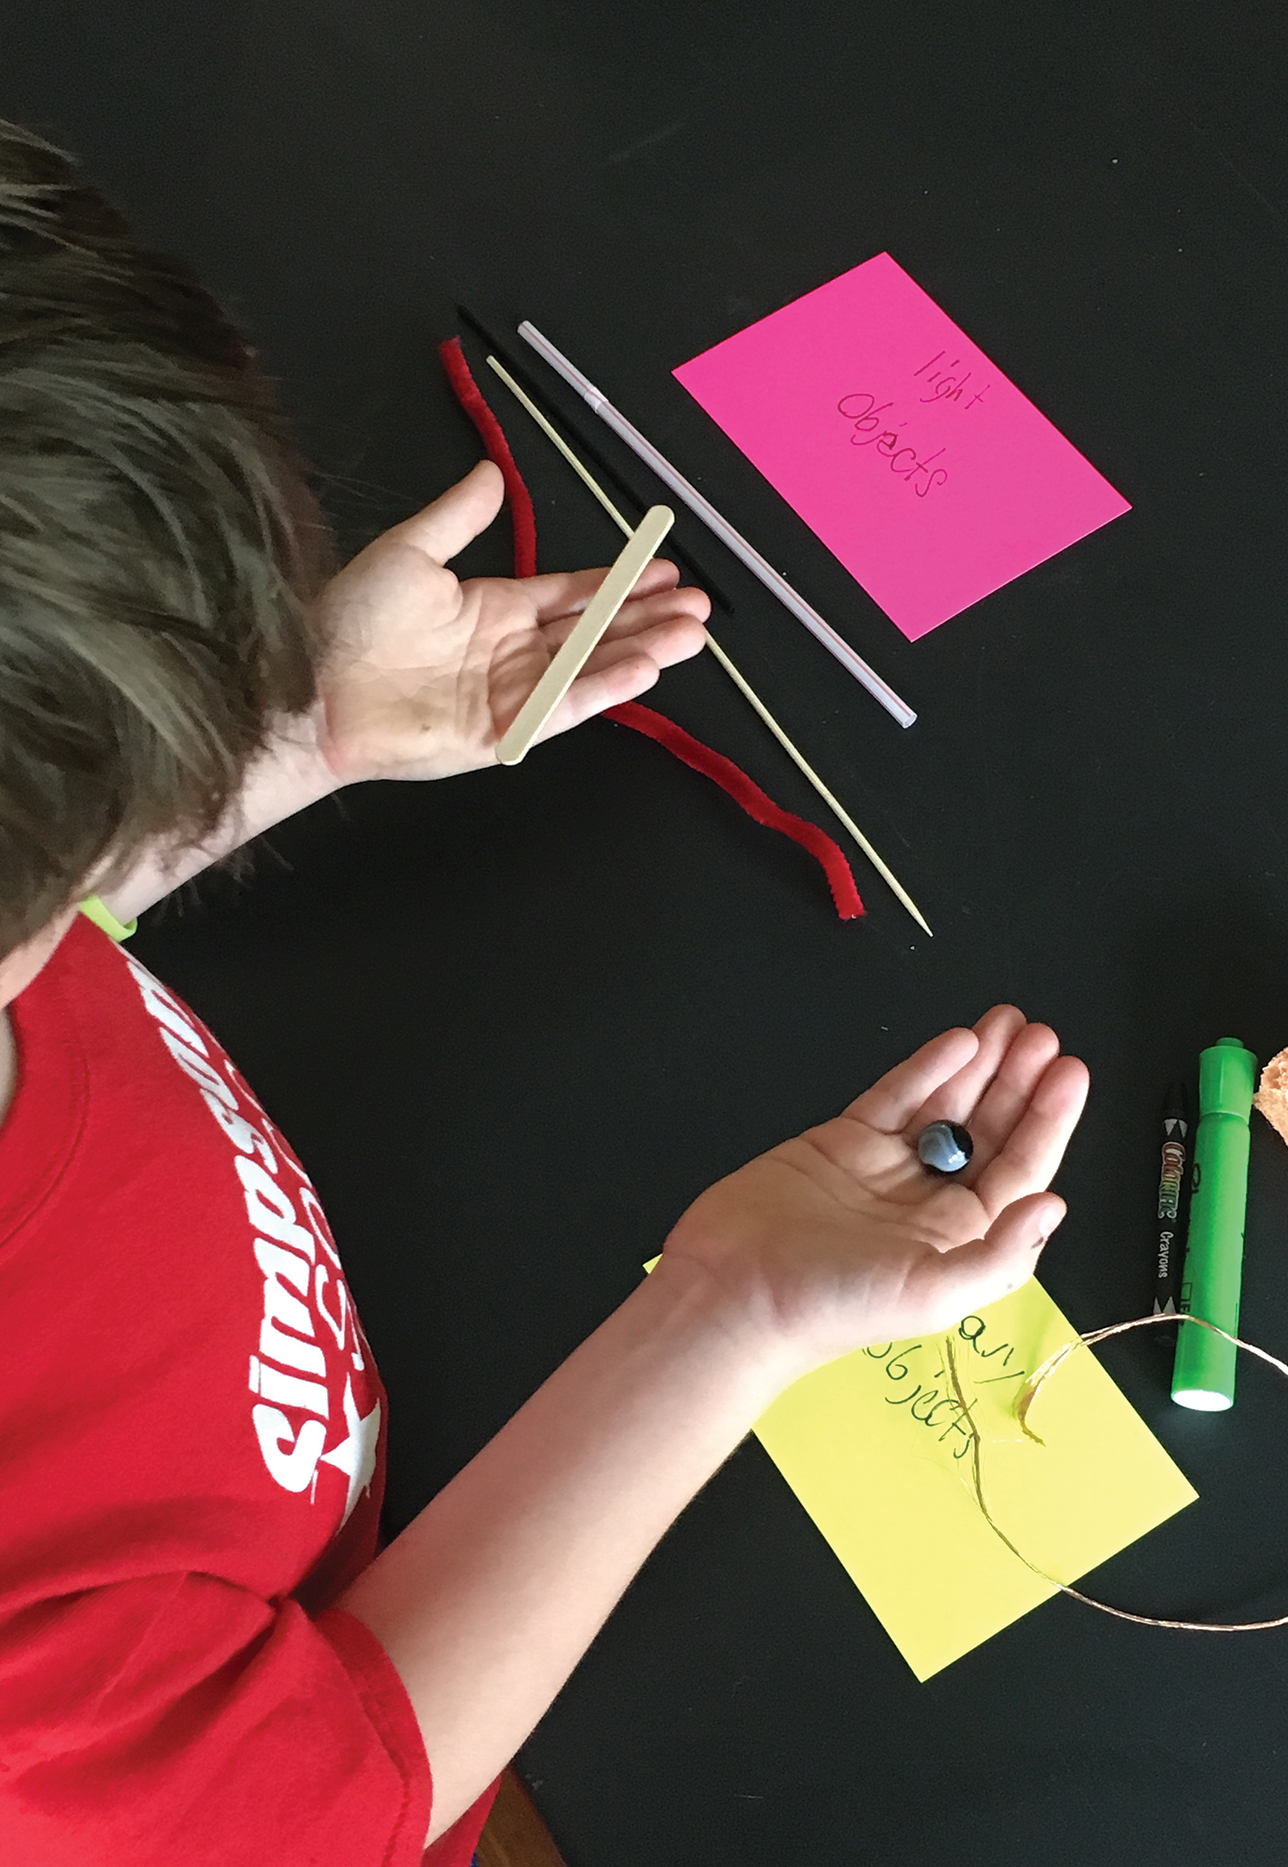
Station 1:
Property = Strength
Materials used = cotton ball, plastic coffee stirrer, wooden coffee stirrer, metal spoon, plastic spoon, popsicle stick, paper towel, cardboard, index card, Twizzlers, metal washers
Station testing overview = Students tested strength by creating a bridge with materials between two large books (or stacks of books) while placing weight (the steel washers) on top of the bridge (Figure 3).
Strength testing.
Students recorded how many washers were held and reported what happened to the object when too many washers were added.
Students also tested the material’s strength by pulling apart or bending the items, recording what happened when each item was tested.
Station result = Students realized through testing and data collection that certain materials have greater strength than others.
Station 2:
Property = Flexibility
Materials used = pipe cleaner, copper wire, plastic-covered copper wire, wooden coffee stirrer, Twizzlers, rubber band, rubber eraser, yarn, craft stick
Station testing overview = Students handled and tested all materials and observed what happened when they are bent, twisted, pulled, or wrapped around something. Students recorded all observations as they tested each object.
Station result = Students realized through testing that certain materials had greater flexibility than other materials.
Station 3:
Property = Absorbency
Materials used = paper towel, cheese cloth/gauze, wax paper, index card, cardboard, cotton cloth, feathers, sandpaper, aluminum foil, sponge
Station testing overview = Students used a pipette to add drops of water onto each material, observed what happened to the water as it landed on the material, and counted the number of drops until the material did not absorb the water or until it broke through the material.
As they tested each object, students recorded all data onto a data sheet supplied (see NSTA Connection). Teachers could also have students record station data into a science notebook or directly onto a whiteboard in the classroom.
Station result = Students realized through testing and data collection that certain materials were more absorbent than others.
Evaluate (45 Minutes–1 Hour)
With students now having a better understanding of the properties of materials, how certain materials are better for an intended purpose, and how to gain firsthand knowledge through testing and data collection, it was time to connect everything and have students complete the engineering design process (up to redesign due to time constraints).
An authentic, engineering-specific assessment (Figure 4) was created for students to think like an engineer and allow us to assess students’ learning. We chose to unveil and read the assessment to students after all testing stations were completed, but teachers could introduce the client letter before students complete the testing stations. This type of assessment should not be printed and handed out to lower elementary students, which is why we read and displayed the letter to facilitate student thinking. The client letter was meant to look “formal” and we wanted students to take the testing seriously with the end goal in mind. After first reading the letter to the class, break it down to the basics and use teacher language so students understand what it is asking them to do. Our rubric for this assessment has not been included because rubrics would look differently based on the number of properties that are tested, the size of the student groups, and how much time was dedicated to learning during this instructional sequence.
Engineering assessment.
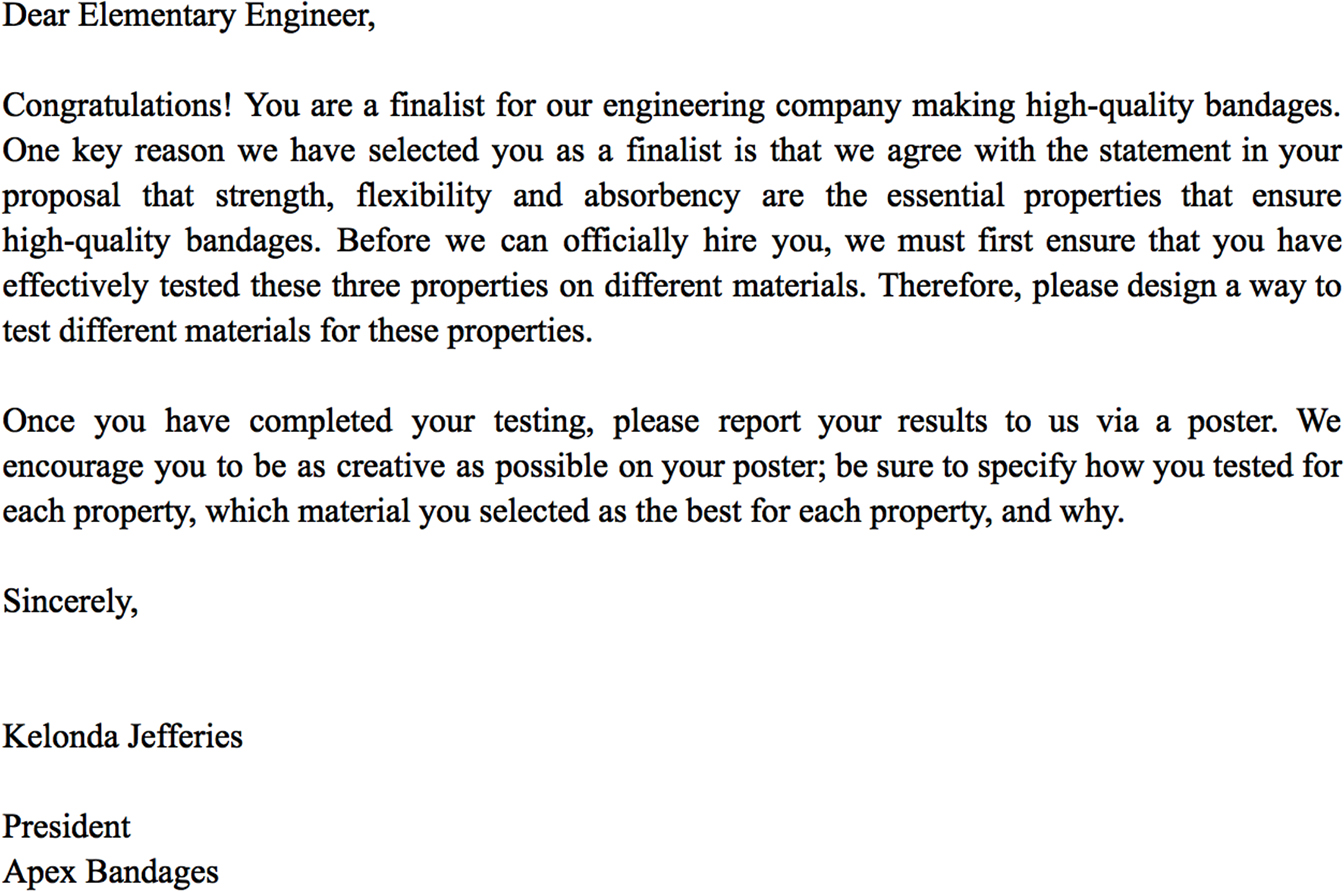
Students evaluated data, chose the best materials based on what they tested, and then were asked to explain through words and pictures how they would construct the best bandage possible using their data to support their design. In this case, the designed bandage prototype was conceptual and students were not asked to construct an actual product. With other assessment ideas, it would be possible (and encouraged) to have students build a physical model to test and retest during the engineering design process. Once student groups shared their bandage ideas, we wrapped up the activity by asking: “Are you happy with your design?” and “After this discussion, could you design a better bandage?”
This activity was valuable in helping students recognize: (1) there are alternative designs that could meet the specifications based on the given criteria; (2) redesign is an important piece of the process to optimize the product or its performance; and (3) it connected their station testing and data collection with the fact that scientists and engineers have completed testing on objects they see daily.
Conclusion
This sequence of lessons was designed to cluster performance expectations and integrate an authentic engineering assessment into the classroom. By carefully developing a 5E instructional sequence with the three-dimensional framework of the NGSS in mind, our students were able to make connections to the real-world work of scientists and engineers. At the conclusion of this sequence of learning activities, students had learned, their interest was piqued, and they enjoyed designing a solution to an identified problem in which they could relate. They were thinking like engineers!
INTERNET RESOURCES
Baseball video
https://www.youtube.com/watch?v=sXS9dfzUbxw
Bridge video
https://www.youtube.com/watch?v=fu4_gY5TFOY
Pingpong video
https://www.youtube.com/watch?v=zSKpxB3rOB8
5E Engineering Physical Science Science and Engineering Practices Elementary