
feature
No Bones About It
Science Scope—September/October 2021 (Volume 45, Issue 1)
By Lydia Lytal, Brooke A. Whitworth, and Gail Morton
CONTENT AREA Life Science
GRADE LEVEL 6–8
BIG IDEA/UNIT Skeletal system
ESSENTIAL PRE-EXISTING KNOWLEDGE Bones provide structure to the human body.
TIME REQUIRED 5 days
COST $10
SAFETY Supervise when using craft sticks.
With an emphasis on engineering in the Next Generation Science Standards (NGSS Lead States 2013), there has simultaneously been an emphasis on design and subsequently STEAM (science, technology, engineering, art, math). Studies have shown that students who are exposed to STEAM lessons demonstrate greater improvement on physical science benchmark assessments than students exposed to a STEM-only physical science curriculum (Graham and Brouillette 2016). Also, there is significantly more retention in students who were taught through art integration, especially for students at the lowest levels of reading achievement (Hardiman, Rinne, and Yarmolinskaya 2014). While integrating art in the science curriculum can promote student motivation (Rinne et al. 2011), it does take careful thought, planning, and assessment (Appel 2006).
We used the lessons we had developed along with clay modeling techniques to lead middle school science students on a discovery-learning journey. They learned about the structure and functions of the skeletal system while we simultaneously taught them about history, storytelling, proportions, and form. This article defines art infusion, how it motivates students to learn, and how it is used to assess student understanding. We then describe three lessons where students discovered how to form bones of the hand using modeling clay. The lessons described here were designed for a middle school science classroom over three 50-minute class periods; however, these lessons can be shorter, longer, and/or spread out within a larger unit on body systems as needed. We implemented this lesson in an eighth-grade classroom, but depending on how your school structures middle school science, it may be appropriate in another grade level.
What is art infusion?
Art infusion is defined as a model empowering the arts in education by employing three strategies: (1) all disciplines are regarded equally in pedagogy, content, and assessment; (2) collaboration exists between art and generalist educators; and (3) students are encouraged to delve deeper into subjects through art (Hunter-Doniger 2018). Art infusion allows students to do more than just memorize content; it motivates them to search for it, find it, make their own meaning out of it, and apply this newfound knowledge in ways that interest them (Hunter-Doniger 2018). Art infusion engages students more profoundly in learning; increases student achievement; and fosters creativity, critical thinking, communication, and collaboration (Perry and Connelly 2011). Children are natural explorers, and arts-infused education provides a path to creativity and discovery. In addition, observing students actively solving problems through the creation of a finished product provides different opportunities for assessment.
Before you begin
Before diving into the skeletal system, students need a little experience working with clay. A good way to provide this experience is presenting the students with clay to design an amulet while simultaneously including history in the lesson. An amulet is a natural or man-made piece of jewelry or an ornament that is thought to give protection from evil, danger, or disease. It is often called a good luck charm (e.g., a rabbit’s foot). Teachers can make connections to what students know by using ancient and contemporary Inuit and African amulets and/or amulets in pop culture, such as children’s cartoons and video games (e.g., Sophia the First, Moana, Zelda, or in video games as the treasure to hunt or tokens given when the player advances to the next level). Teachers can also provide a short presentation of how amulets have been used in cultures throughout history and discuss symbolism, superstition, and religious beliefs with students. It may also be useful to show examples of x-rays of Egyptian mummies with strategic placement of amulets and the thinking behind it.
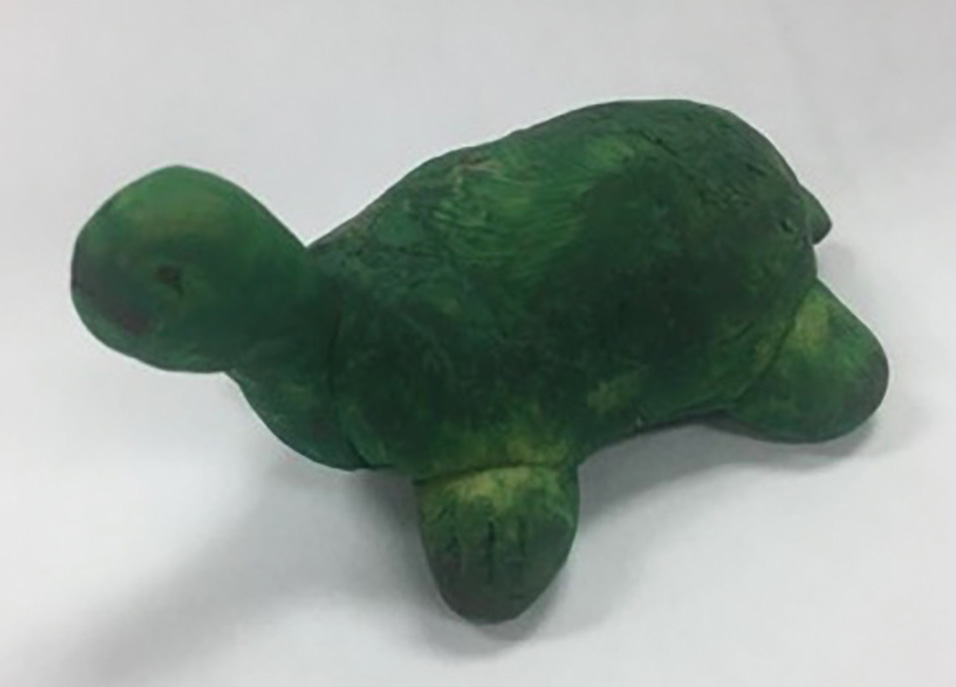
After discussing amulets, each student is given a ball of clay the size of a golf ball and instructed to design and make an amulet that could be a good luck charm (see Figure 1). You may also provide them with a craft stick to help shape the clay. Some students may need to draw their design on paper first if they struggle organizing their thoughts. Students can also be supported when using clay by showing them how to stretch and shape the clay with their fingers. There is a tutorial video in Online Resources that can be used if necessary. After the amulets are created, students write or tell a story about a time when they experienced good luck. This activity requires one class period, but could be longer if the teacher decides to have the students write and tell a story about a time they experienced luck. This activity could be made shorter if the teacher omits the history presentation and discusses it with students as they are simultaneously designing and creating their amulet.
1. Look at your finger and bend it like a hook. How many bends does it have?
2. How many straight pieces does it have?
3. How many bones do you think are in each finger?
4. Is each bone the same length?
5. What is the ratio of the small bone on the end of each finger compared to all of the bones of the finger?
6. Look at the model of the hand. Where would the palm of your hand be?
7. Why are there bones that are long and skinny instead of one big square bone?
8 What is the relationship between the structures of the palm in relation to the function?
9. What do you notice about the thumb that is different from the fingers?
10. Why do you think there are only two bones in the thumb?
Bone of the hand
Before introducing bones to students, ask them to trace their hand on a piece of paper. On their traced hand, ask them to draw what they think the bones of their hand look like. Many students have never thought about this idea before, and the responses will vary greatly. This activity is a great preassessment to check for student prior knowledge of structure and function and how it applies to the skeletal system. We chose the hand for this activity because it is easy for students to trace.
Following this task, a whole-class discussion is a good strategy to use to discuss the student drawings and structure of bones (see Table 1). During the discussion, the teacher should try to elicit students’ ideas and encourage students to challenge one another in areas where their ideas differ. Then a formative assessment such as “I think—I rethink” (Keeley 2015) can be used by students to evaluate and update their drawings based on new knowledge gained from the whole-class discussion. During this formative assessment, students produce an answer to an initial question or assigned task. In this case, the task was to trace their hands and draw what they think the bones of their hand look like. After the students have had time to explore and discuss the concept, they revise their initial thinking by creating a new drawing. This assessment can demonstrate to students that ideas change with new information (Keeley 2015).
| Questions to ask students as they are building bones with clay |
|
| Things to check for |
|
| Tips for using clay |
|
Making bones with clay
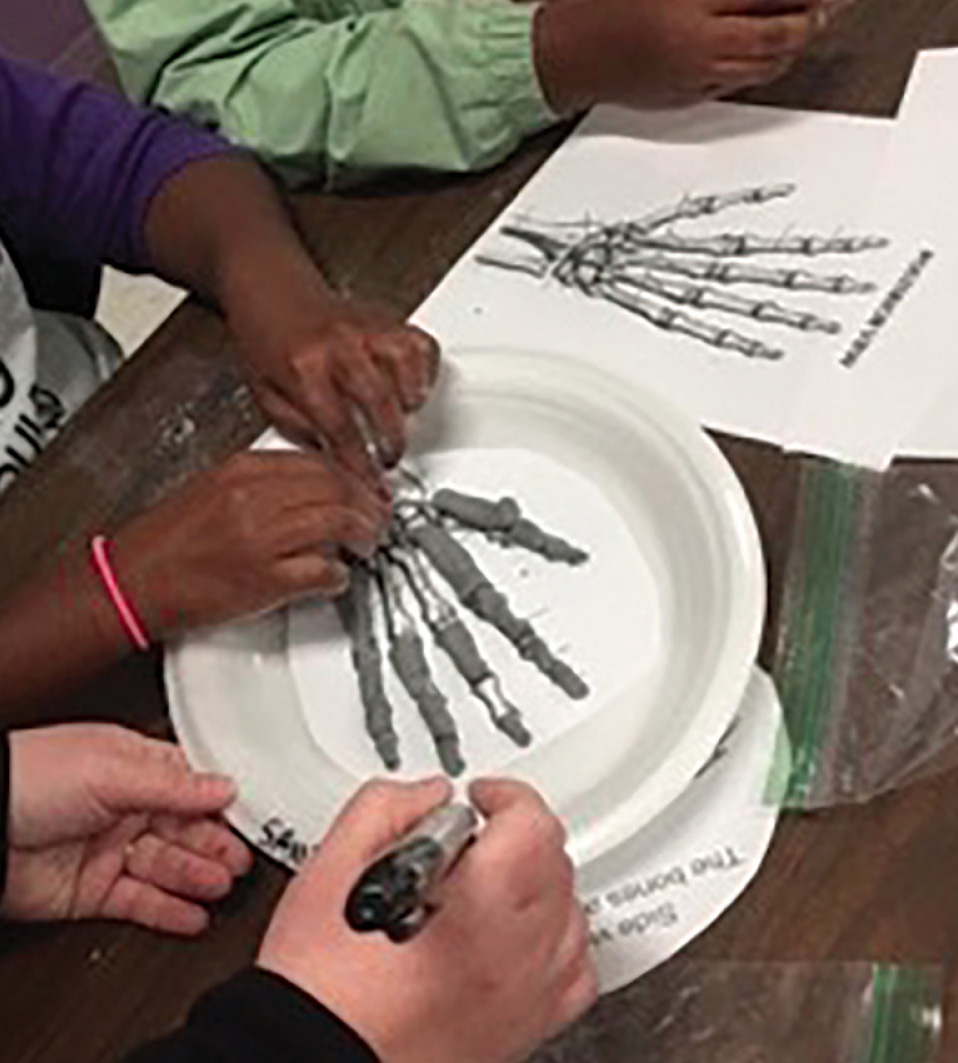
The students then use the clay modeling skills they learned from the amulet activity to create the bones of the hand (see Figure 2). Making a 3-D model can be intimidating at first, so we suggest doing this activity in groups unless your students are experienced with creating 3-D models. Students use their prior knowledge from their day-to-day experiences with hands and images of the bones in the hand to create the 3-D models of the hand. You may differentiate this by taking the picture away to challenge students, or by providing a skeleton as a reference for those that need a little more help. As students are working, the teacher should circulate around the room to informally assess student progress. During this time, it may be helpful to ask questions of groups, look for particular things, and/or provide students tips for working with the clay (see Table 2). (If some groups finish before others, they can use the extra time to paint their amulet). On completion of their models, students should write an explanation about the bone structure and function based on their model and prior knowledge. Teachers can prompt students to write their explanation with the following question: Explain how bone structure and function is evidenced in your model? Once complete, the teacher assesses the model and explanatory writing based on a rubric (see Supplemental Materials for “Rubric for assessing models and explanatory writing” and “Rubric for assessing drawings and argumentative writing”).
When selecting groups, we suggest you place someone in each group who you know is a creative person. This person doesn’t necessarily have to be a vocal leader or a time manager, but someone who can lead by example through their work. You can also assign roles to students such as facilitator, timekeeper, and supply manager. If your students have a technological device at their table, they can look up images as references for their work. We suggest they clean their hands before touching any technology devices you might have them use.
A great way to be proactive with classroom management is to prepare a baseball-size ball of clay, a craft stick, and a small cup of water for each student prior to the activity (the craft stick does not have to be utilized if you do not want students to use tools). If you choose to use craft sticks, instruct students not to break the sticks as doing so can create a sharp tool that can be dangerous. You should also remind students of your standard rules for working in groups along with special rules that include not throwing the clay or smearing it on the floor.
There are many types of clay available to buy, but we suggest using water-based clay. It will wash out of clothes and off hands and table surfaces. It is typically sold in 25- to 50-pound boxes at any ceramic supply store. You will need around 10 pounds of clay for this activity at a cost of around $6. Suggestions for purchasing the clay can be found in Online Resources.
Skull comparisons
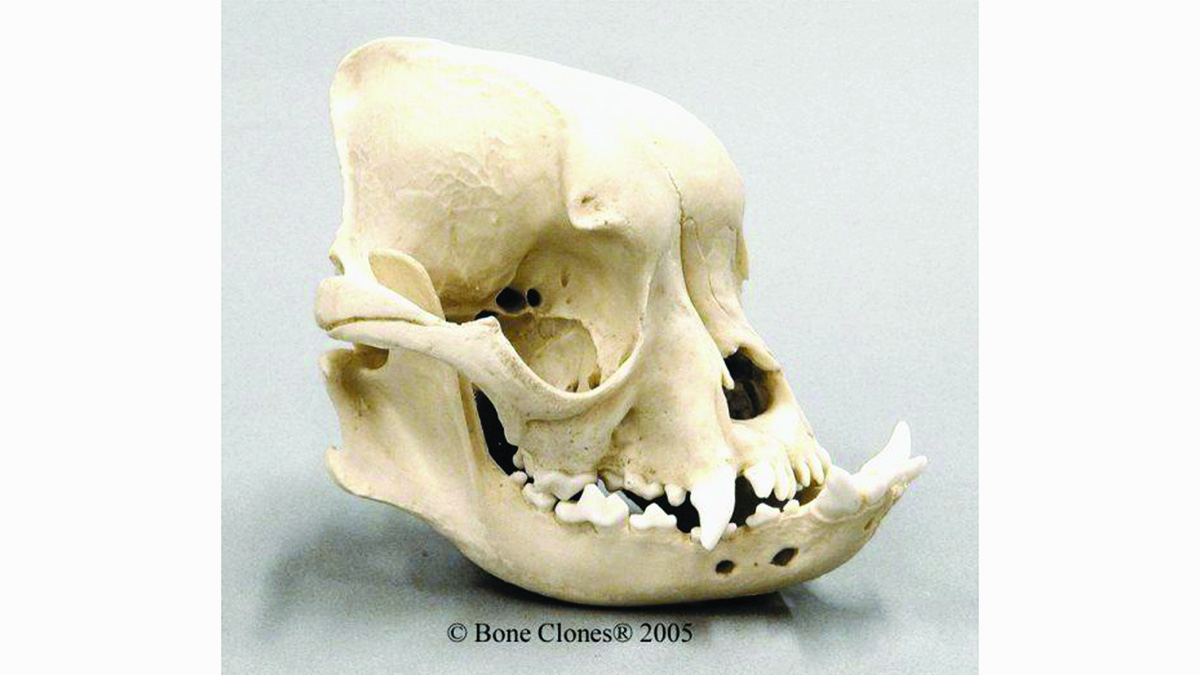
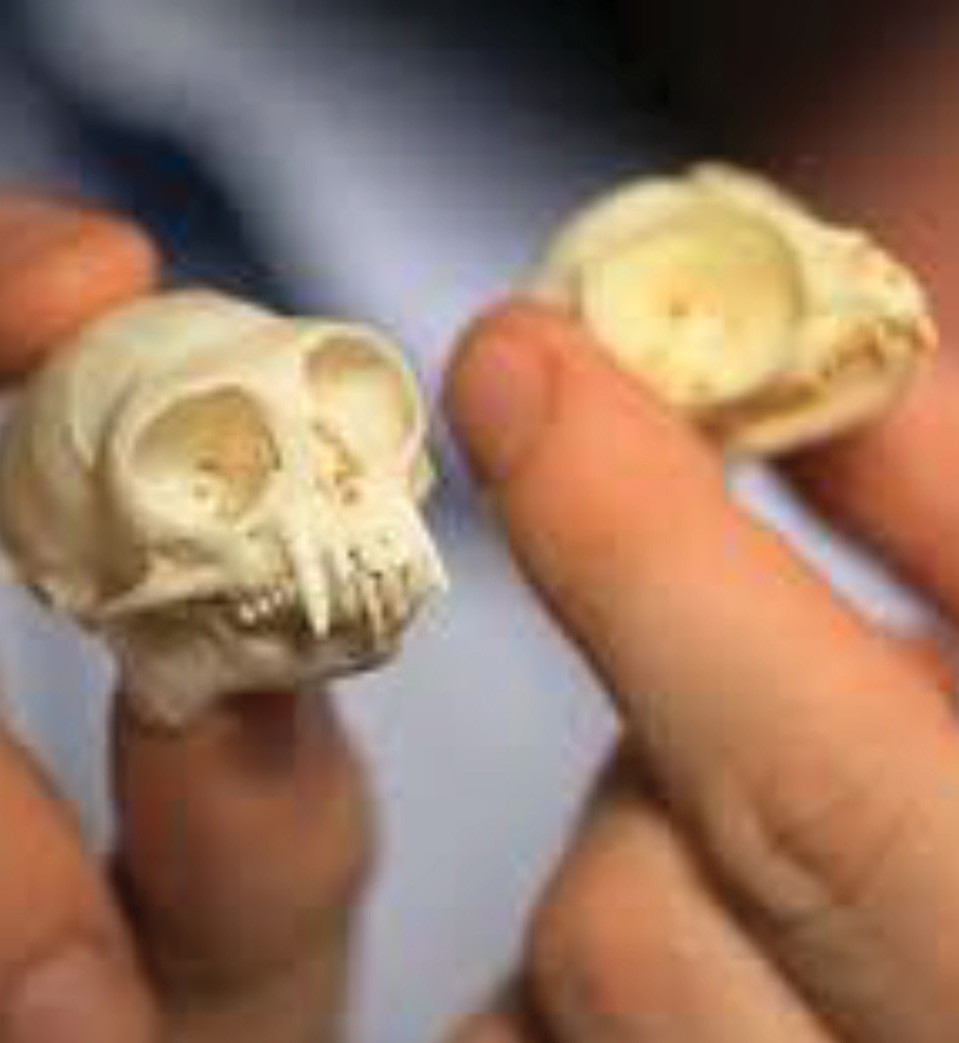
The next activity gives students a chance to apply what they know about bone structure and function. Teachers should show the pictures of actual skulls of two or three different animals and allow students to investigate what animals they belong to. Without revealing what animal’s skull students are looking at, ask questions that promote problem solving such as why the orbitals might be large in the tiny skull of a tarsier monkey or why the jaw of a bulldog is massive. The goal is to see if students can identify the animal that the skull belongs to on the basis of the clues they gather from the shape of the skull. If the students are only able to guess characteristics about the animal, then that is fine. Examples of characteristics are the type of food it eats or when it is most active. The tarsier monkey and the bulldog are good examples because their skulls have obvious features. Clues students should look for to help them identify the animal are the eye socket size and location, size of skull in general, shape of skull, size of the intracranial space where the brain goes, size and shape of jaw, and shape of teeth. If students do not look at those features at first, the teacher may probe them by asking “What do you notice about the shape of the eye?” or “Why would this animal need large eyes?” You can relate this exploration to other bones of the body by exploring how the shape of a bone is determined by its function. For example, discuss how the ribs are curved to protect internal organs, or why the femur is straight in the middle but wider on the ends to support the body while allowing motion of the leg. Additional questions that can be used in critical thinking activity are given in Table 3.
1. What do you notice about the shape of the teeth?
2. Why do you think the teeth are shaped that way?
3. Based on the shape of the teeth, is this animal a herbivore, carnivore, or omnivore?
4. Based on the placement of the eye socket, where do you think the animal’s eyes were looking?
5. Do you think this animal hunted for food, or was it the one that was being hunted (the food)? If you have already introduced the terms predator or prey, then use those words.
6. (If the eyes are on top) Why would an animal need eyes toward the top of their head?
7. What would they be under to need to look up?
Structure and function
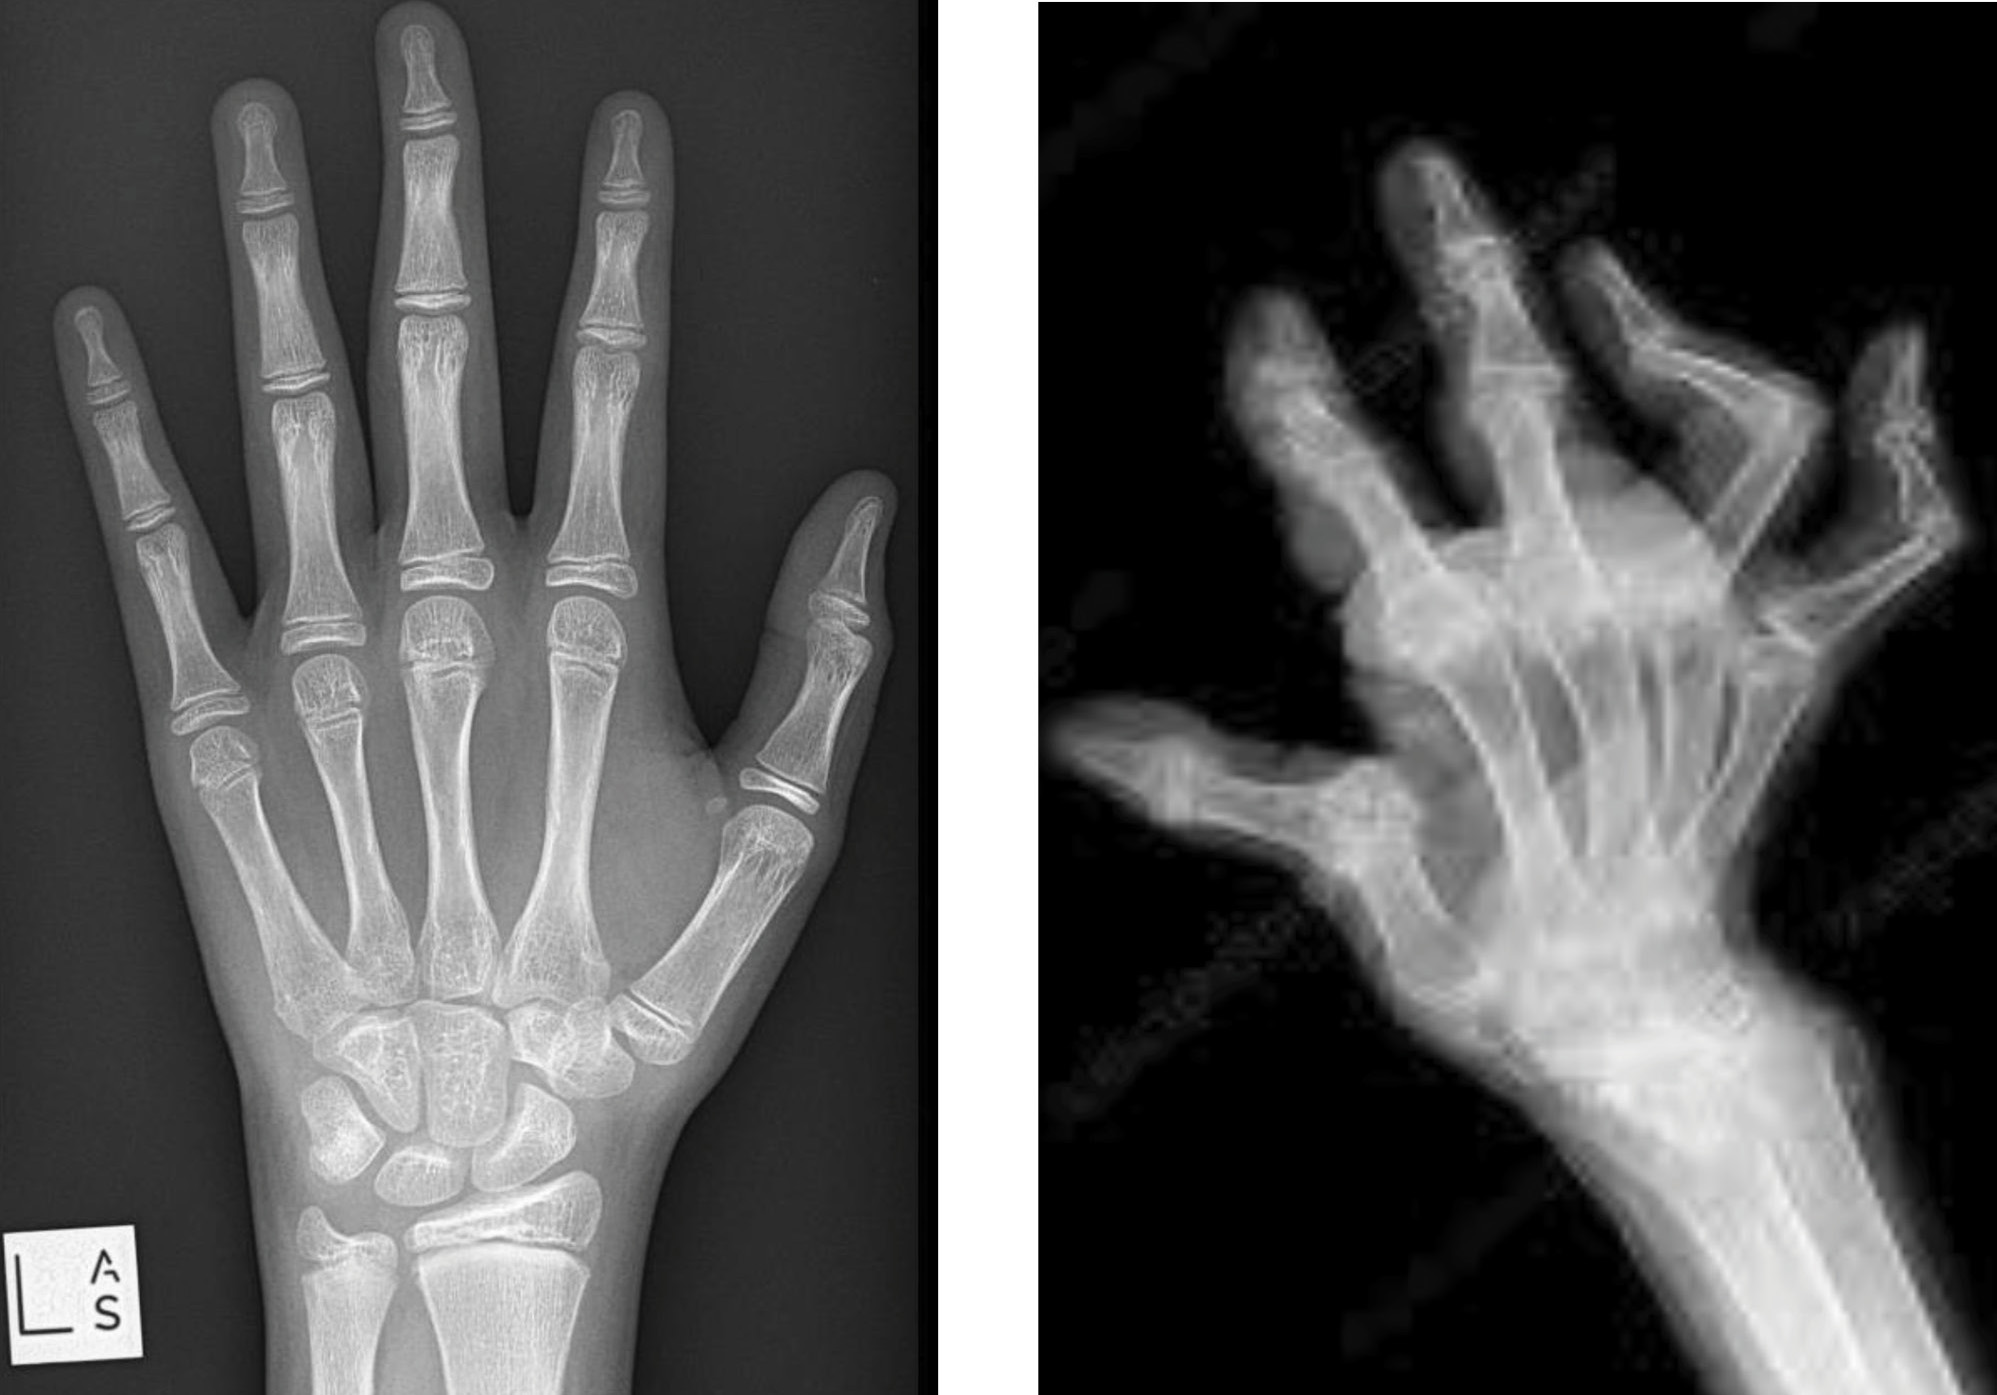
After students have examined the skulls, the teacher can prompt student thinking by asking “How would your drawing change if the person developed rheumatoid arthritis in the hands?” or “What effect, if any, would that have on the mobility of the person with rheumatoid arthritis?” It is helpful in the discussion if you show pictures of the normal and arthritic hand. Student responses vary, but often students will question how fingers become arthritic and mention a family member or friend that has rheumatoid arthritis. The goal of this concluding conversation is for students to consider what happens to the function when the structure changes. The arthritic hand provides students with a visual of different hand structures to determine how the functions would change if the structures were changed. The next lesson in the unit featured the skeletal system as a means for protection of vital organs, the attachment site for our muscles, and the producer of red blood cells to connect to other systems. This leads directly into how systems are connected to other body systems.
Conclusion
Using art in the science classroom encourages students to learn new concepts and helps students become lifelong learners (Chudler and Konrady 2006). The arts connect the dots between learning in all the subjects, which leads to understanding. Through the arts, students learn how to refine and evaluate their work. They learn to accept feedback from others and consider many options for solutions to problems. What students learn in arts-infused lessons has value outside the classroom; it helps students realize connections to their communities and to the world around them. •
ONLINE RESOURCES
Clay King—https://clay-king.com/
The Ceramic Shop—https://www.theceramicshop.com/
Sculpting clay tutorial video—https://www.youtube.com/watch?v=AFKnG-vENUw
Information about skulls—we suggest using these websites if you need to develop your knowledge as a teacher—https://human-memory.net/skull/; https://www.calacademy.org/skull-stories; https://bit.ly/3wNqRTd
Prompts for integrating crosscutting concepts into assessment and instruction—https://bit.ly/3e9jcZa
SUPPLEMENTAL MATERIALS
Lydia Lytal (llytal@bmc.edu) is an instructor of biology and Gail Morton (gmorton@bmc.edu) is an instructor of art, both at Blue Mountain College in Blue Mountain, Mississippi. Brooke A. Whitworth (bwhitwo@clemson.edu) is an associate professor of science education in the Department of Teaching and Learning at Clemson University in Clemson, South Carolina.
Biology Crosscutting Concepts Instructional Materials Interdisciplinary Labs Life Science NGSS STEM Middle School