
Elementary | Daily Do
How Can We Keep Our Vegetables Watered?
Biology Engineering Is Lesson Plan Life Science NGSS Phenomena Physical Science Science and Engineering Practices Three-Dimensional Learning Elementary Grade 2
Sensemaking Checklist


Introduction
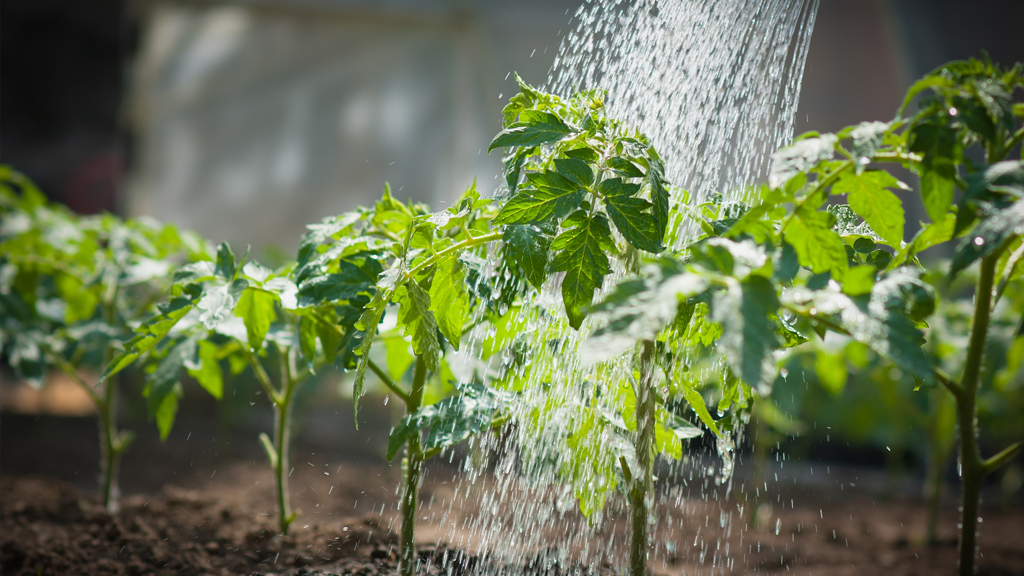
We're well into summer, and as you walk around your city or town, you're likely to come across someone's vegetable garden. Whether these garden plants are growing from haphazardly placed flower points or neat rows in the ground, these vegetable plants all need the same two things: sunlight and water.
In today's task, How Can We Keep Our Vegetables Watered?, students and families engage in science and engineering practices and the thinking tool of structure and function to make sense of science ideas about how properties of materials make some materials better suited for a certain purpose than others. Students then have an opportunity to apply this science idea—as well as their knowledge of what plants need to grow—to create a design for a plant-watering tool.
What Is the Problem We Need to Solve?
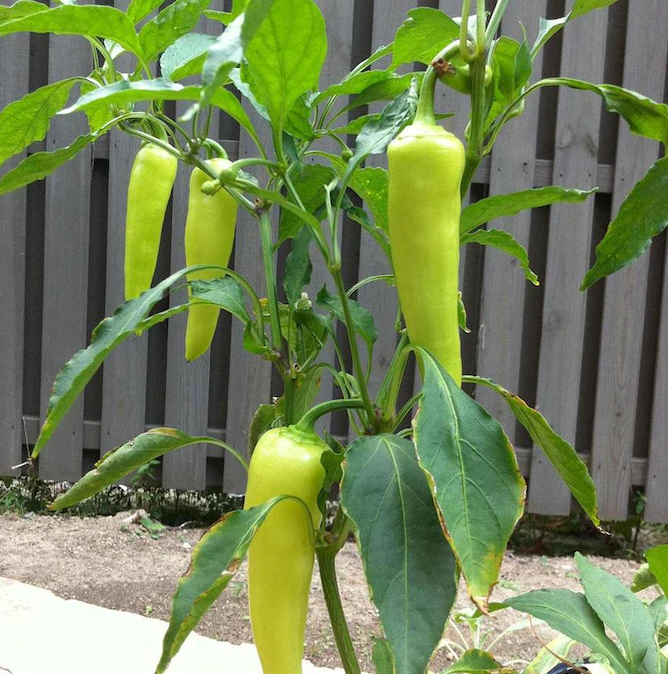
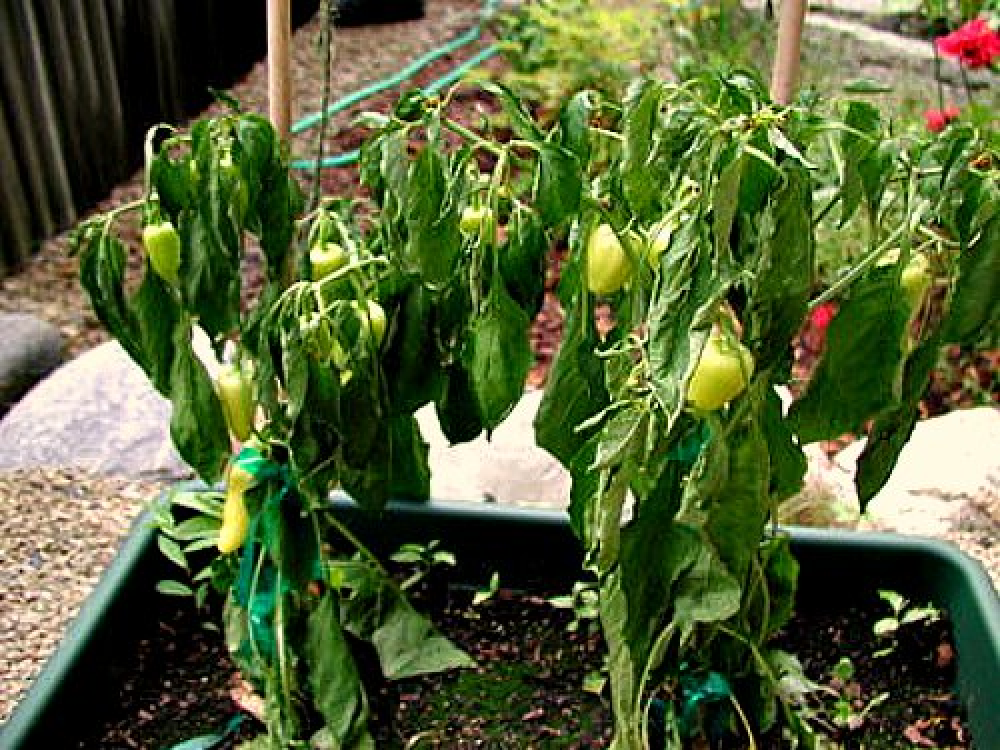
You might show students a watered vegetable plant and a wilted vegetable plant and tell a story about being away from the wilted plant for two weeks. (For example, you might keep the plant in a community or school garden instead of at home, or you are traveling to different places and are away from home.) Tell students you brought in a healthy plant to show them what your plant looked like before you went away. If you don't have a plant to show students, you could use images like the ones above.
Give students an opportunity to observe the plant (or the photographs of the plant). Ask students to record their observations in their science notebook or on blank paper. Then ask them to think about and write one question they have about the wilted plant. Tell students to turn to their partner and share their question.
Ask students to share their own question or their partner's question with the class. Student questions might include these:
- Will the plant live?
- What kind of plant is it?
- Did it rain (when you were away)?
- Did it get watered?
- Was it sunny?
- Is the plant sick?
You might record the students' questions on a piece of poster paper, whiteboard, etc. Multiple students may have the same question; each time the same question is asked, consider adding a check mark next to that question to honor the student who shared it.
Read and answer each question with a yes or no. Write yes or no next to the question on the poster. (You might use two different colors to represent yes and no.) Based on your responses, students should be able to determine that the plant received no water during the time you were away.
Ask students to turn to their partner and answer the question, "What problem would we need to solve to keep this plant (show them the healthy plant) growing for two weeks?"
Ask students to again turn to their partner and share their ideas. As you walk around the room, listen for students to share ideas about watering the plant. When you bring students back together, ask those students to share their ideas first. Ask students if they agree that we need to find a way to water the plant without being able to do it ourselves.
Defining the Problem
Materials
- plastic water bottles with caps
- sealable plastic bags
- plastic cups
- wooden "stakes"
- string
- rubber bands
(Note: At the K–2 grade level, students need opportunities to explore the physical properties of materials and choose materials for a specific purpose based on these properties. You might choose water bottles, sealable plastic bags, and plastic cups that are all about the same size so students can observe and compare properties such as shape, sturdiness, closable or not, ease of filling with water, etc.)
Say to students, "I have some objects here that we might be able to use to solve the problem of watering the plant when we are away."
Place the students in groups of three and give each group one water bottle, one sealable plastic bag, and one plastic cup. Ask each student to describe one of the objects. As you walk around the room, you might ask questions like these:
- How would you describe the shape?
- How does it feel (smooth, rough, slippery, etc.)?
- Does it bend, rip, twist, etc.?
- Is it an object or a system (two or more parts working together)?
- What color is it?
Next, ask students to compare their objects. What are some things that are the same (similar) among the objects? What are some things that are different?
Make a class chart with three columns labeled water bottle, plastic bag, and cup. Move from group to group, asking each group to share one property of each object until all of the students' observations are listed on the chart.
Next, ask student groups to identify the properties for each object that might make it a good choice for holding water. Ask groups to share their ideas, and circle the properties that students identify on the class chart.
Ask students how they might change each object so that only a little water pours from the object at a time. Give students independent thinking time before asking them to share their ideas with their group. As you walk around the room, listen for students to share ideas that you think all students should hear. When you bring the class back together, begin by asking those groups to share their ideas first. You might write student ideas in the appropriate columns on the chart. Consider using a different color than the color you used to record properties.
Say to students, "I wonder if we can use our ideas about plants needing water to grow and the properties of these objects to design a tool that will keep a plant watered when we are away for two weeks."
Brainstorming and Planning a Solution to the Problem
Say to students, "These are the materials that we can use to design a tool that will keep a plant watered for two weeks." Show students the three objects they've already observed and the string, wooden "stake," and rubber bands. Let students know that you have tools to poke holes in the object.
(Note: Keep all materials together on a table or counter. Allow students to walk over to the materials during the brainstorming and planning phases to observe and touch the materials. This will support students in making informed design choices. If the groups have the materials in front of them, it is likely they will start building the tool using trial and error.)
Provide students a worksheet with a line drawing of a plant in a pot (front and back side). Label the front side of the worksheet "My design idea for plant-watering tool #1" and the reverse side "My design idea for plant-watering tool #2." Make sure there is enough space next to the plant for students to draw their ideas. You might print this Brainstorm Template and give it to your students.
Tell students to work in the "Alone Zone" and brainstorm two ideas for a plant-watering tool. As you walk around the room, ask students questions about their design choices:
- Why did you choose the water bottle/plastic bag/cup?
- Why are you using the water bottle/plastic bag/cup in this way?
- How will you put the water in?
- How will the water get from the water bottle/plastic bag/cup to the plant?
Encourage students to refer to the class chart of properties to support their design choices.
Place students in groups of three or four and ask them to share one of their design ideas with their group. Give each group a blank sheet of paper and ask each student to write their name on it. Then ask the students to create a group design for a plant-watering tool. As you walk around the room, ask the groups the same questions you did before.
Ask each group to post their design on the wall, then choose another group's design to visit. Ask the group to identify one thing they really like about the other group's design (place an adhesive note next to the design feature) and ask one question about the design (write the question on an adhesive note and place it next to the design feature). You might have each group visit two or three other group designs.
Remind students before and during the gallery walk, "We are critiquing the ideas shared by the group, not the group members who shared them." (If this idea is not part of your classroom norms, you may want to take time to share and model this norm. Students can practice while working together in small groups to plan their tool design.)
Give student groups an opportunity to revise their design based on the feedback from other students. Consider allowing groups to share their revised designs with the class, sharing what changes they made to their original design and why they changed it.
(Note: You may choose for students to build, test, and improve their design. However, it is not necessary to always engage students in the entire design cycle. This task is designed to give students an opportunity to identify a problem and use science ideas to brainstorm possible solutions.)
Acknowledgement
Today's Daily Do was inspired by the activity A Drink of Water from GrowingGreat: Hands-On Science Series for Parents and Children.