Dr. Christine Royce, a member of the NSTA contingent at the Sino–US Science and Education Forum in Shanghai this week, has posted the following report. Dr. Royce is an Associate Professor of Education at Shippensburg State University and an NSTA Division Director.
Sunday, November 14, 2010
According to the information about “My Flight” on the in seat monitor in front of me, it is 10:32 p.m. departure time and 11:32 a.m. at our arrival destination and the plane is somewhere north of the East Siberian Sea and Russia. We have 7 hours and 17 minutes of flying left, which means we are just about half way there.

Some of the group members convene at Gate A56 in Detroit's airport before boarding the plane to Shanghai. (l-r): Francis Eberle, Elizabeth Mulkerrin, Christine Royce, Kay Atchison Warfield, Marilyn Richardson, Paul Keidel, and Laura Lukes.
Where is there? There is Shanghai, China and this particular flight has on board sixteen—well, maybe seventeen—of the members of the US team headed to Shanghai as part of the NSTA delegation to the US–Sino Forum on Science and Education which is to be held November 15–21, 2010.
I say “maybe 17” members because that is the number that was supposed to be on board, but we weren’t quite sure if all members made the flight. All of us haven’t yet met formally, some of us know each other from different activities, organizations, or past conferences. Some of us are meeting each other for the first time. As our group gathered at gate A56, we each greeted and hugged others we knew, introduced each to others that were new to us, and started to become a larger group. We switched off watching our accumulating carry on luggage to run and exchange currency, get something to eat, and use the facilities. Our boarding passes were stamped after visas checked, and within a very short time of arriving at the gate, we were boarding the 777 and headed to Shanghai. Once on board, the chatter between group members continued, as many of us were seated close to each other. It is obvious that there is energy and excitement among the team members from our sharing of preparation experiences.

Nearly fifteen hours after leaving Detroit, members arrive in Shanghai awaiting luggage ... John and Sue Whitsett, Harriet Page and Mark Greenman.
In total, there will be fifty members of this group who will convene in Shanghai and engage in conversations, discussions, and the sharing of ideas related to science education over the next several days. The travel was varied, each of us leaving our own home cities across the United States, merging in small groups at larger airports around the country, some of which included Los Angeles, San Francisco, and our group’s departure point of Detroit. Some team members who were leaving from different airports were in contact via text, phone, and email right up until the doors of the plane closed.
Throughout the last several months, NSTA members and science educators from across the country looked forward to this trip. People expressed an interest in participating, worked with Michelle at headquarters on applying for visas, were sent updates to the schedule as they became available and were reminded to “remain flexible”, and generally looked forward to the opportunity to learn about science and education in another country. During the application process, we were required to provide a statement of why we wanted to participate in this experience on our interest form so that the committee had information as they selected members of the delegation. Part of my narrative stated as “I believe that this specific forum will provide me with the ability to take my learning as an educator outside of the classroom and into a global arena, thus helping me to add additional knowledge in many professional areas. When it comes to the field of science education, we have as much to share with, as well as, learn from our Chinese counterparts. I hope this trip will provide that sharing opportunity that will serve as a connection point and bridge to future experiences and collaborations. In summary, the main reason that I am interested in attending this program is that I believe ‘experience is the best educator … even for an educator.'” And for all of my friends out there—yes part of my reason was this just sounded like an outstanding opportunity to do something I am passionate about—go and be with “my own kind”—science educators who share a love and passion for our field.

Dinner upon arrival to the Xing Yu Oriental Bund Hotel, all delegation participants were treated to a traditional Chinese dinner served family style. Lisa Ernst and Donna Jo Dillard look over the options.
Over the next week, the NSTA group will meet with the CACSI group from China. CASCI is the Chinese Association for Children’s Science Instructors. I will blog more about the talks, meetings, and opportunities to visit schools and see local sights in the days ahead, but it is important to realize that this opportunity and experience is a dichotomy. It is really no different than other experiences we have all engaged in previously and will continue to do so in the future while at the same time this opportunity is extremely different. There is no doubt that people who know each other, as well as those who are just meeting for the first time and board planes to meet half way around the world is a bit exciting and adventuresome, but we as individuals do similar things each day in our “normal” lives as well. We as individuals go to class, meetings, and other events to form small groups of those we know only to be introduced to new colleagues or classmates and to form a larger group. The question that arises is in both situations, is “do we take advantage of the learning opportunities that present themselves” whether local or global?
According to that in-flight monitor in front of me, our group is scheduled to land at approximately 6:52 p.m. local time in Shanghai which would be early. And on that note, as I am somewhere between departure and arrival, I will sign off for now and try and catch some sleep.

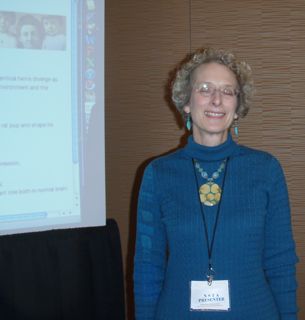
 A session on the modeling project
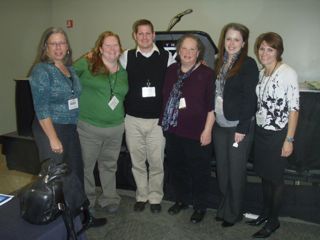


 NSTA must be in Nature’s good graces, because this was a perfect day to arrive in Baltimore for the area conference—blue skies and warm (for November) temperatures. Some of the eateries near the Inner Harbor are still using their outdoor tables, too.
 I just got back from the NSTA area conference in Kansas City, Missouri, and I’d like to try presenting. My colleagues and I have some successful ideas we’d like to share, but I’m a little nervous about submitting a proposal and actually doing a presentation. Any suggestions?—Ally, Omaha, Nebraska