
feature
5E and the PEs
The popular instructional model can help meet multiple performance expectations.
Science and Children—September/October 2021 (Volume 59, Issue 1)
By William Thornburgh, Justin McFadden, and Brian Robinson
Imagine an elementary classroom filled with students reporting the results of multiple student-led investigations that are intended to help a bandage company determine what materials should be used to make their latest and greatest medical-grade bandage. Preparing elementary students to think and communicate like an engineer is possible but requires a sequence of lessons spanning multiple classroom experiences that are aligned to multiple performance expectations (PEs).
This article identifies how multiple PEs can be clustered to meet the instructional goals set forth in the Next Generation Science Standards, and it demonstrates how the 5E instructional model provided a framework to guide our thinking throughout the planning process. It is important to note this article describes the planning process and associated implementation of multiple lessons with a group of elementary teachers, not students. A group of the teachers who participated in the professional development then took the lessons described here into their own classrooms and reported back suggested modifications.
Our Planning Process
The 5Es
The possibility of designing instruction around multiple PEs from the NGSS can be achieved by using the 5E instructional model, as noted in the book Translating the NGSS for Classroom Instruction (Bybee 2013). The 5E instructional model includes the following phases—Engage, Explore, Explain, Elaborate, and Evaluate—and it helps teachers build a more thoughtful and engaging learning experience for students. Performance expectations are not intended to be mastered in a single lesson but rather provide a target to be achieved over the course of multiple lessons. Once desired PEs have been identified, and it makes sense educationally and scientifically, multiple PEs can be clustered together. Then, through a sequence of coherent lessons using the 5E instructional model, students will be “doing” science in an authentic way.
How We Clustered PEs
Our team of teachers began by identifying two complementary science and engineering practices (SEPs). Both SEPs allowed our students to design an investigation to produce numerical data that was collected and then analyzed using tables and graphs. The use of data collection and analysis aligned well with the “essential features of scientific inquiry” (Martin-Hansen 2002) and the 5E instructional model. Second, our team identified two PEs that encompassed both practices and also involved the same disciplinary core idea within the K–2 grade band. Third, Engineering, Technology, and Application of Science Standards, which complemented the aforementioned PEs and SEPs, were folded into these lessons.
Using Understanding by Design
Finally, in addition to using the 5E instructional model to accomplish an authentic science experience, we planned the sequence of lessons using the Understanding by Design approach (UbD; Wiggins and McTighe 2011). The UbD approach offers a less-rigid planning process and structure that helps guide the three most important things for teachers: curriculum, instruction, and assessment. The three stages of the UbD framework include: Stage 1 – Identifying the desired results; Stage 2 – Determining assessment evidence; and Stage 3 – Planning learning experiences and instruction.
Starting With the End in Mind:
Evaluate and Elaborate
To clarify the specifics of the final two stages of the 5Es, we used a method known as S.C.R.A.P (Situation, Challenge, Roles, Audience, Product/Performance). The client in our culminating activity requested a list of potential materials to construct a bandage, as well as wanting reliable tests that could be used to measure a specific property (e.g., strength) of any given material. Students did not actually need to use the materials to construct a bandage (though they could), but they were required to promote a procedure and reliable “test” that could be used to determine the usefulness of a given material. In other words, students took on the role of a materials scientist/engineer for the bandage company.
Evaluate
Our team began the developmental process by imagining a culminating activity where students would be planning and carrying out investigations and analyzing and interpreting data, while also engaging in an “engineering design challenge” (Samuel 1986) with their peers. The word property provided a starting point for our conversation because it was noted within the disciplinary core idea that “…different materials with different properties are suited to different uses” (NRC 2012; p. 107). We then chose our properties (strength, flexibility, and absorbency) from the “Clarification Statement” of the PE to develop a series of experiments that the design challenge could be tailored around. These three properties were selected because they could be easily tested by our students and they made the most sense for deciding what types of materials could be used to design a medical-grade bandage, our end goal!
The great thing is that teachers can alter the culminating activity to be more relevant and culturally responsive to their students. Based on decisions, this could result in selecting new materials and different properties to test. Although assessments are not the main focus of this article, we have included a sample formative assessment (see Supplemental Materials) that could be a potential assessment. Furthermore, no scoring rubric has been included because desired outcomes will vary by teacher and no single rubric would be appropriate based on various assessment strategies available (e.g., standards-based grading vs. traditional grading). Teachers will need to design a rubric that will best suit their and students’ needs and assess the primary objectives of the activity.
Elaborate
The aim of the activity was for students to extend and enrich their understanding by using experimental data from the tests they conducted, which could then be applied to a new context/situation. Briefly put, it was important for students to understand that bandages take on many purposes, which is the reason the client needed to have a variety of tests to measure the various properties of any material prior to designing their new medical-grade bandage.
Our team identified a guiding question and a big idea (Wiggins and McTighe 2011) to think about during the entire sequence of lessons.
- Guiding question – “How can we find out what materials would be best for designing a bandage?”
- Big idea – “Conducting tests of a material’s properties would allow us to find out which materials could be used to design a bandage.”
Then, by using the performance expectations as guidelines, we were able to uncover and refine the skills our students needed to successfully complete these lessons.
Working Backward: Engage, Explore, and Repeat
Engage
In line with the first stage of the 5E instructional model, we wanted a lesson that connected to our student’s everyday lives—all students are aware of bandages. This allowed our team to determine what misconceptions students had about materials and properties. As noted in the NGSS but not entirely described at length, the Benchmarks for Science Literacy suggests that students at this age begin categorizing objects via their observable properties (AAAS 1994). This provided a starting point for our opening lesson, which was a classification activity that acted as a foundational-type experience where lower elementary students were engaged with learning about properties. If you are interested in more background and sample activities on materials and properties, be sure to read Science and Children articles by Adams and Feagin (2017) and Thornburgh, McFadden, and Robinson (2020).
We created small groups of three or four students and asked them to sort and classify objects into “sameness” categories based on intuition. Numerous everyday materials could be used here; yet the key selection criteria should include materials with varying attributes (e.g., size, color, hardness) that are discernable to young children. Examples of materials we chose included like items made of different materials (e.g., metal spoon, plastic spoon) and like items with different properties (e.g., smooth rock, course rock). As students received the materials and instructions, we allowed them to sort the items in any way they wanted to. If your students are like ours, they will likely begin grouping the objects based on categories other than material type (i.e., kitchen stuff vs. bathroom stuff).
When probing student’s thinking and justifications for their categories as you circulate around the classroom, it is important to remain neutral about their decisions because there is no right or wrong classification. Once finished, allow each small group to share with the entire class and discuss their “sameness” categories to discover that not all groups created the same categories.
Explain
After the classification activity and prior to letting students fully explore the concepts of interest in their entirety, the next step was to discuss and demonstrate (Explain) the difference between objects and materials. An example statement your students could follow would be: “This object I am holding is a ruler and the material it is made of is called wood.” Teachers should build on students’ thinking from the prior stage and help them notice that the same objects can be made of different materials (e.g., spoons), and some objects consist of more than one material (e.g., pencil). Provide all students with an opportunity to explain their thinking during this time. The key point is for students to understand and discuss how different materials have different features, which are best suited for an intended purpose.
Further reinforcement of this concept could be accomplished via a simple demonstration using a variety of sports balls. Sports balls are composed of certain materials to accomplish specific purposes, and students will likely be familiar with most sports (e.g., basketball, baseball, golf, ping pong, soccer). A few example questions to consider asking students during this demonstration include:
- How is this ball used in its sport?
- Does the ball need to bounce?
- Does the ball need to be heavy or light?
- What makes the ball move during a game?
After seeing multiple examples and discussing how sports are played, students will realize that some materials perform better than others for a particular object and that some objects won’t work if made of the wrong material. Within the K–2 grade band and in line with the learning progression associated with the crosscutting concept structure and function, students need only to observe that the shape and stability of a structure is related to its function.
Engage (Again)
In the next stage, we focus on developing student understanding of the term property and its significance to the forthcoming property tests. This falls in line with what Bybee (2013) described as “repeating phases.” The 5E approach does not always have to occur sequentially, and this decision to repeat phases would be based on teachers’ activities, goals, students, and available time. This lesson piqued student interest again and allowed them to use familiar words and ideas while exploring something likely unfamiliar and puzzling.
We began by placing students into small groups of three or four and having each student in the group tasked with choosing a one-word descriptor to describe the object, saying it out loud to their group members, and then the next person had to use a different descriptor. This process continued until students had exhausted all possible descriptors for the object under consideration, much like the old game known as “telephone.”
In this activity, we used “density cubes” because they provided a key advantage in that each cube (approximately 1” × 1”) was homogeneous and constructed of the same material (i.e., aluminum, copper, steel, brass, nylon, PVC, acrylic, pine, oak, poplar, etc.). Teachers could also provide a data sheet or table (see Supplemental Materials) that contains pictures of each type of material, space to make measurements (if desired), and with space for student’s descriptor words. Please note, although we chose a set of density cubes, a wide array of other objects could be used to provide a hands-on learning experience for your classroom.
Explain (Again)
Student groups were brought back together where they shared their results of this activity with the entire class. This is an appropriate time for the teacher to explain that property is a special word used to describe the qualities of a material and it is the material’s property that (most likely) determined each of the descriptors used during the modified game of “telephone” they just completed.
We then reinforced that a material’s properties actually determine its usefulness for an intended purpose and asked our students to think about everyday examples where they rely on specific materials and properties (e.g., bicycles, lunch boxes, etc.). The main discussion points pertaining to the word property should include common, early-elementary applicable material properties, such as: mass, strength, absorbency, flexibility, stiffness, and color.
If time allows (approximately 15–20 more minutes), or if your students need further practice, they could also attempt to reclassify the density cubes (or objects you chose) again using the new vocabulary they have just learned. Two prompts we used with our students to guide the reclassification activity were to sort by material (e.g., wood, plastic, metal) and to sort by teacher-identified (and/or student-assumed) properties (e.g., heavy vs. light, shiny vs. dull, smooth vs. rough, etc.). In using and repeating two stages of the model (Engage/Explain), our students were better prepared for the upcoming property tests. See Table 1 for more detail on each stage of the instructional sequence.
Testing, Collecting, and Reporting Data
Explore
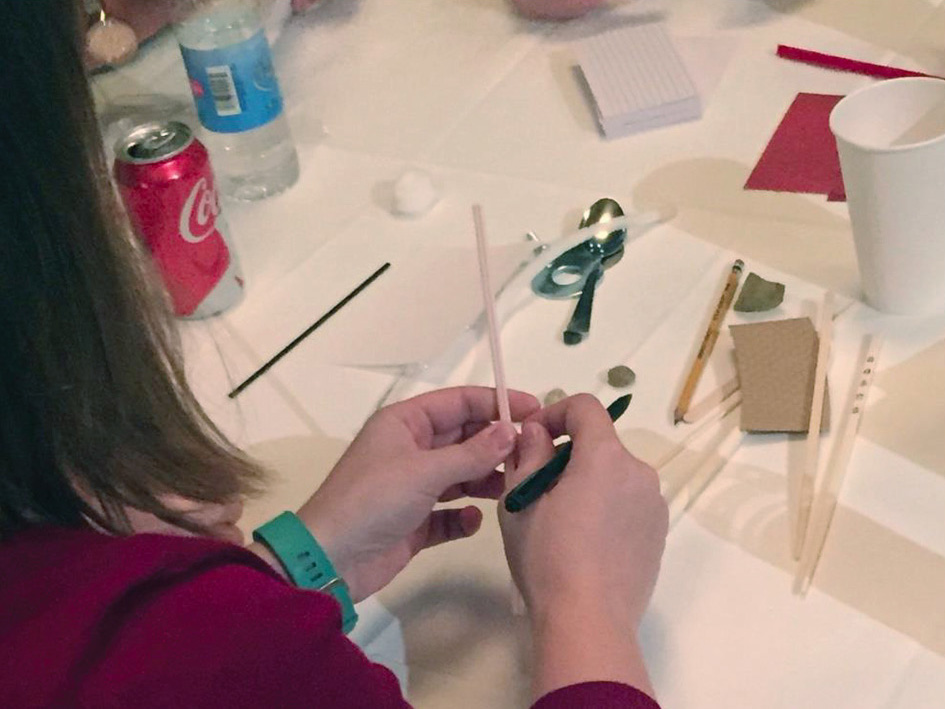
The brief example that follows is what was done with our teachers and their students. It can easily be modified according to your classroom resources and students’ background experiences, particularly as it relates to designing a fair investigation. Of the previously mentioned properties, we selected based on our end goal (a medical-grade bandage). The rest of the article describes how students tested and learned about absorbency. In Figure 1, a teacher is wondering how to test a variety of materials, which is what your students will be doing—asking questions, making predictions, designing an experiment, conducting an investigation, and collecting/analyzing data.
| Table 1. Modified 5E instructional sequence and a brief description of each stage. | ||||||||||||||
|---|---|---|---|---|---|---|---|---|---|---|---|---|---|---|
|
Using two different materials (e.g., paper towel square and cotton fabric), we asked students to predict which material would “hold” the most water. Then, we asked students to share ideas about how a scientist/engineer could experiment to discover an answer to their prediction. Once the class was armed with ideas on how to conduct a property test for absorbency, we demonstrated how students could collect the necessary data (e.g., graduated cylinder, pipettes) and provided them with a variety of other materials (e.g., cotton balls, feathers).
We allowed student groups of three to four to carry out their own investigation, but teachers may want to consider providing more structured guidance depending on their students. Upon completion of testing this property (and the others selected), the results from the investigation(s) were then used to help their client understand how multiple properties (e.g., absorbency) were tested using different materials (e.g., cotton balls).
According to Bybee (2013), as students formulate explanations about the properties of the materials they test, they will begin to develop certain cognitive and physical abilities. We observed this with our own students, recognizing that they would refer back to the test results when explaining why a certain material would be better suited for use in a bandage compared to other materials.
As your students carry out the various investigations, we encourage you to listen to student ideas and help guide their thinking as they develop new conceptual understandings. After conducting multiple property tests, your students should begin realizing how the results from each test they completed could be used to help design a new bandage for the client requesting assistance for the development of a medical-grade bandage.
Connecting PEs with 5Es
The sequence of lessons we developed using the 5E instructional model and UbD (backward design) was better informed and aligned with the vision set forth in the NGSS because two PEs were combined over time. Because some PEs can be combined, the 5E instructional sequence makes sense as a planning tool due to its theoretical foundations (i.e., views of how children learn) and continued use in elementary classrooms. The 5Es have remained within the toolbox of elementary science teachers because the sequence promotes the development of coherent and progressively challenging learning experiences that afford opportunities for students to learn about and actually try out the practices that scientists and engineers engage in. ●
Online Resources
Density Cube Set
http://www.carolina.com/density-measurement/density-cube-set/752475.pr?intid=&question=density+cube&jl_ctx=
Materials Engineering
https://engineering.purdue.edu/MSE/aboutus/whatsmaterials
Supplemental Materials
Download the data sheet, assessment, and NGSS connections at https://bit.ly/3z6Gvew.
Justin McFadden (jrmcfa05@louisville.edu) is an associate professor of science education at the University of Louisville in Louisville, Kentucky. William Thornburgh is an executive officer at the American Modeling Teachers Association and is located in Simpsonville, Kentucky. Brian Robinson is an associate professor of Engineering Fundamentals at the University of Louisville.
5E Crosscutting Concepts Disciplinary Core Ideas Instructional Materials NGSS Performance Expectations Pre-service Teachers