
Feature
Ecosystem in a Jar
Inspiring observation and appreciation of natural systems
Ecosystems, interacting systems of biotic and abiotic factors, are a fascinating topic in life science. The Next Generation Science Standards (NGSS Lead States 2013) recognize Ecosystems: Interactions, Energy, and Dynamics (HS-LS2) as one of four overarching ideas in life science that students should understand. Student appreciation of these complex and fragile systems is more important than ever as human impacts threaten biodiversity around the globe.
Direct observation of real ecosystems is essential for students to build both ecological content knowledge and the scientific practices needed to investigate natural systems (Korfiatis and Tunnicliffe 2012). This investigation was designed to build students’ understanding and appreciation of ecosystems in an authentic, engaging, and cost-effective way. It employs the 5E Instructional Model (Bybee 2016) and spans a three-week ecosystems unit. This unit was taught to junior and senior AP Environmental Science students at a Title 1 high school, though it could easily be adapted for use in a variety of life science courses.
Materials
- Empty jars with lids (16 oz.–32 oz., can be reused food jars with the labels removed)
- Nail and hammer (or a different method to poke small holes in the lids)
- Hand trowels for digging
- Springwater
- Pieces of fresh fruit (only necessary if food sources are unavailable outside)
Day 1: Engage
I begin the first day of our ecosystems unit by holding up an empty mason jar and asking students, “In what ways is Earth like this jar?” Students discuss their ideas in small groups for five minutes. We then discuss as a class, and I write students’ thoughts on the board. Similar ideas voiced by students include “both have limited space,” “there’s an inside and an outside,” and “both are closed.”
Next, I provide each group of three to four students with an empty mason jar. I ask students to consider what they might add to their jars to create miniature models of the ecosystem outside our classroom. (We have not formally defined the term ecosystem yet; this is an opportunity to elicit students’ existing ideas on the topic.) Groups sketch and label their jar ecosystem models on poster paper or newsprint. After 15 minutes, students post their sketches around the room and participate in a galley walk. As students circulate and view the sketches, they leave comments for their peers. I specifically ask them to consider how the sketched models will or will not behave like our local ecosystem over time and to leave written suggestions for model improvement.
Students return to their groups and review the suggestions left by classmates. Then they revise their models to better match the outdoor ecosystem over time. By the end of this segment, most groups have included several biotic and abiotic elements represented in our local ecosystem, including soil, rocks, plants, insects, water, and dead material. (Our school resides within a temperate deciduous forest biome, though students’ jars could easily reflect the biome in which they live.) Some groups also suggest that air holes and sunlight will be necessary to maintain the ecosystem. We end with a class discussion of these factors, and groups make final revisions to their models.
Day 2: Explore
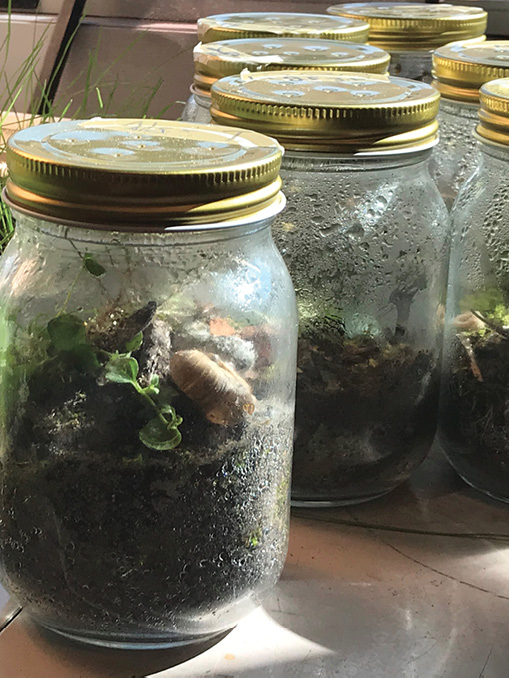
The next day, student groups construct their ecosystem models. I provide each group with a 32 oz. mason jar and lid but jars smaller than 32 oz. will also work. (If students are learning from home, they can repurpose an empty food jar for this activity by rinsing it out and removing the label.) Wearing goggles, students use a nail and hammer to carefully tap five small holes in the lid for ventilation.
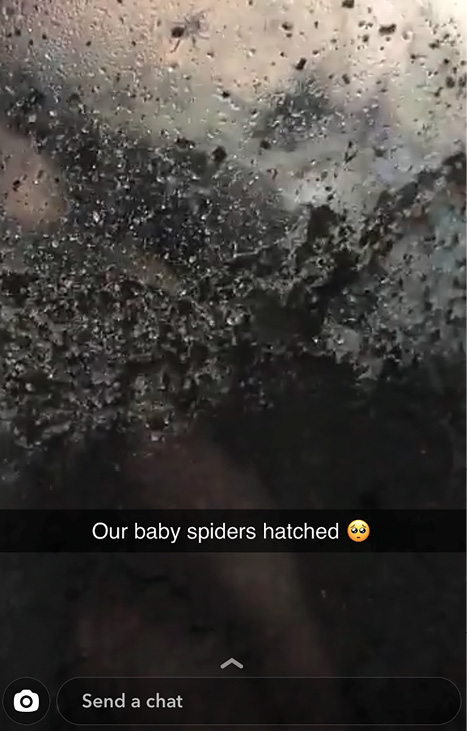
Student social media post.
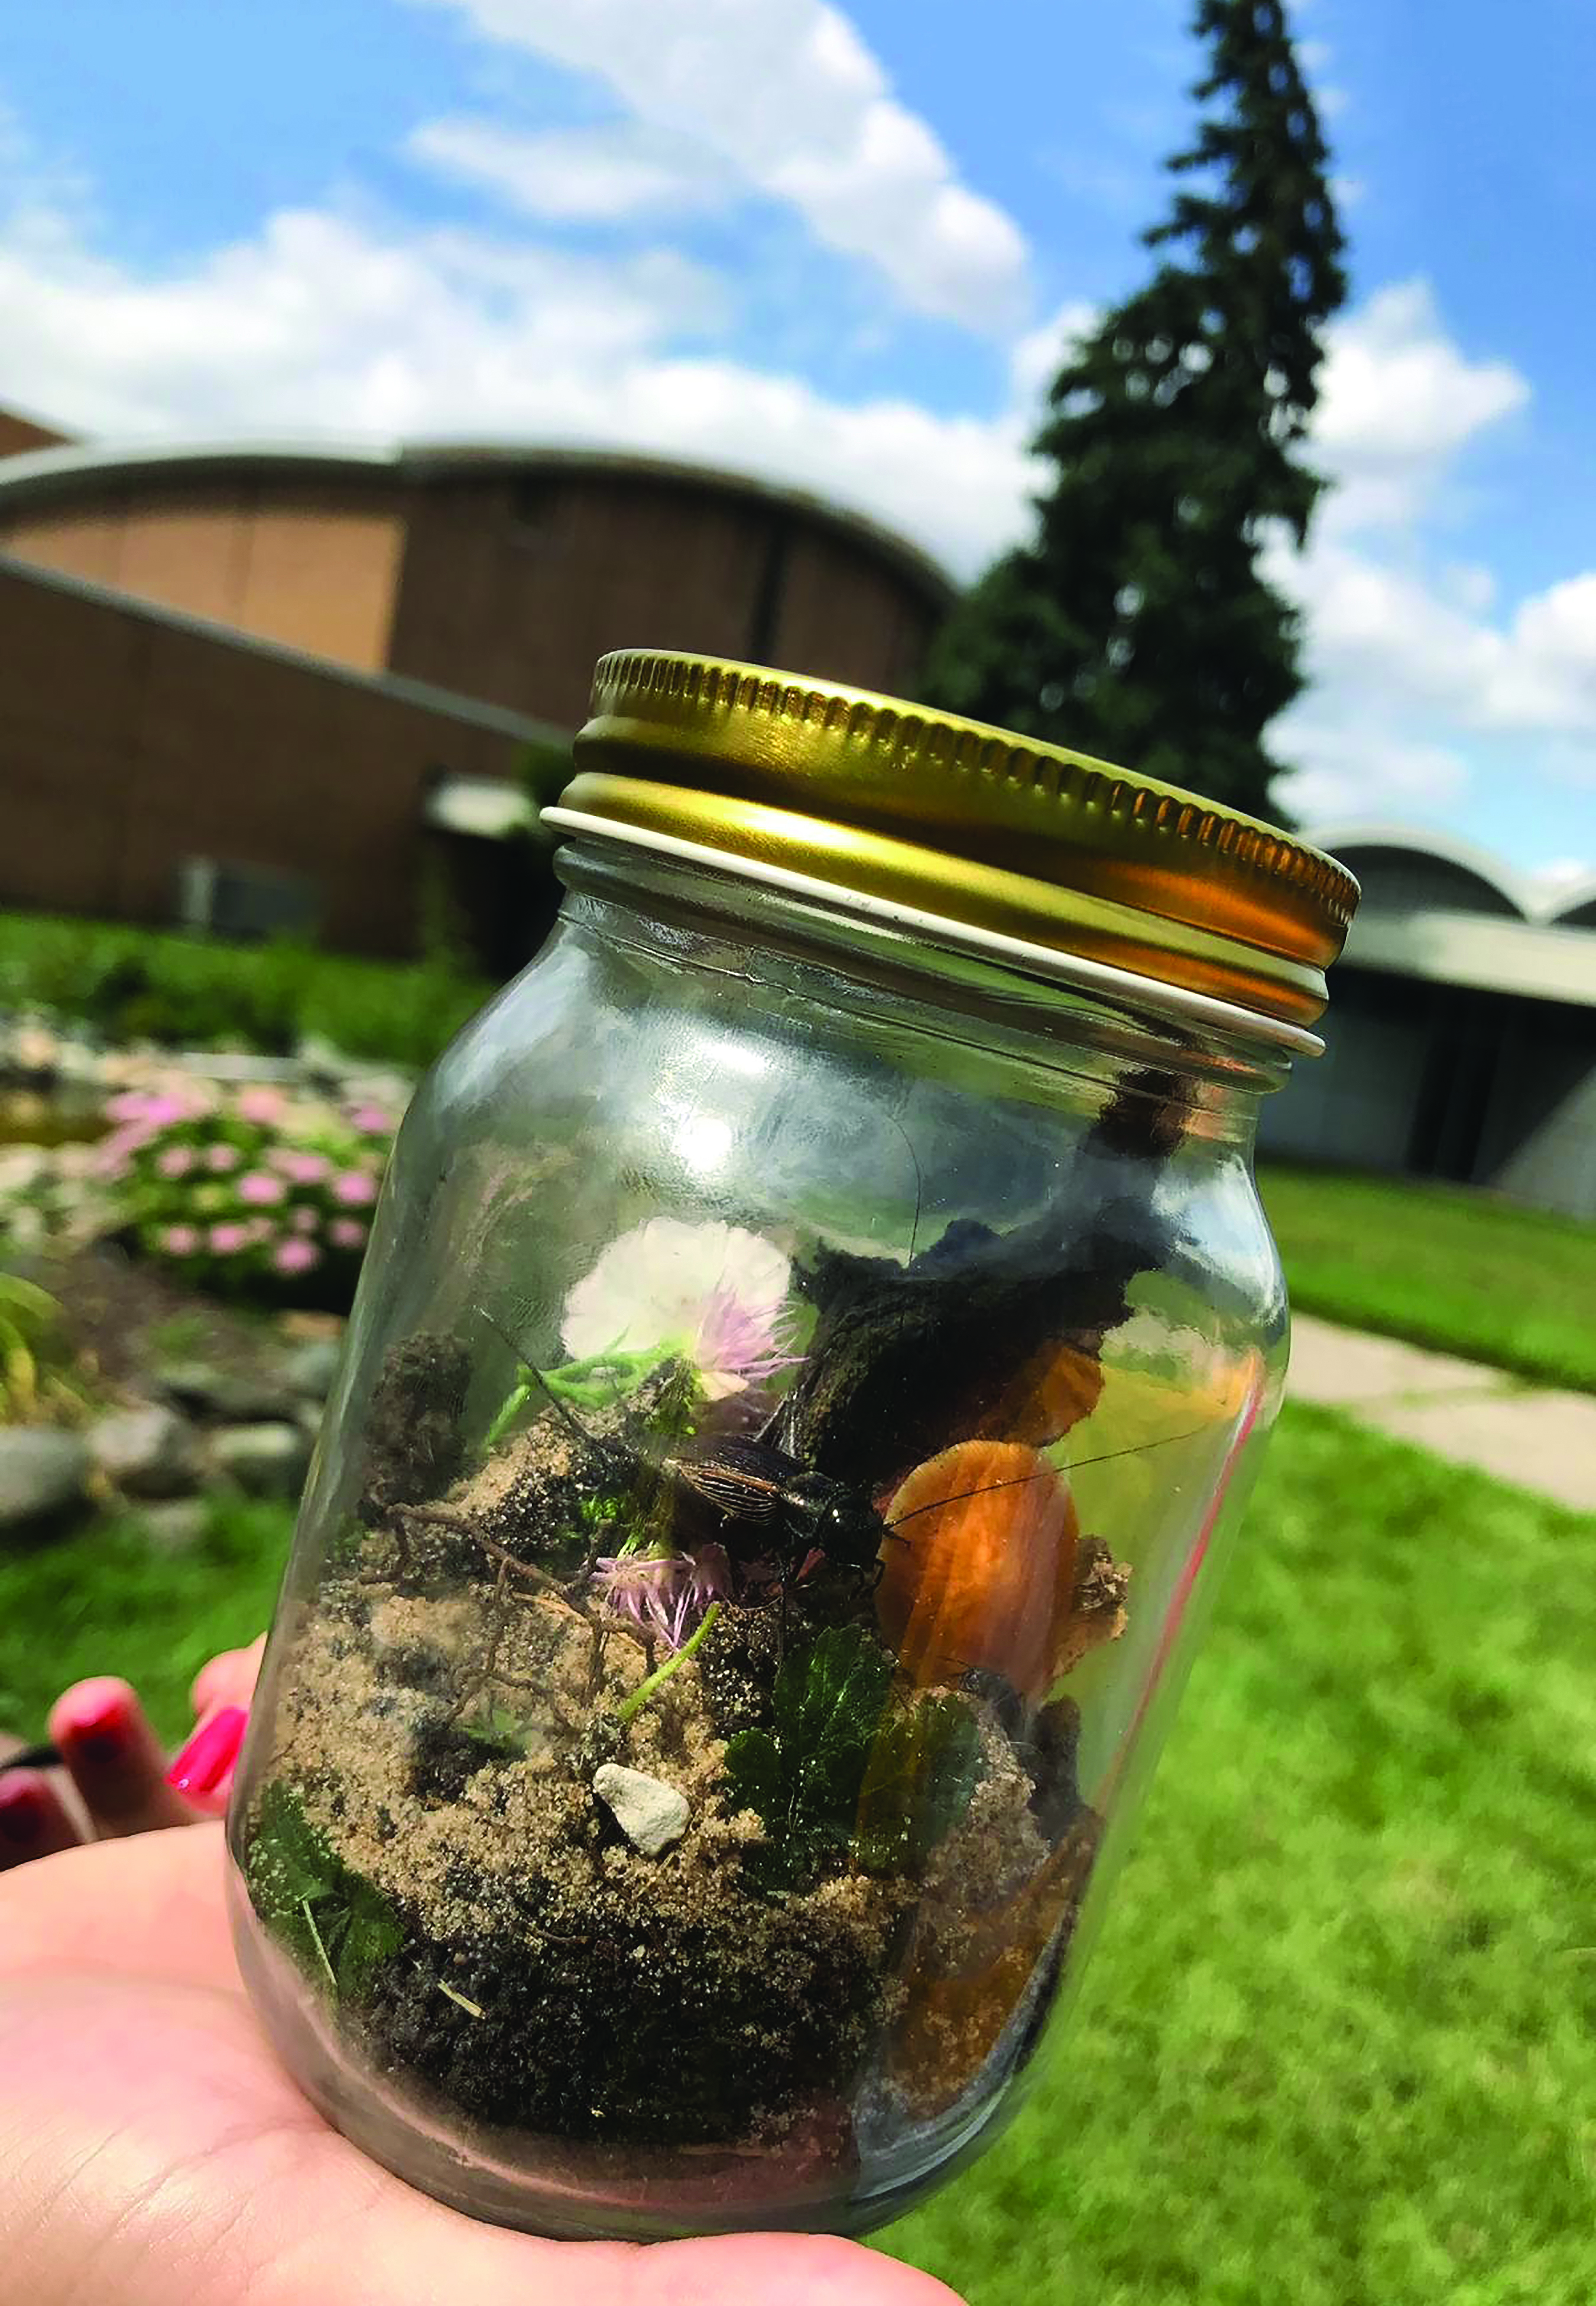
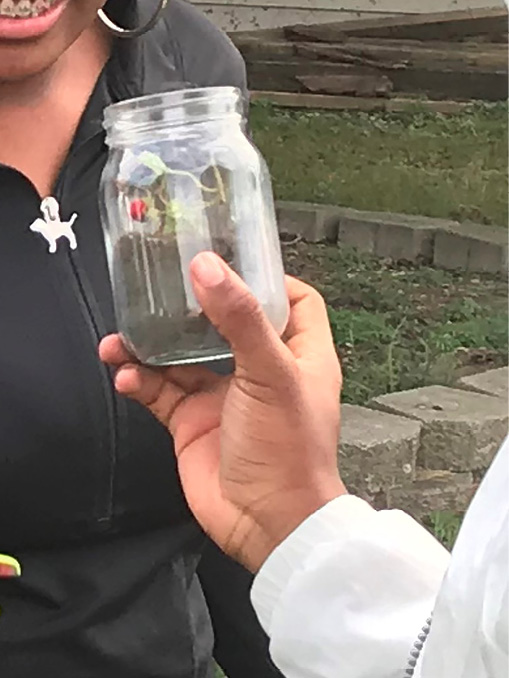
Next, students head outside to collect samples and construct their mini ecosystems. Any outdoor area with soil and vegetation will work. Areas with trees offer additional options but are not necessary. Each group explores the area with a hand spade. As students look for ingredients to add to their ecosystems, I encourage them to dig below the surface of the soil to locate additional life. Students are free to modify their initial plans for their model ecosystems if they discover new components represented in the schoolyard. Rather than telling students what to add to their jars, I circulate among the groups and ask questions such as, “How does this reflect the larger ecosystem?” and “How do you think those two components will interact?” However, I do recommend that all groups add some rocks to the bottom of their jars before adding soil. This will ensure sufficient drainage. I also encourage students to fill their jars less than one-third with soil, otherwise it can be difficult to observe the inside of the jar.
Students demonstrate significant observational abilities during this activity. Most of them make closer observations of soil, leaves, and insects than they ever have before. I am always impressed by students’ eagerness to get their hands dirty and pick up live insects. As students construct their jars, a growing appreciation for the living world becomes evident. Students frequently approach me with questions like, “We want to add this bug into our jar, but do you think it will suffer if we do?” I respond with, “What else do you think you should add so that your bug has a chance to survive?” This spurs students to search for berries, nuts, and other food sources, as well as options for shelter. (My students easily find these items in the grass, shrubs, and trees. However, if such food sources are not available in your schoolyard, sliced fruit can be provided in the classroom.) Sometimes students catch flying insects in their jars but decide among themselves that it would be inhumane to keep them in a jar and release them. Though I have not had students catch small animals like toads, I would not allow them to include them in their jars if they did. Based on the consideration students show for nature during this investigation, they would likely conclude that keeping an organism of this size in a jar would be inhumane.
After excitedly spending the majority of the class period outside assembling their jars, students return to the classroom. Most groups recognize that water is an essential component of any ecosystem and want to add some to their jars. I provide a beaker with water and a pipette for students to use. I advise students to add no more than a few milliliters of water—less is more in the long run. Groups label their jars with their names and set them by a sunny window. However, we do not leave the jars in direct sunlight to prevent overheating.
Days 3–7: Explain
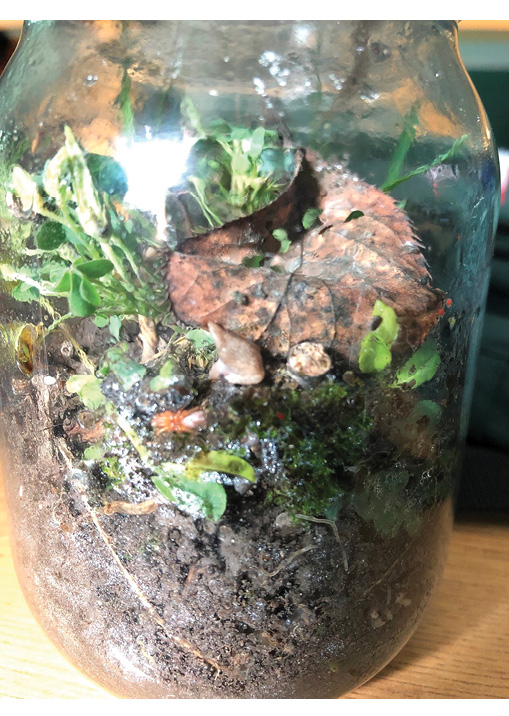
Groups spend the first 10 minutes of class each subsequent day observing their jars. Students use data tables to record their daily observations. I encourage students to make very close, detailed observations of their ecosystems and take photos. The remainder of each class period is spent discussing topics such as matter and energy flow, photosynthesis, cellular respiration, food webs, tropic pyramids, and biomes. I use interactives, videos, and class discussions to cover these topics (see “On the web” for examples). Meanwhile, the jar ecosystems provide an excellent anchor for each lesson.
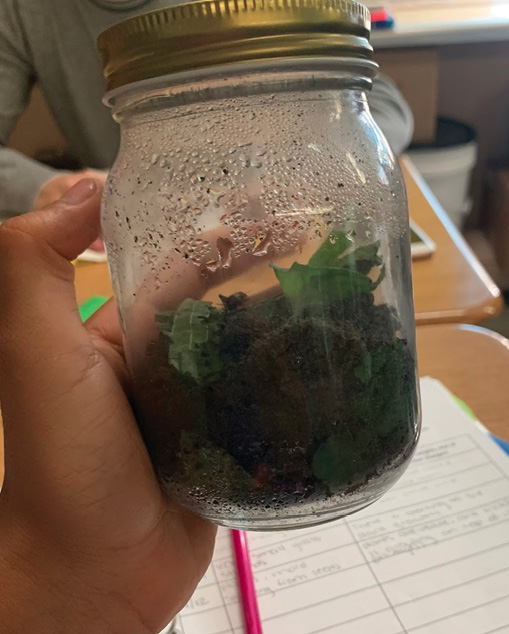
Each topic we cover in our ecosystems unit is evident in students’ jars. For example, the hydrologic, carbon, nitrogen, and phosphorous cycles are traditionally taught using a series of complicated diagrams. This makes the topic dry and forgettable to students. However, when students are holding their jars in front of them, I can ask, “How is matter circulating in your ecosystem?” Students are quick to observe water condensation on the inside of the jar. When the droplets become large enough, they begin to “rain” back down. When I ask students what powered this cycle in the jars, they conclude that incoming solar energy must have been the cause, sparking discussion of the connection between matter and energy flows.
While the water cycle is easy for students to see, other biogeochemical cycles can be more difficult for students to visualize. By combining the jar ecosystems with simulations, interactives, and animations, these cycles become concretized. For example, I begin a lesson on the carbon cycle by showing students the first minute of an excerpt of NOVA: Earth From Space (see “On the Web”). The clip demonstrates the phenomenon of atmospheric oxygen levels rising during the day and carbon dioxide levels rising at night across Earth, presented clearly via satellite images. I pause the video and ask student groups to draw two diagrams of their jar ecosystems on poster paper, one during the day and one at night. I then ask students to label how carbon is cycling in each case, keeping in mind the phenomenon they observed in the video. It is useful to elicit students’ existing knowledge at this stage because, while most students have previously learned about photosynthesis and cellular respiration, many still believe that cellular respiration is performed only by animals. (If students have not previously learned about the processes of photosynthesis and cellular respiration or large gaps in knowledge emerge on many of the posters, it is best to review those topics before proceeding.) It is important to allow plenty of time for group discussion and debate during this stage, and to not point out any mistakes on students’ diagrams. The teacher should circulate only to ask probing questions and encourage more thought and explanation from students.
Once groups have completed their initial sketches, they hang their posters around the room for a gallery walk peer review. Students stop at each diagram and provide feedback, specifically keeping in mind the phenomenon from the video. As students view the posters and discuss their thoughts through the lens of energy and matter, they construct an increasingly sophisticated explanation for the roles of photosynthesis and cellular respiration in cycling carbon. Based on the satellite evidence that carbon dioxide levels increase and oxygen levels decrease at night, students conclude that plants must perform cellular respiration, and at night there is no sunlight to fuel photosynthesis and counteract the carbon dioxide release. We finish the lesson by watching the rest of the NOVA: Earth From Space video, which includes a nicely animated explanation of the processes that students constructed themselves. As a formative assessment, I ask students before they leave class what process(es) are performed by the plants in their jars during the day and at night. Students demonstrate an authentic understanding that both photosynthesis and cellular respiration are performed in their jars during the day, but only cellular respiration can proceed at night. Students further demonstrate their mastery of these processes in their final group presentations (see “Evaluate”). In the following days students further their understanding of the carbon cycle by considering the roles of animals and soils.
The jar ecosystems can be paired with a variety of real-world phenomena to drive student learning about ecosystems. Students observe predator-prey and other biotic interactions in their jars, allowing them to develop authentic food webs and tropic pyramids to model energy flow. We have even observed group behavior as ants built a complex underground nest in one jar and reproduction as spider eggs hatched in another. On multiple occasions students were disappointed when it seemed like one of their insects had disappeared, just to be surprised when it reemerged days later! Mold and fungi emerge and reveal themselves as decomposers. All of these developments are enthusiastically observed by students and recorded in their data tables. Our daily lessons throughout the unit are all the richer thanks to the ecosystems students hold in their hands. One 12th grader told me that this was the “coolest thing” he had ever done in school. Other students demonstrate their engagement by sharing the latest jar developments on social media (Figure 1). I myself learn from every iteration of this activity. No two jars are ever identical.
Days 8–12: Extend
At this point in the unit students have learned the fundamentals of ecosystem dynamics and have observed their jars for one week. To extend our understanding of ecosystems under changing conditions, groups brainstorm disturbances that they could introduce into their jars to model disturbances that occur in real-world ecosystems. Student suggestions include flood, drought, introduction or removal of species, landslides, temperature changes, and pollution. Groups select one disturbance that they will apply to their jars. I allow them to return outside to gather more materials if needed for their plan. Students also discuss and write down their specific predictions for how their ecosystems will change in the week following the disturbance.
As with the previous week, students begin each class period of the week by observing their jars and recording observations. We spend the rest of class discussing various disturbances to ecosystems and their impacts using interactives, short videos, and class discussions (see “On the web” for examples). The changes (or lack thereof) occurring in the jars provide context and motivation for these lessons. The results of students’ introduced disturbances are often unexpected, leading to rich questioning and discussion among students. They apply the ecosystem fundamentals they have learned throughout the unit as they construct explanations for what they observe.
Days 13–14: Evaluate
Assessment is an ongoing process in this unit. Each day I informally assess students based on their observations and group discussions about their jars. The summative assessment I assign at the end of the unit is a group report in Google Slides. The report covers all ecosystem fundamentals from the unit through the lens of students’ jars. Groups must include the following in their reports:
•An argument for how your jar is a suitable model of the larger ecosystem
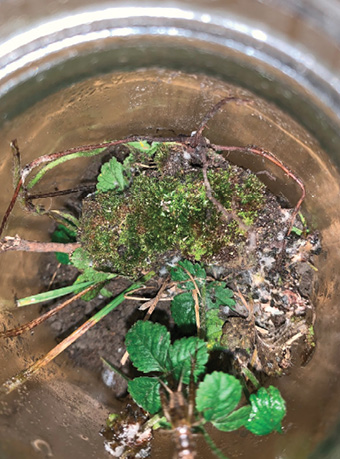
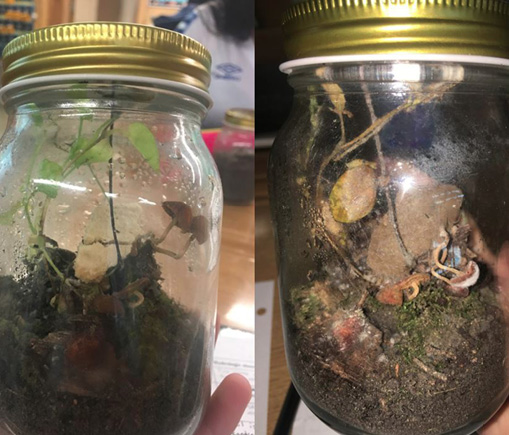
•An explanation for how water, carbon, nitrogen, and phosphorus cycle through your ecosystem, using photos of your jar (Figure 2)
•A food web for your ecosystem, demonstrating the flow of energy and matter
•A trophic pyramid for your ecosystem, including an explanation for why the pyramid narrows as it goes up (Figure 3)
•An argument based on evidence for how your introduced disturbance impacted your ecosystem, as well as how a similar disturbance may play out on a larger scale
Students often go above and beyond as they complete their reports. They conduct online searches to gather additional evidence about the components of the ecosystems to help explain what they have observed. The report is a three-dimensional assessment of student learning. Mastery of the disciplinary core ideas is needed to generate responses for each element of the report. Additionally, students must demonstrate their ability to develop and use models as they connect their jar ecosystems to the larger world. Students construct explanations, develop and use models, and engage in argument from evidence as they build an increasingly sophisticated understanding of their mini ecosystems. Finally, the crosscutting concepts of energy and matter, and stability and change emerge repeatedly. Since each jar ecosystem is unique, each report is unique. Groups finish by sharing their presentations with class.
After presentations are complete, students return outdoors and empty their ecosystems back into the schoolyard. Many of the insects survive long enough to be released, leading to a sense of accomplishment among students. It is a bittersweet moment as students say goodbye to the mini worlds they have grown so attached to.
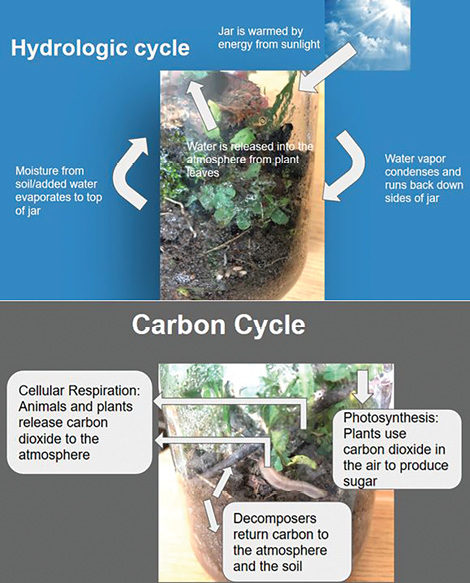
Student work example: Cycles
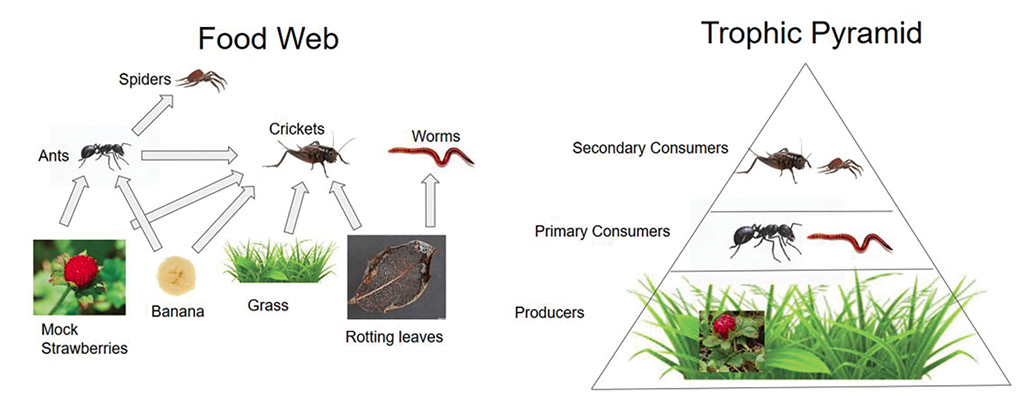
Student work example: Tropical levels.
Differentiation
The jar ecosystem investigation can be easily differentiated to accommodate students’ unique needs. Student groups can be intentionally selected to include members at a variety of science proficiency levels, thus allowing students with more advanced understanding to support and assist progressing students. Alternatively, students may be grouped with students at a similar level. Advanced groups can then complete additional challenges (e.g., try to find another secondary consumer for your jar or try to develop another ecosystem model that represents a different biome) while progressing students receive more teacher support. Additionally, if students struggle to devise a disturbance for their jars, the teacher may provide idea cards with suggestions.
Safety
Be sure to provide the jars for the students. They should not bring glass jars to school on the bus due to possible breakage and potential harm to others. Students should wear non-latex gloves when handling specimens and making their jar ecosystems. Students should use caution when poking holes in the lid. Students could be cut from the rough edges of the internal holes in the jar lids. Overall, these few safety issues are far offset by what the students experience throughout this living and invigorating investigation.
Conclusion
Jar ecosystems are an engaging, cost-effective way to enrich any ecology unit. The complexities of ecosystems reveal themselves before students’ eyes, serving as an excellent phenomenon to return to every day. Students think and act as scientists throughout the project, making the related content more meaningful. In addition, students demonstrate an increased appreciation for the microprocesses of nature that they may never have noticed before. Such an awareness is the first step in taking better care of the one big jar we all share.
On the Web
- BiomeViewer interactive: https://www.biointeractive.org/classroom-resources/biomeviewer
- Photosynthesis and cellular respiration phenomenon video: https://dptv.pbslearningmedia.org/resource/nves.sci.earth.atmosphere/plants-affect-the-atmosphere/
- Nitrogen cycle interactive: https://www.sciencelearn.org.nz/image_maps/14-the-terrestrial-nitrogen-cycle
- Wolves of Yellowstone video and activity: https://dptv.pbslearningmedia.org/resource/a58e3ca2-52ab-45f5-87ac-26ee0d681146/wolves-of-yellowstone-earth-a-new-wild/
- Food webs and disturbances card modeling activity: https://bit.ly/3grtaVG
- Bioman ecological succession game: https://biomanbio.com/HTML5GamesandLabs/EcoGames/succession_interactive.html
- Group presentation rubric: https://bit.ly/3n2MX0a
- NGSS Connections: https://bit.ly/37SoMek
- Poke roughly five small holes in the lid for air exchange. Do not make the holes too large or insects may escape.
- Place some rocks at the bottom of the jar before adding soil for drainage. Do not fill more than 1/3 with soil.
- Add only a few milliliters of spring water to jars. If jars appear to dry out after a few days, add some more water.
- Include food sources for living insects. If students cannot find sufficient food sources outside, provide small pieces of cut fruit for them to add. Replace food as needed.
- Do not include large animals (e.g., toads) in the jars.
- Place jars in a location where they receive sunlight during the day, but do not leave them in direct sunlight.
- Do not open the jars unless necessary (e.g., adding food or water, introducing disturbance).
- Observe for approximately two weeks, then return the materials outdoors.
Emily Cizmas (emily.cizmas@wayne.edu) is a PhD candidate at Wayne State University in Detroit, MI and a science teacher at Lincoln Park High School in Lincoln Park, MI.
5E Biology Crosscutting Concepts Disciplinary Core Ideas Environmental Science Inquiry Lesson Plans Life Science NGSS Performance Expectations Phenomena Science and Engineering Practices Teaching Strategies Three-Dimensional Learning High School