
feature
Outrageous Optics
Science Scope—September/October 2021 (Volume 45, Issue 1)
By Lisa Pike, Nathan Harness, Stephen Welch, and Dana Wright
CONTENT AREA Physical Science / Life Science / Art
GRADE LEVEL 6–8
BIG IDEA/UNIT Light travels in waves. When light strikes a thin film, iridescence can occur.
ESSENTIAL PRE-EXISTING KNOWLEDGE Light waves and the visible spectrum, including refraction
TIME REQUIRED 2–3 class periods
COST Total cost $75–$100 to start, then $50 in consumables after first year
SAFETY See Safety Considerations section for warnings about nail polish.
As STEM education continues to be viewed as a major driver of critical innovation worldwide (Godin 2008), creativity has become the most important skill we can encourage and develop in our students (Trilling and Fadel 2009). Integrating STEM with art education, as we have done here, is a powerful way to promote both disciplines (Riley 2012; Sousa and Pilecki 2013).
Here we show how, over the course of a few class periods (see Table 1, Supplemental Materials), students can take science ideas and incorporate them into a creative endeavor. This lesson could be done in a physical science classroom after studying light waves or in a life science classroom studying the human eye, vision, or camouflage. However, we suggest doing the extension in the art classroom, collaboratively, exemplifying how scientific thinking can be applied in a nonscience class. We have created an art lesson using thin-film iridescence, which can be explained using the science ideas of refraction, reflection, and absorption of light (an element of DCI PS4.B, electromagnetic radiation). Once dry, the iridescent films students create can be cut and used in an art project centering on iridescent animals.
The lesson is inherently inclusive, with multiple modes of teaching and a variety of assessment types and rigor, designed to actively engage all students. There are opportunities to group students with similar abilities and a variety of end-product options for students of all levels. With all activities, we found identifying students who excelled at physics or math and who could serve as expert peer-teachers to be helpful. We also identified students who were high achieving in art to have them help with the activity as a whole and with the physical creation of the artwork at the end of the lesson. The lesson is scaffolded in such a way that it is easy to do the three-day lesson collaboratively with an art teacher, building on the exploration of light and color, or to simply do the science piece alone, as an extension to a unit on light waves or color.
A caveat, before we begin—you are likely to have a colorblind student in your classroom. People who are colorblind can still see color, they just perceive fewer discrete colors. They will still see iridescence. Colorblind corrective glasses that are commercially available can increase contrast between colors, but won’t allow someone to see a color they couldn’t see before. You can use this as an opportunity for a student to “teach” classmates and describe what this lesson looks like to them. This is also a good place to discuss how each of our perceptions of color could be different from one another, and certainly are very different from many other animals.
Day 1, Activity 1: Engage and explore by identifying and comparing colors of light and pigment
Living organisms have pigments—substances that absorb light—and the light they reflect, or don’t absorb, is the color you see (Nassau 1983; Farrant 1999). Show students pictures of colorful plants and animals and discuss how color is generally, though not always, caused by a pigment. Remind students that the color of an object isn’t the object itself but the color of light that gets reflected to the eye; color is an interpretation done by your brain (see teacher’s notes in Supplemental Materials).
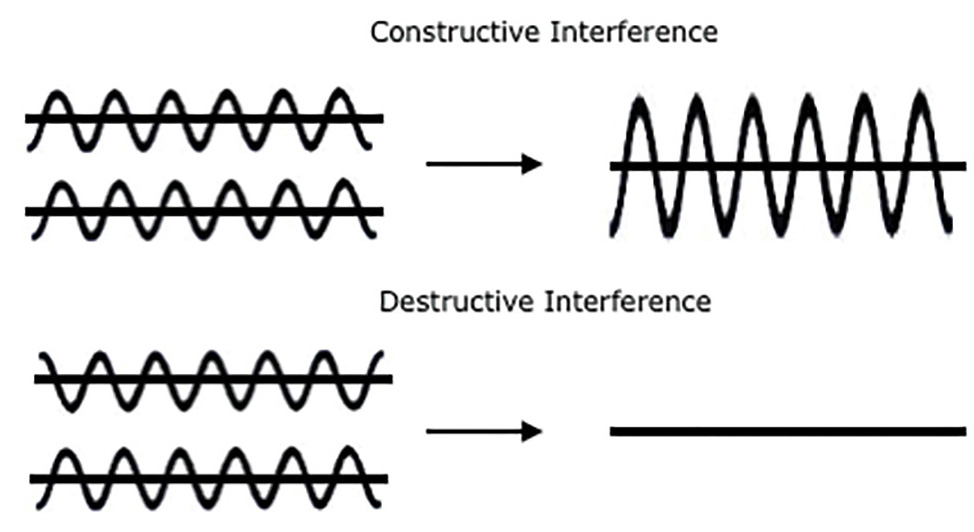
Next, I ask students to name the primary paint colors. They invariably answer red, yellow, and blue. Explain that red, yellow, and blue colors are now referred to as cyan, magenta, and yellow (CMY). This is because the artist color wheel was formed before we understood the science of spectral color and wavelengths. The three primary paint colors (cyan, magenta, and yellow) and their combinations produce other colors, as when you add cyan and yellow together to make green. This is how your printer produces color images and why you buy ink in these three colors. All three colors together in equal amounts make black.
I then ask students what they know about the primary colors of light and if they would be the same as the primary colors of paint. Some students say that mixing all colors of light together gives you white light, because they have experience with a prism splitting white light into its component colors. While magenta, yellow, and cyan are the primary colors of pigment, or paint, the primary colors of light are different. The three primary colors of light are red, green, and blue (RGB). The primary colors of light are in reference to the cone cells in your eyeball, of which you have three types—cones that pick up red, green, and blue light wavelengths. The other colors we “see” are caused by varying amounts of red, green, and blue light reaching our eyes. Mixing two of these three primary colors of light in equal intensities follows the rules of color addition and will give you secondary colors of light, or the primary paint colors—red plus green equals yellow, red plus blue equals magenta, and green plus blue equals cyan (Nassau 1983; Farrant 1999; see also Light Waves and Color in Online Resources). This can be confusing for students—mixing colors of light is not done in the same way as mixing colors of paint. The next part of the lesson illustrates this.
Color subtraction and complementary colors
Start by dividing students into groups of three to four. Give each group three transparent rulers (one each in the primary paint colors—cyan, magenta, and yellow) to ensure students recognize the CMY colors. Secondary colors can be seen by overlapping two rulers at a time against white paper. Secondary colors of paint are formed by color subtraction: a cyan ruler absorbs its complementary color, red; a magenta ruler absorbs green; and yellow absorbs blue. When ambient, or white light (RGB), shines on two overlapped rulers, say, magenta and cyan, each absorbs (or subtracts) its complementary color, and blue is left over and reflected to our eyes. Tell students that if they know the resultant color, then they know which two colors are being absorbed (one by each ruler). If they cross all combinations of two rulers, by process of elimination they can figure out the complementary colors.
Comparing color subtraction (pigment) with color addition (light)
Working with the pigmented rulers, paints, and colored flashlights (see Table 1, Supplemental Materials), students figure out the rules of color addition (for light) and subtraction (for paints) and make a “rules cheat sheet” (see Table 2; see also the student worksheet in Supplemental Materials). Have students use flashlights with RGB film to add two primary colors of light together to make a secondary color of light. Because the primary colors of light work additively, any two primary light colors that are mixed (added) together will form the secondary color of light found in the color wheel position between those two primary colors. Opposite colors in a color wheel are complementary; red and cyan are complements, and a pigment will absorb, or subtract, its complement. For example (here I point to my red shirt), this shirt is red because it is reflecting red light but absorbing the complement, cyan. When white light shines on my red shirt, cyan (which is green plus blue) is absorbed or subtracted. We can write this as a subtraction equation: White light (RGB) – Cyan (G + B) = Red. To check for understanding, ask students if they can mix paint colors and light colors in the same way. How would they test this?
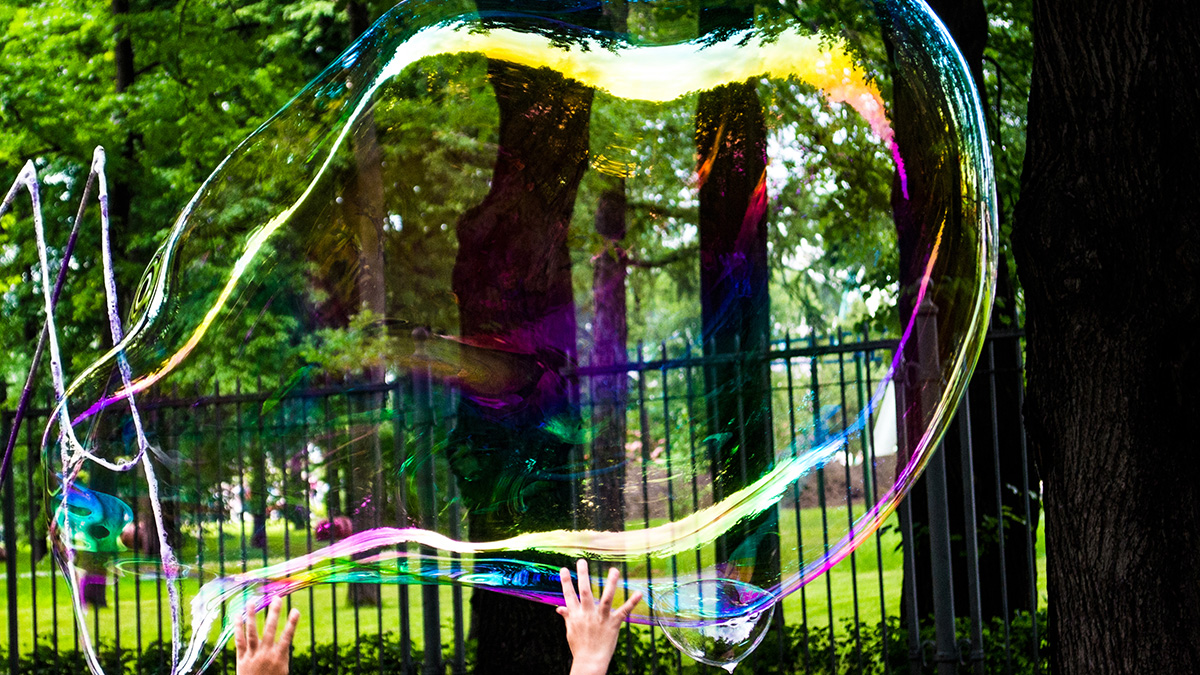
Day 1, Activity 2: Engage with bubbles and explore wave interference
Outside if possible, or over a towel or carpet inside (caution, tile becomes slippery), blow bubbles and look at their shimmery surface. Have students explain what they observe on the bubble surface. They might observe that the light is brighter on some parts of the bubble. Ask what makes bubbles shimmer. Often students are stumped, though some may remember a discussion of the relationship between amplitude and intensity (the higher the amplitude, the higher the intensity). Show students two diagrams of a bubble, one a single layer of soap and the other showing two layers of soap sandwiching a thin layer of water. Ask students which model could explain why we see different colors when we look at the soap bubble. Ask students to explain their thinking in their science journal, then turn and talk with a partner. Now ask students to share ideas while you record on the board. Ask them, “We’ve only drawn a few of the waves striking the bubble. If you think about light striking the entire surface of the bubble, do you think it’s possible that waves overlap on their way out of their bubble? How might that change the wave? Draw what you think might occur when two waves meet.”
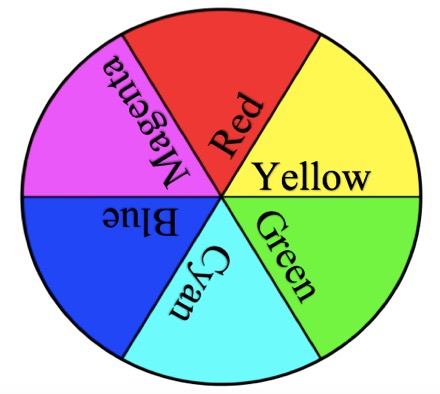
Explain that when one wave meets another wave, interference occurs (see Figure 1). The resultant wave formed from the interference can be either positive if in phase (constructive) or negative (destructive) if 180 degrees out of phase. Constructive interference happens when the peaks of the waves line up and produce a larger (higher amplitude) wave, while destructive interference happens when the peaks and the troughs line up and can diminish or destroy a wave. For light waves, constructive interference gives a greater light intensity (and a higher amplitude), while destructive interference results in a muted light intensity and a lower amplitude. Students should draw a model in their journals to explain both types of wave interference. After sketching their wave interference models, ask them about the amplitude of the wave and specifically how amplitude changes when waves interfere. If amplitude is measuring how much energy the wave carries, then how does amplitude relate to brightness (or light intensity)? Show two different wattage lightbulbs to illustrate the fact that the higher energy bulb (with a greater amplitude) has a greater brightness.
The resultant wave formed when two waves met can be either larger, when constructive interference occurs, or smaller, when destructive interference occurs.
In fact, bubbles do have two soap films enclosing a layer of water, and there is interference between the light waves reflecting off the bottom layer versus the top (see Figure 2). It is this slight offset between the waves that causes some wavelengths (colors) to be canceled out, decreasing their amplitude and dimming their intensity, while other wavelengths are increased in amplitude and their colors intensified. In our bubble example, we see light reflecting off the top and bottom surfaces of the thin bubble film, and we also see refraction of light as it moves from air into the water layer between the soap top and bottom films. Ask students to explain why the bubble “shimmers”—see if they can verbalize that both constructive and destructive interference is occurring because of refraction and reflection on the thin bubble film, and constructive interference makes that part of the bubble brighter and destructive interference makes others parts dimmer.
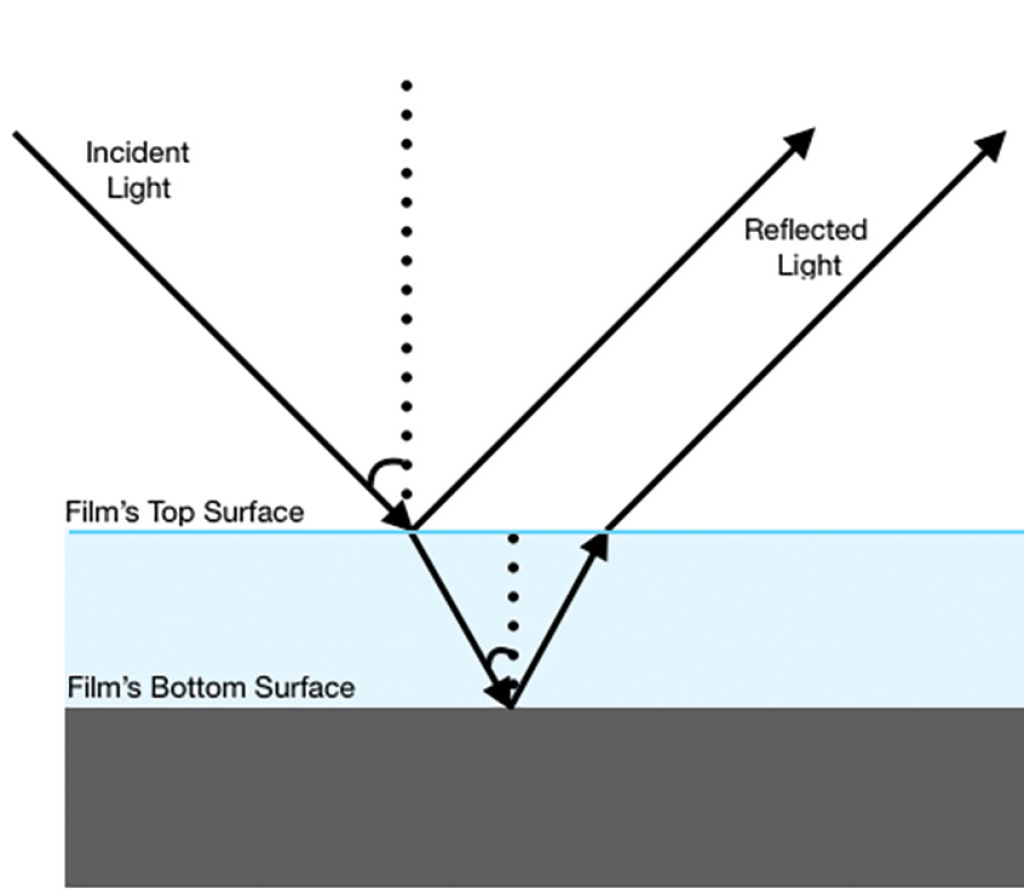
When white light strikes a thin, transparent film, some of the light reflects off the top surface of the film and some of the light reflects off the bottom surface. Eventually, the light that is reflected off the bottom surface will meet with the light that reflected off the top of the film. Some wavelengths are intensified (constructive interference), others are muted (destructive interference), and a rainbow effect called iridescence is created.
With bubbles, the soap film thickness also changes as it dries, or when the angle of light changes (as you move your head position), and we see different colors being cancelled or intensified and the colors seem to swirl (see Figure 3). An oil slick on water shows the same effect, and so does a thin clear nail polish film on the surface of water or paper, which is what we use in this STEAM activity. This concept of waves meeting and interfering is important as we discuss one way (besides biological pigments) that animals and plants can produce color: iridescence.
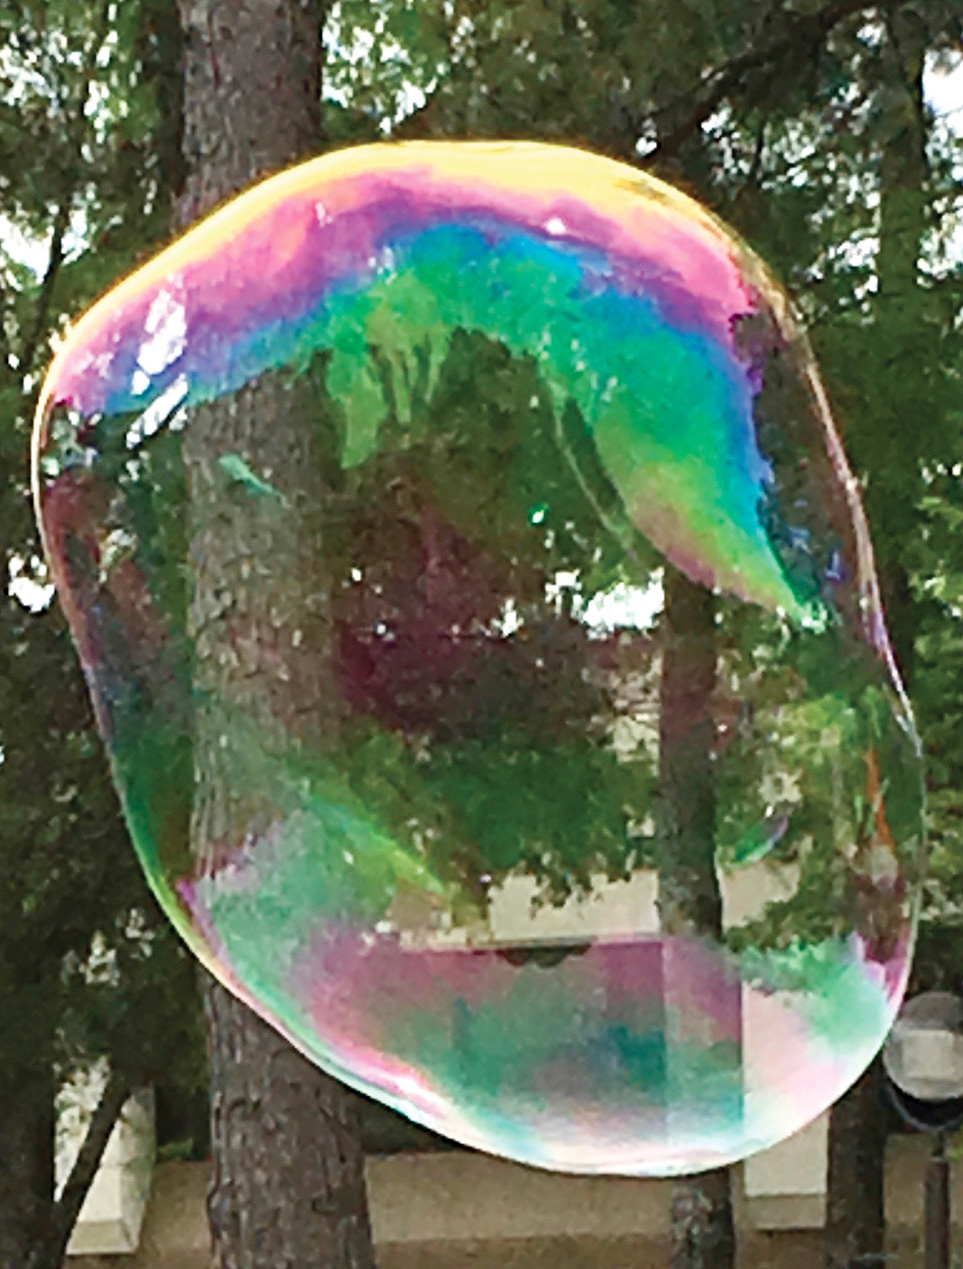
Bubbles are good examples of iridescence as the bubble solution acts as a thin film. When the soap film thickness changes or when the angle of light changes, different colors get cancelled or intensified, and the colors seem to swirl.
The word iridescence comes from the Greek word Iris, which means rainbow, and that is exactly what you see with iridescence—a gorgeous, glossy rainbow that makes the plant or animal seem to shimmer with bright color. With iridescence, the color of an object changes as you look at it from different angles; pigments, on the other hand, look the same from all angles (Nassau 1983; Farrant 1999). Iridescence can occur in a couple of ways—through structural elements like the scales on a butterfly wing, or through a thin film, such as with a soapy bubble film or an oil slick. When white light reflects off a mirrored surface, each color reflects without any interference. But when white light strikes a thin, transparent film, we get thin film iridescence. Some of the light reflects off the top surface of the film and some of the light reflects off the bottom surface. Eventually, the light that is reflected off the bottom surface will meet with the light that is reflected off the top of the film. Depending on the distance light travels and bends through the film, meeting waves join via constructive and/or deconstructive interference, with some colors intensifying (brightness increases) and some muting (becoming dimmer, or less bright), creating the beautiful rainbow shimmer we saw on the bubbles (Amato 1995; Nassau 1983; Farrant 1999).
Ending Day 1, Activity 3: Making thin film iridescence and exploring iridescence scientifically
If time permits, I like to end Day 1 by making iridescence on a piece of sandpaper. If working with a shorter time block, you will need to split this into three days, leaving time between making the iridescent paper and making the artworks for the iridescent paper to dry.
Tell the students that in this activity they will continue to work in their groups of three to four using a nonuniform thin layer of clear nail polish (the thin film) to make iridescent paper and to scientifically investigate the patterns that result from iridescent films when they use different colors of paper as a background.
Safety considerations
This lab uses clear nail polish, which has an odor that might be overwhelming and may cause headaches or eye irritation (see link in Online Resources to the Occupational Safety and Health Administration [OSHA]). You will need a well-ventilated area (e.g., fume hood, spray booth, or science lab ventilation) or a table on which to do this outside. Keep nail polish bottles capped when not actively putting a drop into your water. Hang iridescent paper to dry in a well-ventilated space outside (string and clothespins work well to create a line for drying outside). Once dry, the paper is odorless.
We used the Pure Ice brand of clear nail polish (found at Walmart, $7 per 0.5 fluid ounce bottle). It is formaldehyde free, dibutyl phthalate (DBP) free, and toluene free. Look for brands that are marked free of these ingredients, which have more serious side effects. We do not recommend using any nail polish with DBP, formaldehyde, or toluene.
Personal protective equipment including vented chemical splash goggles meeting the ANSI/ISEA Z87.1 D3 standard, nonlatex plastic aprons, and nonlatex vinyl gloves are required during the setup, hands-on, and take-down segments of the activity. To protect clothing, gloves should be made available. Avoid contact with the eyes and skin. Keep away from food and drink. Wash hands with soap and water once the activity is complete.
Procedure
Have students make their first piece of iridescent paper with black 100-grit sandpaper, which has a rough surface to which the thin film clings well, with many different thicknesses because of the grit, thus really showing iridescence (see Figure 4). Student groups will do the following:
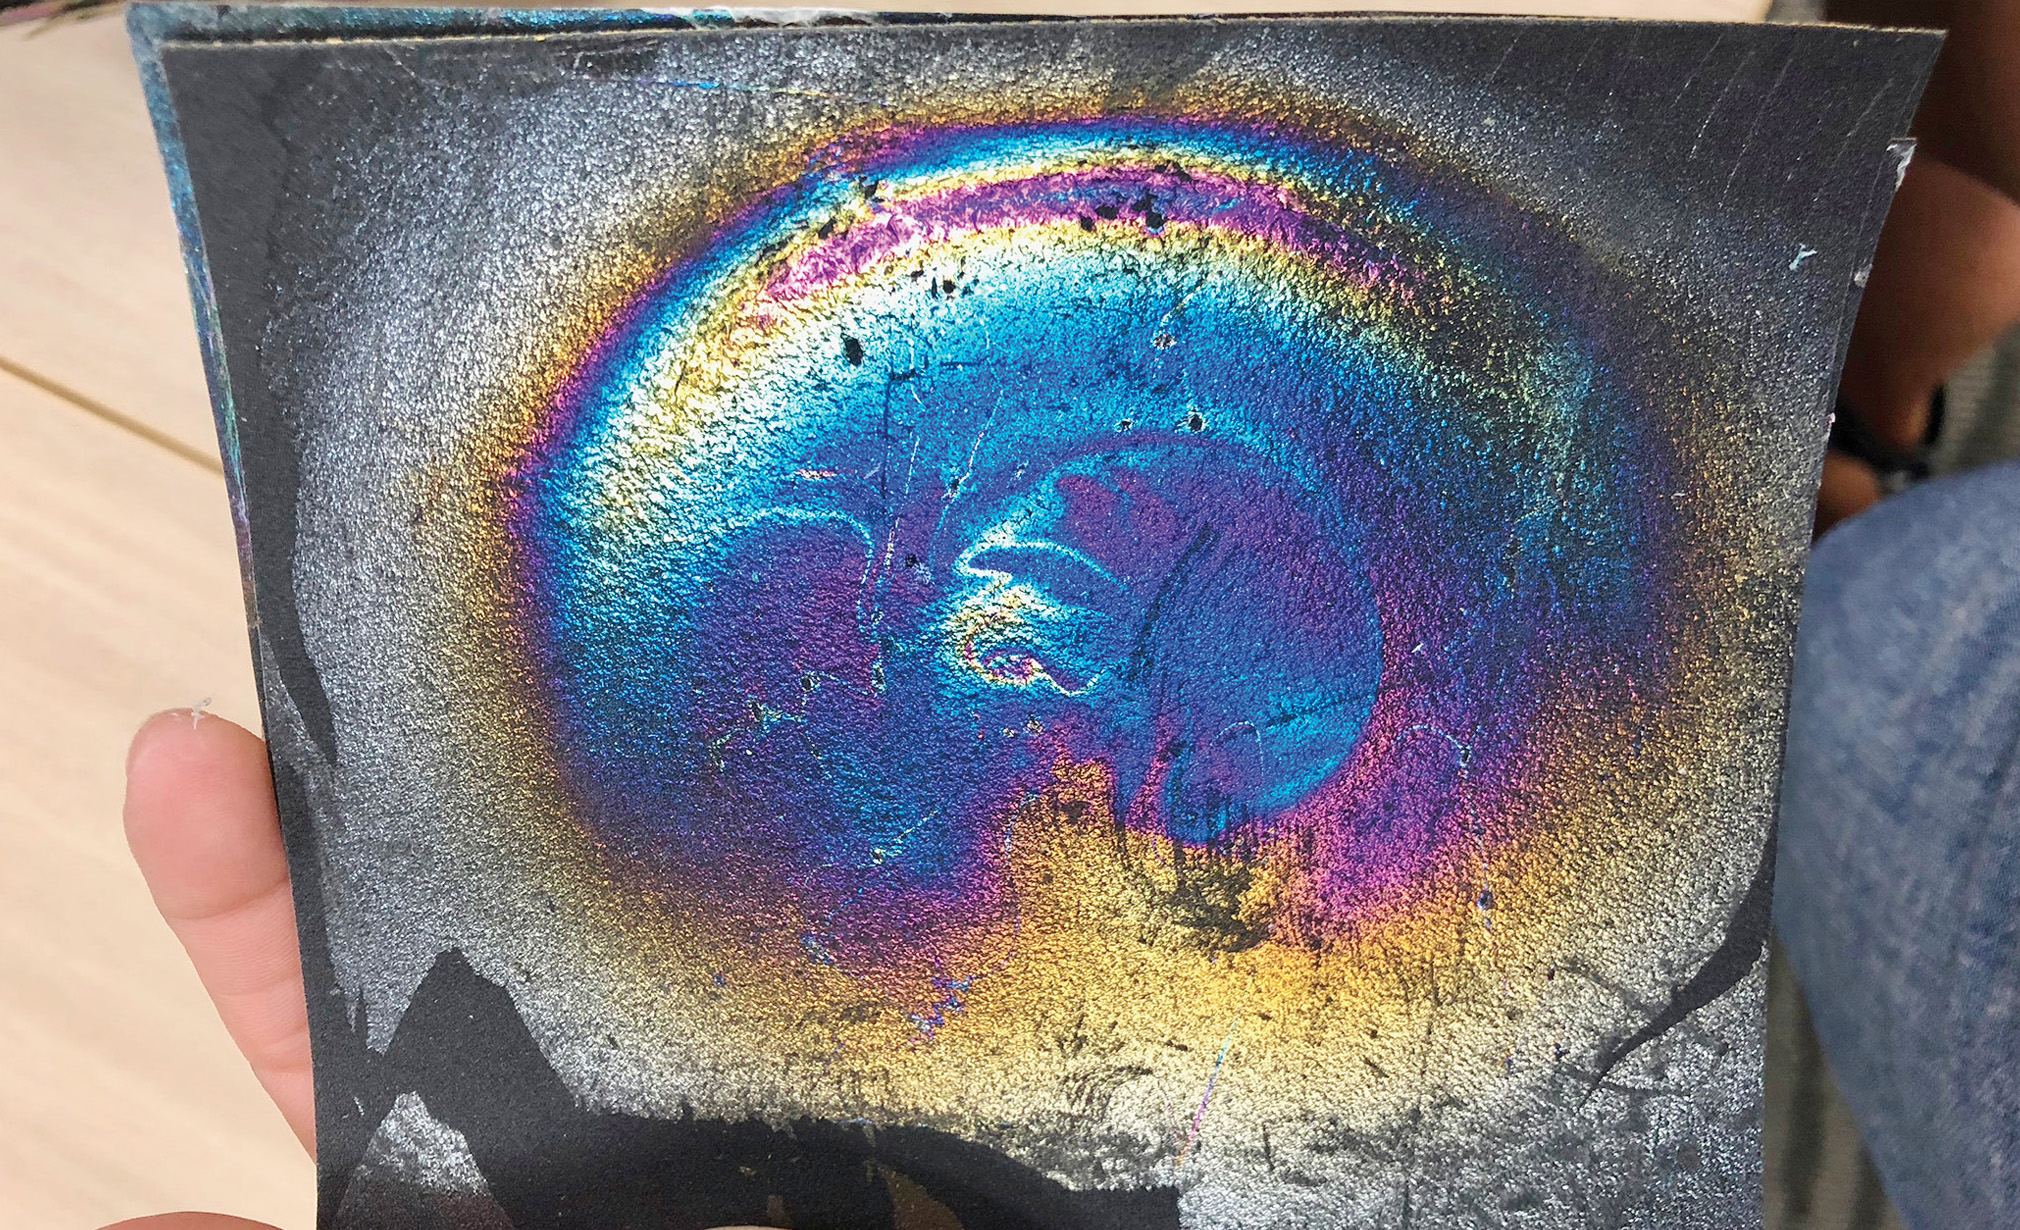
Students create thin films using clear nail polish.
1. Take a plastic dishpan and fill it with about three inches of water.
2. Over the center of the pan, let one drop of clear nail polish fall onto the water.
3. Wait about 15 seconds.
4. Put a 3 x 3-inch piece of paper into the pan, slowly sliding it at an angle deep under the nail polish film, then lifting it by one corner to catch the film on the paper.
5. After you have done steps 2–4 several times, you will need a small aquarium net to remove excess film from your water, then keep on going (too many drops of nail polish or too much leftover film on the water makes the layer too thick, and it will peel off instead of sticking to your paper).
6. Let paper dry overnight (hang it, or place it on a paper plate or paper towel).
7. Once dry, the paper can be used in your art project by simply cutting out the shapes and sizes you need.
Students should try this first with black sandpaper, then with red, green, and blue construction paper, to see what happens. They should then try to explain by creating a “rule” as to how the color of paper creates different colors of iridescence. Last, ask students to use their rule to predict what will happen if they create thin film iridescence on yellow construction paper.
Note: Black paper absorbs incident light—but because of the thin film, not all light is absorbed, and the colors we see are the colors that are reflected by the thin film via interference. Because black doesn’t preferentially absorb some colors over others, we will see all the colors reflected.
Identifying patterns and making predictions
Students should pick out that there is a pattern—the paper color is the color that shows up strongly in the iridescence because it is the color that is reflected. Complementary colors get absorbed by the paper and so those colors are present in lesser amounts in the iridescence (see Table 3, Supplemental Materials). Work with students to word the hypothesis, or rule, based on the patterns they observe. The color a paper absorbs will show up weakly as iridescence. Ask the class, “If this hypothesis is valid, then what should happen if we make thin film iridescence on yellow paper?” This is a prediction that we can test. Students are generally successful at this and impressed with how well their predictions turned out.
While the reflected color is the strongest, and this is the “rule,” in some cases you also see weaker iridescence of the absorbed colors. For example, red paper reflects red light, and so red shows up strongly in the iridescence. Blues and greens make up cyan, the complement of red, and will get absorbed and thus not be strongly present in the iridescence pattern. However, since the thin film does reflect some light before absorbance happens, you might see a little blue and green with cyan.
Wrapping up Day 1
End by asking students to think about an iridescent animal that they would like to create. Have them make a colored-pencil sketch. Now that the students have learned how to get the iridescence patterns they want, they can make multiple copies of iridescent paper in the colors they need; we will use these in the following class period as they fashion their animal.
Day 2/3: The STEAM art project
Explaining and extending with STEAM
Start day 2 by asking each student group what their “rule” is—how they determined what the iridescent pattern would look like for each background color. Ask each group to use their rule to explain or draw how iridescence occurs, making sure to use refraction and wave interference to explain the brightness (or dimness) of colors observed. To connect back to Day 1 lessons, see if they can explain how thin film iridescence in the bubbles is similar to the nail polish films.
Now it is time to create beautiful 3-D iridescent animals (see Figure 5) using a cardstock base. For big projects and serious art students, I supply cardstock or black matting paper to make “frames” as it is sturdier, and the matting paper is larger at 18×18 inches and easier for attaching iridescent “scales” with hot glue. I also supply black foam paper and glitter foam paper for accents like eyes and mention that, as with roofing shingles, sometimes it is easiest to start at the back and apply scales in overlapping rows.
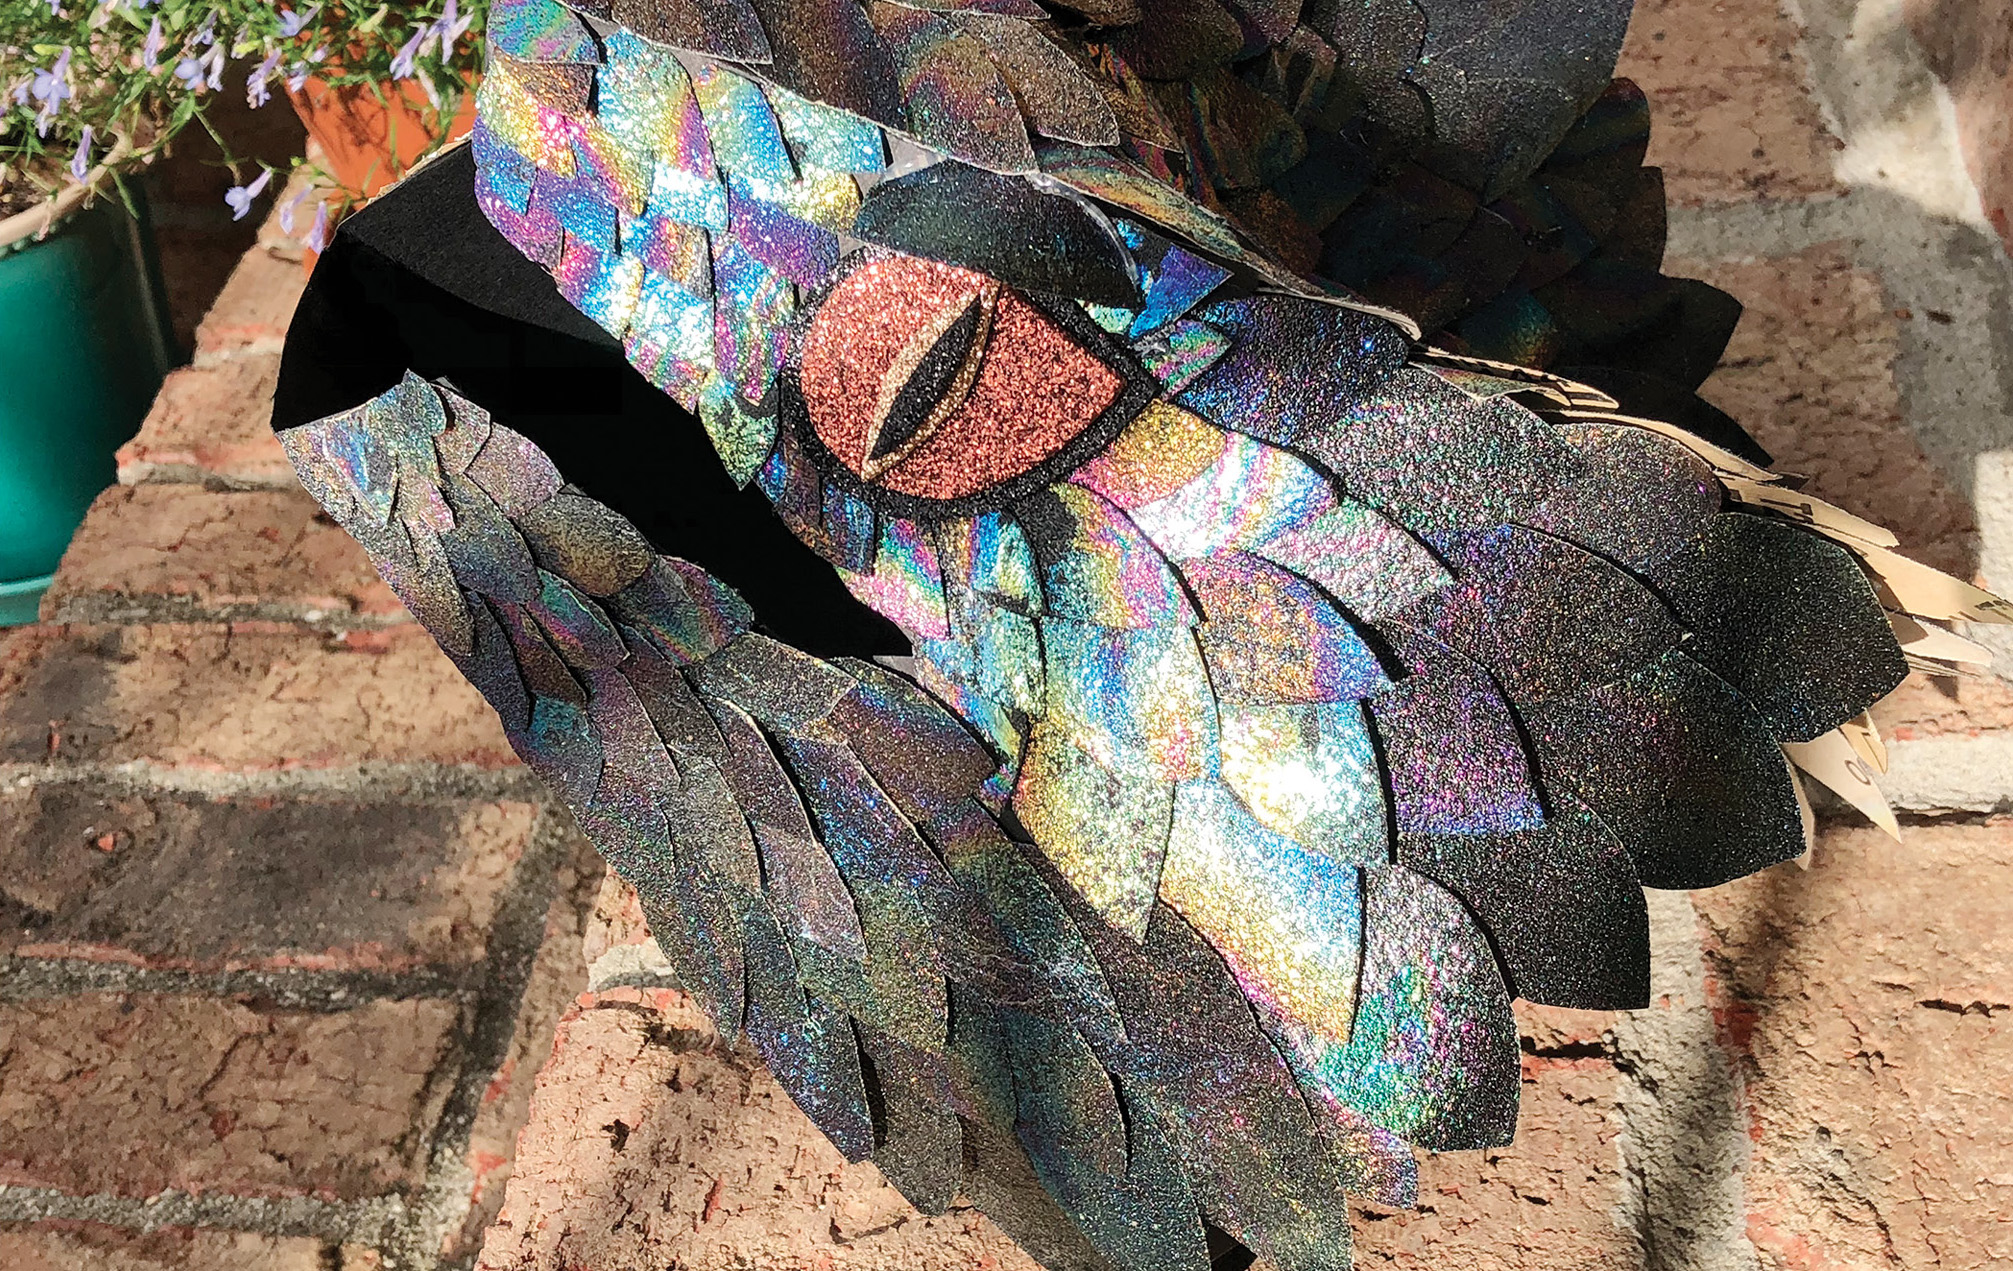
An example of an advanced art project using iridescent scales created with sandpaper and clear nail polish thin films. The eye of this dragon was made with glitter foam paper, and the frame was simply an origami dragon head shaped using black matting paper.
Link with engineering and technology
Structural elements, like thin discs or grooves, can produce iridescence. Many animals have structural elements that, in effect, are thin films; these include Morpho butterflies, cuckoo wasps, peacocks, some hummingbirds, the common grackle, the Paua snail, the figeater beetle, the sunbeam snake, and the jewel beetle. Scientists have studied how animals and plants create iridescent effects and have been able to mimic this in engineering labs. Experimentation has led to iridescence being used in a variety of ways, including in anti-counterfeiting technology, to create novel art works (with iridescent nanopaint) and fashion statements (iridescent synthetic fabrics and photonic cosmetics), fishing lures, and thermal imaging cameras. It can also be seen if you look at the back of a CD-ROM, which produces iridescence through a series of microscopic grooves rather than via a clear thin film.
Evaluate
There are opportunities for formative and summative assessment throughout the lesson. Science journal entries are a place where students can demonstrate an understanding of reflection and refraction from thin films or bubbles and where they can graph wave interference. For the project, have students hand in a paper that describes, with a sketch, the iridescent animal they intend to make, with the color effect they are striving for. Then, compare their intention with the actual creations and ask them to explain why their sketch and final product do (or do not) look alike. Last, have students research an animal that makes its own pigments (what it absorbs/reflects) and describe the color pattern and function of the color pattern (e.g., as warning colors vs. camouflage). They may present this as a poster, with hand-drawn pictures, as part of their art portfolio. In art class, this lesson can be extended by discussing pointillism next, a technique which uses tiny dots of cyan, magenta, yellow, and black in close proximity to make an image.
Science, engineering, experimentation, and the science and engineering practices are not just for science and engineering classes. In an art class, students make hypotheses and test predictions, then experiment using different colors of paper to create different patterns of iridescence. The end result is a gorgeous art project that links them to the content they are learning in middle school physical science and makes for a memorable classroom experience. •
Online Resources
Health Hazards in Nail Salons—https://www.osha.gov/nail-salons
How to Make Rainbows with Prisms—https://sciencing.com/make-rainbows-prisms-6281318.html
Iridescent Art—https://www.instructables.com/iridescent-art/
Light Waves and Color—https://www.physicsclassroom.com/class/light
Light Properties Lesson—https://www.teachengineering.org/lessons/view/clem_waves_lesson03
OSHA–Health Hazards in Nail Salons—https://www.osha.gov/nail-salons/chemical hazards
Science Snack: Laser Jello—https://www.exploratorium.edu/snacks/laser-jello
Science Snack: The Three Little Pigments—https://www.exploratorium.edu/snacks/three-little-pigments
Online Supplemental Materials
Lisa Pike (LPike@fmarion.edu) is an associate professor and Nathan Harness is an assistant professor, both in the Biology Department at Francis Marion University in Florence, South Carolina. Stephen Welch is a teacher at Wilson High School in Florence, South Carolina. Dana Wright is an educator with NASA’s Wallops Flight Facility in Virginia.
Assessment Biology Curriculum Disciplinary Core Ideas Engineering General Science Inquiry Interdisciplinary Labs Life Science Maker Spaces NGSS Phenomena Physical Science Teaching Strategies